

Your PC freezes mid-task, updates fail with cryptic error codes, or Windows won’t boot past a black screen. Sound familiar? You’re not alone. Windows 11 brings smoother performance most of the time, but when something breaks, the fixes aren’t obvious. This guide walks you through the actual steps that resolve the most common Windows 11 problems, starting with the simplest solutions first. You’ll learn which fixes work for boot failures, update errors, slowdowns, and crashes, without wasting time on complicated repairs you don’t need.
Quick Fixes for the Most Common Windows 11 Problems
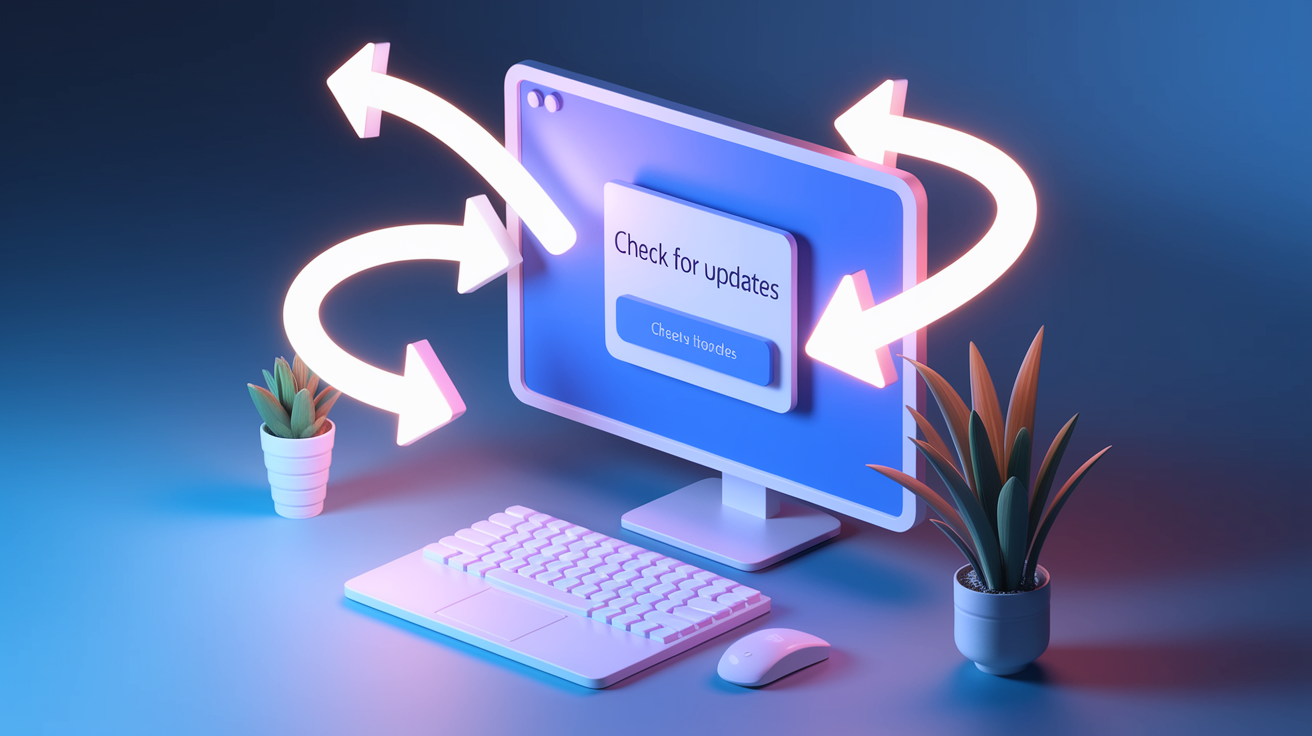
Start with the single most important step: open Settings, click Windows Update on the left side, then click Check for updates. Many Windows 11 problems clear up once you install the latest patches. Microsoft fixes bugs through these updates, and what looks like a complicated system error often disappears after a simple update.
Before you dig deeper, try three quick wins. First, restart your computer. Sounds too easy, but a clean restart clears temporary glitches that cause strange behavior. Second, press Ctrl+Shift+Esc to open Task Manager, click the CPU or Memory column header to sort by usage, and check if one program is eating up all your resources. Third, navigate to Settings > System > Troubleshoot and run the troubleshooter that matches your problem. These built-in tools fix common issues automatically.
Follow a clear hierarchy when something goes wrong. Start with Windows Update since patches resolve many issues without any extra work. Move to the appropriate built-in troubleshooter if the problem persists. If that doesn’t work, you’ll use command line tools like System File Checker. Only consider system recovery options after the simpler fixes fail. Jumping straight to drastic repairs wastes time and creates unnecessary stress.
Here’s your immediate action sequence for most Windows 11 problems:
- Run Windows Update through Settings > Windows Update > Check for updates
- Restart the PC to clear temporary issues
- Check Task Manager (Ctrl+Shift+Esc) for obvious resource problems
- Run the appropriate built-in troubleshooter from Settings > System > Troubleshoot
- Check Device Manager for driver issues by looking for yellow exclamation marks
- Note any error codes that appear for further diagnosis
The six most frequent problem categories and their first response actions:
- Boot failures: Can you access Safe Mode? If Windows won’t start normally, try booting to Safe Mode to disable recent changes
- Performance slowdowns: Check Task Manager’s Performance tab to see if CPU, Memory, or Disk usage is maxed out
- Update errors: Run the Windows Update troubleshooter from Settings > System > Troubleshoot > Other troubleshooters
- Network connectivity: Restart both your router and PC, then check if your network adapter shows as connected
- Driver conflicts: Open Device Manager and look for yellow warning symbols next to hardware devices
- Application crashes: Check Event Viewer’s Application logs to find which program failed and what error code it generated
Windows 11 Update and Installation Troubleshooting

Windows Update isn’t just about security patches. It’s also your first troubleshooting tool for system issues. Each update includes bug fixes that resolve crashes, compatibility problems, and performance issues that users reported. Running Windows Update should be your starting point before you try anything more complicated.
When updates fail, you’ll see error codes that point to specific problems. Error 0x80070002 means Windows can’t find update files. Error 0x800F0922 indicates a connection problem or not enough disk space. Error 0x80073712 means the update files got corrupted. Write down the exact error code. It tells you what went wrong. Navigate to Settings > Windows Update > Check for updates to run updates manually. If an update fails, click View update history on the same screen to see which specific update caused the problem. Click Uninstall updates if a recent update created new issues.
Windows 11 has strict hardware requirements that can block installation or updates. Your PC needs TPM 2.0 (a security chip), Secure Boot enabled in BIOS, and at least 64 GB of storage. Check if your system meets requirements by pressing Windows+R, typing msinfo32, then looking at “BIOS Mode” (should say UEFI, not Legacy) and “Secure Boot State” (should say On). Minimum 10 GB of free disk space keeps Windows running properly, though Microsoft reserves some space specifically for updates. Verify available space through Settings > System > Storage or by opening File Explorer and clicking This PC. You’ll see a bar graph showing how full your C: drive is.
Sometimes hardware compatibility requires BIOS updates. Visit your motherboard or PC manufacturer’s support website, enter your exact model number, and check if newer firmware is available. BIOS updates can enable TPM 2.0 or Secure Boot if your hardware supports it but has those features turned off.
Resolving Windows 11 Boot and Startup Problems

Boot problems show up in different ways depending on where the startup process fails. A black screen with just a cursor means display driver issues or startup program conflicts. A spinning wheel that freezes indicates Windows is stuck loading a service or driver. Blue screen errors with codes like CRITICALPROCESSDIED or INACCESSIBLEBOOTDEVICE point to corrupted system files or driver failures. Repeated restart loops happen when Windows detects a critical error, tries to fix it automatically, fails, and restarts to try again.
Access the Windows Recovery Environment when normal boot fails. If you can reach the login screen, hold Shift while clicking the power icon, then click Restart. If Windows won’t even reach the login screen, force three failed boot attempts. Turn the PC on, force power off when you see the Windows logo, repeat three times total. On the third restart, Windows automatically loads the Recovery Environment.
The Recovery Environment offers several Safe Mode options, each for specific situations. Safe Mode loads Windows with only essential drivers. Use this for basic troubleshooting when you don’t need internet access. Safe Mode with Networking adds network drivers so you can download driver updates or search for solutions online. Safe Mode with Command Prompt skips the desktop entirely and drops you into a command window. Helpful for advanced repairs when the desktop won’t load. Enable low resolution video mode if you think a display driver is causing black screens. Disable driver signature enforcement temporarily allows installation of unsigned drivers, though you should only use this when absolutely necessary for specific troubleshooting.
From the Recovery Environment, click Troubleshoot > Advanced options > Startup Settings > Restart, then press the number key for your chosen Safe Mode option. Once in Safe Mode, you can uninstall problematic drivers, remove recently installed programs, or run system repairs. If boot problems started right after installing new hardware or updating drivers, Safe Mode gives you a working environment to roll back those changes. Automatic Repair and Startup Repair live under Advanced options too. These tools scan for common boot problems and attempt automatic fixes, though they work best for corrupted boot files rather than driver conflicts.
Different boot problems need different solutions based on how much time you have and what’s failing:
| Boot Problem Type | Primary Solution | Estimated Time |
|---|---|---|
| Black screen after login | Safe Mode driver rollback | 15 minutes |
| BSOD with error code | Note code and research solution | Varies |
| Spinning wheel freeze | Automatic Repair | 20-30 minutes |
| Repeated restart loop | Safe Mode to disable recent changes | 20 minutes |
Windows 11 Performance Issues and System Slowdowns
Press Ctrl+Shift+Esc to open Task Manager and click the Performance tab. You’ll see real time graphs for CPU, Memory, Disk, and Network. Each graph shows percentage usage and helps you identify what’s choking your system. Watch these graphs for 30 seconds while your PC is slow. The problem usually shows itself quickly. If CPU bounces between 80 and 100%, you have a processor bottleneck. If Memory stays above 90%, you need more RAM. If Disk flatlines at 100%, either your hard drive is too slow or background processes are hammering it.
Click over to the Processes tab to find the culprit. Click the CPU column header to sort processes by processor usage. The highest number sits at the top. Same works for Memory, Disk, and Network columns. When you spot a program using massive resources and you’re not actively using it, you’ve found your problem. Web browsers with dozens of open tabs frequently top the list. Windows Search Indexer sometimes spikes to 100% disk usage. Antivirus scans can max out CPU for extended periods.
Right click a problematic process and select End task if it’s unresponsive or you don’t need it running. Be careful. Ending critical Windows processes can crash your system. If you don’t recognize a process name, leave it alone unless you’ve researched it first. For programs you don’t need at startup, click the Startup tab in Task Manager, find applications with “High impact” status, right click them, and select Disable. This stops them from launching automatically when Windows starts, freeing up resources.
Sustained CPU usage above 80% means your processor can’t keep up with what you’re asking it to do. Close unnecessary programs, or if you hit this limit during normal use, your PC needs a faster CPU. Memory usage above 90% indicates you’ve run out of RAM. Windows starts using your much slower hard drive as virtual memory, which kills performance. Close memory heavy programs or add more RAM to your system. Disk usage at 100% usually points to a slow hard drive, especially older mechanical drives. If you’re still using a hard drive instead of an SSD, that’s your bottleneck. Switching to an SSD creates the single biggest performance improvement you can make. Background processes like Windows Update, antivirus scans, or file indexing also spike disk usage temporarily.
Check Power Settings if your system feels slow even with low resource usage. Navigate to Settings > System > Power > Power mode and set it to Best performance instead of Balanced or Best power efficiency. This keeps your CPU from throttling down to save energy. Thermal throttling happens when your CPU overheats and automatically slows down to cool off. If your PC is hot to the touch or the fans run loud constantly, dust buildup or failing cooling might be choking performance.
Network Connectivity and Wi-Fi Troubleshooting in Windows 11
Network problems show specific symptoms that point to different causes. “No internet access” means you’re connected to a network but can’t reach the internet. Usually a router, modem, or ISP problem. “Limited connectivity” indicates your PC sees the network but can’t connect properly. Typically a configuration or driver issue. Intermittent disconnections where the connection drops and reconnects point to interference, weak signal, or power management settings killing your adapter. Before you change settings, restart your router by unplugging it for 30 seconds, then restart your PC. If you use ethernet, check that the cable clicks firmly into both your PC and router. Navigate to Settings > Network & internet > Advanced network settings and verify your adapter shows as “Connected.”
Check Settings > Network & internet to see your connection status at the top of the screen. If it says “Connected, no internet,” the problem is between your router and your internet provider, not your PC. If it says “No network,” your network adapter is disabled or can’t see any networks.
Now reset your network adapter using command prompt. These five steps clear most connection problems:
- Right click the Start button and select Terminal (Admin) or Command Prompt (Admin) from the menu
- Type
ipconfig /releaseand press Enter to release your current IP address. You’ll lose network connection temporarily - Type
ipconfig /renewand press Enter to request a new IP address from your DHCP server (usually your router) - Type
ipconfig /flushdnsand press Enter to clear cached DNS entries that might point to old, incorrect addresses - Type
ping google.comand press Enter to test connectivity. You should see replies showing the round trip time in milliseconds
Type ipconfig by itself and press Enter to check what IP address your PC actually has. Look for the line that says “IPv4 Address” under your network adapter. A valid home network IP starts with 192.168.x.x or 10.x.x.x. If you see an IP starting with 169.254.x.x, that’s a self assigned address meaning your PC couldn’t reach the DHCP server on your router. Check that your router is on and your connection is working.
For problems that command line tools don’t fix, the built-in Network troubleshooter runs through common fixes automatically. Go to Settings > System > Troubleshoot > Other troubleshooters and click Run next to “Network and Internet” rather than manually running each diagnostic step yourself.
Driver Issues and Hardware Compatibility Problems
Right click the Start button and select Device Manager to see all your hardware and its driver status. A yellow exclamation mark next to a device means the driver is missing, outdated, or incompatible. A red X means the device is disabled. Devices listed under “Other devices” don’t have drivers installed at all. Windows doesn’t know what they are.
You’ve got three ways to fix driver problems, depending on what went wrong. Update driver gets the latest version from Windows Update or the manufacturer’s website. Roll back driver returns to the previous version if a recent update broke something. This only works if you’ve updated the driver before and Windows kept the old version. Uninstall device then restart forces Windows to detect the hardware fresh and reinstall the driver from scratch, which clears corrupted driver files.
Different device types need specific driver sources. For graphics drivers, skip Windows Update and go straight to NVIDIA, AMD, or Intel’s website. Type your exact graphics card model into their driver download page. Graphics drivers from Windows Update work but lag months behind the latest versions with performance improvements and bug fixes. For audio drivers, visit your motherboard manufacturer’s support page if you use built-in audio, or your sound card manufacturer if you have a separate sound card. Download the Windows 11 driver package and run the installer. For USB devices showing as “Unknown device” in Device Manager, the device needs drivers that didn’t come with Windows. Check the manufacturer’s website using the device model number usually printed on the label. Peripheral devices like printers and scanners should pull drivers automatically from Windows Update, but if that fails, the manufacturer website has the current driver package.
USB devices sometimes disconnect because Windows tries to save power by shutting them down. Open Device Manager, expand “Universal Serial Bus controllers,” right click each “USB Root Hub” entry, select Properties, click the Power Management tab, then uncheck “Allow the computer to turn off this device to save power.” Repeat for every USB Root Hub listed. This prevents USB selective suspend from killing your devices.
When a driver update creates new problems instead of fixing them, roll it back to the previous version. Open Device Manager, locate the problematic device, right click it and select Properties. Click the Driver tab, then click the Roll Back Driver button. You’ll only see this if a previous driver version exists on your system. Select a reason for rolling back (just pick “Other” if you’re not sure), click Yes to confirm, then restart your computer. The old driver version loads after restart.
If updating and rolling back both fail, completely remove and reinstall the driver. Right click the device in Device Manager and select Uninstall device. Check the box that says “Attempt to remove the driver for this device” if you see it. This clears old driver files instead of leaving them on your system. Click Uninstall, then restart your computer. When Windows starts back up, it detects the hardware and automatically installs a driver. This works for most hardware except graphics cards, which you should reinstall manually using the manufacturer’s installer after uninstalling.
Using System File Checker and DISM Tools for Windows 11 Repair

System File Checker scans every protected Windows file and replaces corrupted versions with correct copies from a cached store. Use it when you get unexplained crashes, error messages about missing system files, or Windows features that suddenly stop working. SFC runs within Windows, so you need a bootable system. If Windows won’t start, you’ll need the Recovery Environment instead.
DISM (Deployment Image Servicing and Management) repairs the component store that SFC pulls its replacement files from. Think of it this way: if SFC is the mechanic fixing your car, DISM fixes the mechanic’s toolbox. When system corruption runs deep, the component store itself gets damaged, which means SFC tries to replace corrupted files with other corrupted files from the broken store. DISM reaches out to Windows Update servers to download clean component files, repairs the store, then SFC can use that healthy store to fix your system files.
Always run DISM before SFC. DISM fixes the source, then SFC uses that fixed source to repair your system. Running them in reverse order wastes time since SFC might pull bad files from a corrupted component store. Right click the Start button and select Terminal (Admin) or Command Prompt (Admin). Type the commands exactly as shown, including spaces and forward slashes. Wait for each command to complete before running the next one. These scans take time and rushing them causes failures.
The complete repair sequence works like this:
- Right click Start and select Terminal (Admin) or Command Prompt (Admin) to get a command prompt with elevated permissions
- Type
DISM /Online /Cleanup-Image /RestoreHealthand press Enter, then wait 10 to 20 minutes for the scan and repair to complete - After DISM shows “The operation completed successfully,” type
sfc /scannowand press Enter, then wait 15 to 30 minutes - Restart your computer after both scans finish successfully. Some repairs don’t take effect until after a restart
Results come in different forms. “Windows Resource Protection found corrupt files and successfully repaired them” means SFC fixed your system. “Windows Resource Protection found corrupt files but was unable to fix some of them” means deeper corruption that requires checking the CBS.log file for details. “Windows Resource Protection did not find any integrity violations” means your system files are intact and corruption isn’t your problem.
| Command | Purpose | Estimated Duration |
|---|---|---|
| DISM /Online /Cleanup-Image /CheckHealth | Quick check for corruption | 2-5 minutes |
| DISM /Online /Cleanup-Image /RestoreHealth | Repair component store corruption | 10-20 minutes |
| sfc /scannow | Scan and repair system files | 15-30 minutes |
When SFC says it found corrupted files but couldn’t fix them, check the Event Viewer section of this article for instructions on examining DISM and CBS logs to identify which specific files failed and why.
Windows 11 Storage and Disk Space Management
Low disk space affects Windows in ways that aren’t obvious. Performance slows down because Windows needs free space for temporary files, virtual memory, and system operations. Updates fail or refuse to install. Error messages pop up warning about storage. Windows 11 needs at least 10 GB free to function properly. Less than that and you’ll hit problems.
Check available storage two ways. Open File Explorer, click This PC in the left sidebar, and look at the C: drive bar graph showing how full it is. Or navigate to Settings > System > Storage for a detailed breakdown showing exactly what’s using space. The Storage screen lists categories like Apps, Temporary files, Documents, Pictures, and System files. Click any category to see size and contents.
Free up space using Disk Cleanup, the built-in tool for removing unnecessary files. Right click your C: drive in File Explorer, select Properties, then click the Disk Cleanup button. Check boxes next to file types you want to remove, then click OK. You can also access this through Settings > System > Storage > Temporary files, which shows the same deletable categories. Storage Sense automates this process. Toggle it on at Settings > System > Storage > Storage Sense, and Windows automatically removes temporary files and Recycle Bin contents on a schedule you set.
Navigate to Settings > System > Storage > Show more categories to find large files by type. Click “Large or unused files” to see what’s eating space, sorted by size. You’ll often find old downloads, forgotten video files, or installation packages you don’t need anymore.
Safe categories to delete using Disk Cleanup:
- Temporary files: Safe to delete, Windows recreates them as needed
- Recycle Bin contents: Permanently removes files you already deleted
- Windows Update Cleanup: Removes old update installation files after new updates are confirmed working
- Delivery Optimization Files: Cached Windows Update files used for sharing updates with other PCs on your network
- Thumbnails: Preview images that regenerate automatically when you view folders
- Previous Windows installations: After confirming Windows 11 runs stable, removes the Windows.old folder that lets you roll back to Windows 10
Built-in Windows 11 Troubleshooters and Diagnostic Tools

Microsoft streamlined troubleshooting when Windows 11 version 23H2 launched. Windows 10 had 15 separate troubleshooters, Windows 11 dropped that to 10, and in February 2023 Microsoft announced they’re phasing out the old MSDT (Microsoft Support Diagnostic Tool) platform entirely. Most troubleshooters now redirect you to the Get Help app, which uses the same diagnostic and repair tools but in a more modern interface that matches Windows 11’s design.
Access troubleshooters through Settings > System > Troubleshoot > Other troubleshooters. On Windows 11 23H2, the Troubleshoot page only shows two main options: “Other troubleshooters” and “Get help.” Click “Other troubleshooters” to see the list of available automated tools with a Run button next to each one.
The old troubleshooters and the Get Help app do the same underlying work. Run diagnostics, reset configurations, repair services, just packaged differently. Windows Update still uses the old style troubleshooter interface, but even that one displays a “will be retired” warning. When you click Run next to other troubleshooter categories, Windows redirects you to the Get Help app where you follow guided steps instead of watching a progress bar. The results are the same, just the presentation changed.
Windows 11’s 10 automated troubleshooters each target specific problem areas. Windows Update troubleshooter resolves download failures, installation errors, and update service problems. Network and Internet troubleshooter fixes connectivity issues, adapter problems, and IP configuration errors. Audio troubleshooter repairs sound playback and recording problems by resetting audio services and checking default devices. Printer troubleshooter detects printer connection problems and clears stuck print jobs. Bluetooth troubleshooter fixes device pairing failures and connection drops. Camera troubleshooter resolves webcam detection and permission issues. Playing Audio is specifically for sound output problems separate from the general Audio troubleshooter. Recording Audio targets microphone input issues. Video Playback troubleshooter fixes display problems during video playback. Windows Store Apps troubleshooter repairs Microsoft Store download and installation failures.
To run a specific troubleshooter, go to Settings > System > Troubleshoot > Other troubleshooters, locate the troubleshooter matching your problem, click the Run button next to it, and follow the on screen prompts. Some troubleshooters complete in seconds, others take a few minutes. After running, you’ll see a list of detected issues and what fixes were applied. Restart if prompted. Some repairs don’t activate until after reboot.
Type “Get Help” in the Start menu search box to access the Get Help app directly without going through Settings. This works well when you need guided troubleshooting for problems that don’t fit into the 10 automated categories. The app asks questions about your issue, then suggests relevant diagnostic steps and solutions.
Other sections in this article reference this troubleshooter section when you need to run a built-in tool for a specific problem. This keeps all troubleshooter information in one place instead of duplicating instructions across multiple sections.
System Restore and Rollback Options for Windows 11

System Restore returns Windows system files, installed programs, the registry, and device drivers to an earlier state without touching your personal files like documents, photos, or videos. It’s useful when recent driver installations, Windows updates, or new software break something that was working before. You get your working system back while keeping your data intact.
Here’s the critical part most people miss: System Protection is turned off by default in Windows 11. System Restore only works if restore points exist from when your PC was functioning properly, and Windows only creates restore points when System Protection is enabled. If you haven’t turned it on yet, do it now before problems start. Right click the Start button, select System, click “Advanced system settings” on the right side, click the System Protection tab, select your C: drive from the list, click the Configure button, then turn on System Protection. Set disk space allocation to 5 to 10% of your drive capacity. Windows uses this space to store restore point data. Click the Create button to make an immediate restore point as your baseline.
System Protection runs per drive, though C: drive is the only one that typically matters for rollback since it contains Windows system files. You can enable protection on other drives if you want restore points for programs installed there, but most people only need C: drive protected.
When you need to actually use System Restore, right click Start, select System, click “Advanced system settings,” click the System Protection tab, then click the System Restore button. A wizard walks you through selecting a restore point. Each restore point shows the date it was created and what triggered its creation. Automatic restore points happen before major Windows updates, manual ones show the description you entered when creating them. Pick a restore point from when your system worked correctly, before the problem started.
If Windows won’t boot at all, access System Restore through the Recovery Environment. Boot to Advanced options (covered in the boot problems section), click Troubleshoot, click Advanced options, then click System Restore. Follow the same selection process to pick a restore point.
System Restore affects different things in different ways:
- Preserves: Personal files, documents, photos, videos, and music stay exactly as they are
- Preserves: User profile data and browser bookmarks remain unchanged
- Removes: Programs installed after the restore point date get uninstalled. You’ll need to reinstall them
- Removes: Drivers and Windows updates installed after the restore point get reverted to their earlier versions
Restoration typically finishes in 10 minutes. Your PC restarts, loads the restored configuration, then shows a confirmation message listing what changed. Check that your problem is fixed and the system runs stable. If the restore didn’t help or made things worse, you can undo it by running System Restore again and selecting “Undo System Restore” from the restore point list.
Windows 11 App Crashes and Software Compatibility
Apps crash for several reasons that have nothing to do with Windows itself. Outdated software versions that haven’t been updated for Windows 11 compatibility. Corrupted installation files from interrupted downloads or disk errors. Conflicts with other software, especially when two programs try to use the same system resources. Insufficient system resources when the app needs more RAM or CPU than your PC has available. Many problems that look like Windows issues are actually application problems.
Legacy programs designed for Windows 7 or earlier sometimes refuse to run on Windows 11. Compatibility Mode tricks them into thinking they’re running on an older Windows version. Right click the program’s executable file or shortcut, select Properties, click the Compatibility tab, check “Run this program in compatibility mode for,” then pick the Windows version the program was designed for from the dropdown list. Windows 8, Windows 7, Vista, or XP. Click Apply. Some old programs also need “Run this program as an administrator” checked on the same tab.
When an app crashes repeatedly, reinstalling it often fixes corrupted files. Navigate to Settings > Apps > Installed apps, locate the problem application in the list, click the three dot menu next to it, then select Uninstall. Restart your PC, then reinstall the program from the official website or Microsoft Store. Always download from the original source, not third party sites. Some programs offer a Repair option in that same three dot menu, which attempts to fix the installation without removing your data or settings. Try Repair first if it’s available, since it’s faster and keeps your configuration.
Check the Event Viewer section for instructions on reading Application logs when you need to identify specific error codes or crash causes that point to the real problem.
| Problem Type | Solution Approach | Where to Find |
|---|---|---|
| App won’t launch | Check compatibility mode, reinstall application | Right-click .exe > Properties > Compatibility |
| App freezes during use | End task in Task Manager, check for updates | Ctrl+Shift+Esc > Processes tab > End task |
| Frequent crashes with error | Check Event Viewer Application log, reinstall | Event Viewer > Windows Logs > Application |
| Installation fails | Run installer as administrator, check system requirements | Right-click installer > Run as administrator |
Windows 11 Display, Monitor, and Graphics Problems
Display problems range from wrong resolution that makes everything look stretched or blurry, to black screens where nothing shows up, flickering that strains your eyes, weird colors that don’t match reality, blurry text even at correct resolution, monitors Windows won’t detect, and incorrect screen orientation when it’s stuck sideways or upside down.
Fix most display settings through Settings > System > Display. Change resolution using the “Display resolution” dropdown. Pick your monitor’s native resolution, usually the highest number available (1920×1080 for most 1080p monitors, 2560×1440 for 1440p, 3840×2160 for 4K). Adjust scaling with the “Scale” percentage if text and icons look too small or too large. 100% shows everything at actual size, 125% makes things bigger, 150% even bigger. Windows recommends a scaling percentage based on your screen size and resolution, but you can pick a different value if the recommendation doesn’t look right. Set correct orientation using the dropdown if your screen is rotated wrong. Landscape is normal horizontal, Portrait is vertical. The HDR toggle turns high dynamic range on for compatible monitors. Brightness slider adjusts screen brightness directly from Windows.
For advanced display settings that affect refresh rate and color format, go to Settings > System > Display, scroll down to “Related settings,” then click Advanced display. Select your monitor from the dropdown if you have multiple displays. You’ll see current refresh rate and color format. Screen flickering often comes from refresh rate mismatch. Click the “Choose a refresh rate” dropdown and try a higher rate if available. Most monitors support 60Hz minimum, gaming monitors go to 120Hz, 144Hz, or higher. Higher refresh rates reduce flicker and make motion look smoother.
Scaling problems create blurry text when Windows scales up content on high resolution displays. Settings > System > Display > Scale setting offers 100%, 125%, 150% presets. Custom scaling through the “Scale” dropdown lets you fine tune by percentage increments for better clarity. Some apps ignore Windows scaling and look blurry. Right click the app’s shortcut, Properties, Compatibility tab, click “Change high DPI settings,” then check “Override high DPI scaling behavior” and select “Application” from the dropdown.
Multiple monitor setup requires detection and arrangement. Settings > System > Display shows numbered boxes representing each monitor. Click Identify to flash numbers on your physical screens so you know which is which. Drag the monitor boxes to match your physical desk arrangement. Put monitor 2’s box to the right of monitor 1 if that’s how they sit in reality. This makes your mouse cursor move naturally between screens. Click a monitor box, scroll down, and check “Make this my main display” to set which monitor shows your taskbar and Start menu.
For graphics driver updates, rollbacks, and troubleshooting, check the Driver Issues and Hardware Compatibility Problems section rather than this display section. Driver management methodology lives there to avoid duplication.
Keyboard, Touchpad, and Input Device Troubleshooting
Input device problems show up as unresponsive keys that don’t register when pressed, touchpad that won’t click or scroll, mouse cursor jumping randomly or freezing in place, and wireless devices that lose connection and won’t reconnect.
Check if Device Manager recognizes your input device. Right click Start, select Device Manager, then expand “Keyboards,” “Mice and other pointing devices,” or “Human Interface Devices” sections depending on what’s not working. Look for your device name in the list. A yellow exclamation mark next to it means driver problems. If the device isn’t listed at all, Windows doesn’t see it. Check physical connections for wired devices, or try re-pairing wireless devices.
Disable then re-enable the device to force a reconnection that clears temporary glitches. In Device Manager, right click the device name, select Disable device, wait 5 seconds while the device deactivates, right click it again, then select Enable device. This resets the connection without restarting your whole PC. The device should start responding if it was just a temporary communication error.
USB selective suspend saves power by turning off USB devices when they’re idle, but this sometimes prevents devices from waking back up. Navigate to Control Panel (type “Control Panel” in Start menu search), click Power Options, click “Change plan settings” next to your active power plan, click “Change advanced power settings,” expand “USB settings” in the list, expand “USB selective suspend setting,” then set both “On battery” and “Plugged in” to Disabled. Click Apply. Your USB devices will stay powered on continuously instead of shutting down to save energy.
Adjust touchpad behavior through Settings > Bluetooth & devices > Touchpad. Here you can change sensitivity from less sensitive to most sensitive, enable or disable tap to click, configure three finger and four finger gestures, and toggle the touchpad completely off if you prefer using a mouse. The touchpad toggle is useful when typing. Accidental palm touches trigger unwanted cursor movement, so turning it off prevents that.
For driver updates and rollback procedures when your input device still doesn’t work after these setting changes, see the Driver Issues and Hardware Compatibility Problems section instead of duplicating those instructions here.
Windows 11 Security and Login Problems
Login problems hit several different ways. Forgotten password locks you out completely. Account locked after multiple failed login attempts temporarily blocks access. “User Profile Service failed the logon” error means your user profile corrupted and Windows can’t load it. Temporary profile loading gives you a generic profile instead of your actual one with all your settings.
Reset a Microsoft account password from the login screen by clicking “I forgot my password,” then follow the recovery steps using your backup email, phone number, or security questions you set up when creating the account. If you
Final Words
Start with Windows Update and work your way through each windows 11 troubleshooting step methodically.
Most problems resolve with a simple restart, a driver update, or running the right built-in tool.
If the first fix doesn’t work, move to the next one. You don’t need to jump straight to system recovery.
Keep notes of error codes and what you tried. That context helps if you need to search for more specific solutions later.
With these tools and methods, you can handle the majority of Windows 11 problems without outside help.
FAQ
How do you troubleshoot Windows 11?
You troubleshoot Windows 11 by starting with Windows Update (Settings > Windows Update > Check for updates), then restarting your PC, checking Task Manager for resource problems, running the relevant built-in troubleshooter, and checking Device Manager for driver issues before moving to advanced repairs.
What is the biggest problem with Windows 11?
The biggest problem with Windows 11 is often outdated drivers or Windows Update issues, which cause crashes, performance slowdowns, and hardware compatibility failures. Running Windows Update and updating drivers through Device Manager resolves most common problems before system-level repairs become necessary.
How do you run troubleshooter in Windows 11?
You run a troubleshooter in Windows 11 by opening Settings > System > Troubleshoot > Other troubleshooters, then clicking the Run button next to the relevant troubleshooter category. Most troubleshooters now redirect to the Get Help app for streamlined diagnostics.
How do you check if Windows 11 is corrupted?
You check if Windows 11 is corrupted by running System File Checker through Command Prompt as administrator. Type “sfc /scannow” and press Enter. If the scan finds corrupt files it can’t repair, run “DISM /Online /Cleanup-Image /RestoreHealth” first, then run SFC again.
How do you access Safe Mode in Windows 11?
You access Safe Mode in Windows 11 by holding Shift while clicking Restart, then selecting Troubleshoot > Advanced options > Startup Settings > Restart. After restart, press 4 for Safe Mode, 5 for Safe Mode with Networking, or 6 for Safe Mode with Command Prompt.
How do you free up disk space in Windows 11?
You free up disk space in Windows 11 by opening Settings > System > Storage > Temporary files, selecting file categories to delete (temporary files, Recycle Bin, Windows Update Cleanup), then clicking Remove files. Disk Cleanup provides additional cleanup options through drive Properties.
How do you reset network settings in Windows 11?
You reset network settings in Windows 11 by opening Terminal or Command Prompt as administrator, then typing “ipconfig /release” and Enter, “ipconfig /renew” and Enter, and “ipconfig /flushdns” and Enter. This releases your IP address, requests a new one, and clears DNS cache.
How do you enable System Restore in Windows 11?
You enable System Restore in Windows 11 by right-clicking Start > System > Advanced system settings > System Protection tab, selecting your C: drive, clicking Configure, turning on System Protection, and setting disk space to 5-10%. Click Create to make a restore point immediately.
How do you update drivers in Windows 11?
You update drivers in Windows 11 by opening Device Manager (right-click Start > Device Manager), right-clicking the device, and selecting Update driver. For graphics cards, download drivers directly from NVIDIA, AMD, or Intel websites instead of relying solely on Windows Update.
How do you fix display resolution problems in Windows 11?
You fix display resolution problems in Windows 11 by opening Settings > System > Display, then selecting the correct resolution from the “Display resolution” dropdown. For multi-monitor setups, click Identify to see which monitor is which, then adjust each display’s settings individually.
How do you check Windows 11 activation status?
You check Windows 11 activation status by opening Settings > System > Activation. The page shows “Windows is activated” with your digital license or product key status, or displays activation error codes if problems exist. Click Troubleshoot if activation fails.