

Want to install Windows 11 without a Microsoft account?
You can, and it’s easier than you think.
This guide shows two reliable ways that work on current builds: run a quick OOBE (Out-of-Box Experience) command to flip the setup, or force a “no Internet” path so Windows lets you create a local account.
If those fail, I’ll also show a Rufus-created installer that removes the online-account check before you boot.
Follow these hands-on steps and you’ll finish setup with a local account and no forced cloud sign-in.
Immediate Steps to Install Windows 11 Using a Local Account (No Microsoft Account Required)

If you’re sitting at the Windows setup screen right now and need to skip the Microsoft account requirement, you’ve got two main paths: run a command that flips a hidden OOBE switch, or kill your Internet connection so Windows offers “continue without Internet.” Either way forces the installer to let you create a local account.
On release builds like 24H2, the command is OOBE\BYPASSNRO. On preview builds past 26120, that one’s been removed and replaced by start ms-cxh:localonly. You’ll also drop Internet using ipconfig /release from the command prompt, or just unplug Ethernet or turn off Wi‑Fi. Once Windows sees no connectivity, it lets you proceed with a local username and password.
-
Boot the Windows 11 USB or DVD and get to the first setup screen (language or region selection).
-
Press Shift + F10 on your keyboard. Command Prompt opens.
-
Type OOBE\BYPASSNRO (no spaces, backslash required) and press Enter. The computer restarts immediately.
-
Wait for the system to reboot and return to setup.
-
Press Shift + F10 again and type ipconfig /release, then press Enter to disconnect from the network.
-
Type exit to close the command window.
-
Proceed through region and keyboard choices until you see “Let’s connect you to a network.”
-
Choose “I don’t have Internet” or “Continue with limited setup” (wording varies by build).
-
Enter a local username.
-
Enter a password, or leave it blank if you want, though that’s risky. Complete the three security questions.
Windows unlocks the limited setup path the moment it loses Internet access. If you’re on a build where OOBE\BYPASSNRO returns “command not found,” use start ms-cxh:localonly instead. Both commands tell OOBE to disable the mandatory Microsoft account check. The ipconfig /release command speeds things up by cutting network access instantly, forcing the “no Internet” screen without waiting for connection timeouts.
Methods to Bypass the Microsoft Account Requirement During Windows 11 Installation

Microsoft removed the visible “skip” option from Windows 11 setup screens to push cloud sync and cross-device integration. The installer now assumes you’ll sign in with a Microsoft account. The only way to unlock local account creation is to manipulate OOBE or use modified install media. These workarounds force Windows to reveal options it hides by default.
Reliability varies by build. Commands that work on one release may be disabled in the next. Microsoft actively patches third-party tools and fake-email tricks each time they gain traction. The methods that still function as of April 2025 rely on either OOBE commands or pre-configured installers built with Rufus.
Below are the main categories of bypass methods:
- OOBE command prompt: press Shift+F10 during setup to open a command window and run a script that disables the account requirement.
- Rufus-created installer: build a custom USB with a toggle that removes the Microsoft account check before installation begins.
- Email-error trick: enter a fake or overused email address (like no@thankyou.com) to trigger an error fallback that offers local account creation.
- autounattend.xml answer file: drop a community-generated configuration file onto the install USB to automate setup and pre-create a local user.
- Disconnect from the Internet: physically unplug Ethernet, disable Wi‑Fi, or run ipconfig /release so the installer offers “I don’t have Internet” and allows limited setup.
- Pro edition domain-join workaround: select “Set up for work or school,” then choose “Domain join instead” to create a local account without joining a domain.
The most reliable categories for current builds are OOBE\BYPASSNRO and start ms-cxh:localonly for release and preview builds respectively, followed by Rufus-created installers. Older tricks like fake emails and simple Internet disconnection have been blocked or made inconsistent by recent updates.
Using the OOBE Command Prompt to Create a Windows 11 Local Account

OOBE is the Out-of-Box Experience. It’s the setup assistant that runs when you first install Windows. It includes hidden settings and scripts that change behavior when triggered. The OOBE\BYPASSNRO command flips an internal flag that tells Windows to stop enforcing the online account requirement and to expose the “I don’t have Internet” screen even when a connection exists. Once that screen appears, you can choose “Continue with limited setup” and create a local account. The command must be typed exactly, with a backslash and no spaces: OOBE\BYPASSNRO.
Microsoft’s been removing and renaming these commands as they discover them. On builds 26120 and beyond, OOBE\BYPASSNRO was replaced with start ms-cxh:localonly, which opens a different internal dialog that produces the same outcome. Both commands cause the system to restart immediately, then return to the setup flow with the account requirement disabled. If you type the command incorrectly or use a forward slash, Windows returns “command not found” and nothing changes.
-
Boot from your Windows 11 USB or DVD and proceed to the first setup screen.
-
Press Shift + F10 on your keyboard. A black command window appears.
-
Type OOBE\BYPASSNRO (capital letters are optional, but the backslash is required) and press Enter.
-
The computer restarts automatically. Don’t interrupt the restart.
-
When the setup screen reappears, press Shift + F10 again.
-
Type ipconfig /release and press Enter to disconnect the network adapter.
-
Type exit to close the command window.
-
Continue through the region and keyboard selection screens.
-
At “Let’s connect you to a network,” choose “I don’t have Internet.”
-
The installer offers “Continue with limited setup.” Click it.
-
Enter a local username (no special characters or spaces recommended).
-
Enter a password. Leaving it blank is allowed but not recommended. Complete the three security question prompts.
Alternate Commands for Newer Windows 11 Builds
If OOBE\BYPASSNRO returns “command not found,” you’re on a preview or release build where Microsoft removed the old script. Use start ms-cxh:localonly instead. This command opens a hidden dialog that achieves the same result: it tells OOBE to allow local account creation without requiring a network connection.
-
Press Shift + F10 at the first setup screen.
-
Type start ms-cxh:localonly (no spaces, all lowercase works) and press Enter.
-
A brief pause or flash may appear as the command executes.
-
Close the command window and proceed through setup.
-
At “Let’s connect you to a network,” choose “I don’t have Internet” and continue with local account creation.
Microsoft changes OOBE command availability with every major feature update. If both OOBE\BYPASSNRO and start ms-cxh:localonly fail, the Rufus method or an autounattend.xml installer may be your only option. Always test commands on the current build before relying on them for a production install.
Creating a Windows 11 Installer that Automatically Allows Local Account Setup (Rufus Method)

Rufus is a lightweight USB bootable-media creator that modifies the Windows installation files before you copy them to the drive. When you toggle the “Remove requirement for an online Microsoft account” option in Rufus, it injects scripts into the installer that disable the account check and optionally pre-create a local username. The result is a USB that behaves like an older Windows setup, offering local account creation without requiring any command-line workarounds during OOBE.
You’ll need a USB flash drive of at least 8 GB. Rufus will erase everything on the drive. You also need a Windows 11 ISO file, which is about 5 GB. Rufus version 4.4 or newer includes the toggles for account and hardware requirement removal. The tool can download the ISO directly from Microsoft servers or use a file you’ve already downloaded. Once the USB is ready, you boot from it, and Windows setup skips the Microsoft account screen automatically.
- Insert your USB drive and launch Rufus.
- Under “Device,” select your USB drive from the dropdown.
- Under “Boot selection,” click the Download button or select an existing Windows 11 ISO file.
- If downloading, choose Windows 11, latest release, Home, Pro, or Education, x64 architecture, save the ISO to your computer.
- Under “Image option,” leave “Standard Windows installation” selected.
- Under “Partition scheme,” select GPT for UEFI systems (most modern PCs).
- Under “File system,” leave NTFS selected.
- Click “Start.”
- In the customization window that appears, check “Remove requirement for an online Microsoft account.”
- Optional: check “Create a local account with username” and enter the username you want. You’ll set the password later in Windows Settings.
- Optional: check “Remove the Secure Boot / TPM 2.0 and RAM requirements” if your PC doesn’t meet Windows 11 hardware requirements (may not work on the newest builds).
- Optional: check “Set regional options to the same values as this user’s” to skip country and keyboard prompts during OOBE.
- Click OK to confirm, then wait for Rufus to write the modified installer to the USB.
| Feature | Function |
|---|---|
| Remove requirement for an online Microsoft account | Disables the forced sign-in screen and allows local account creation during setup |
| Create a local account with username | Pre-seeds the local username; password is set later via Settings > Sign-in options |
| Remove Secure Boot / TPM 2.0 and RAM requirements | Bypasses hardware checks (less reliable on builds released after mid-2024) |
| Set regional options | Auto-fills country, time zone, and keyboard layout to match your current Windows installation |
After booting the Rufus-created USB, you can still run ipconfig /release from Shift+F10 to speed up the “I don’t have Internet” prompt, but the installer should offer local account creation even if you stay connected. The Rufus method has been confirmed working on builds up to 26200 as of April 2025.
Advanced Automated Install Options for Skipping Microsoft Accounts

An autounattend.xml file is an answer file that Windows Setup reads during installation to automate decisions like partition selection, product key entry, and user account creation. When you drop a properly configured autounattend.xml onto the root of your Windows 11 USB, the installer skips interactive prompts and creates a local user account without showing the Microsoft sign-in screen. This approach is common in IT deployments and can be generated using community tools or Microsoft’s Windows System Image Manager.
The answer file must be named exactly autounattend.xml and placed in the root directory of the USB drive, not inside any folder. During installation, Windows PE reads the file and applies the settings automatically. Because the file pre-configures the username, password, and account type, OOBE never reaches the Microsoft account prompt. Reliability depends on the build. Microsoft occasionally changes the structure of OOBE, which can break older answer files.
- Download or generate an autounattend.xml file from a community tool or create one in Windows System Image Manager.
- Edit the file to specify your desired local username, password, and security question answers.
- Copy the autounattend.xml file to the root of your Windows 11 installation USB (not inside any subfolder).
- Boot from the USB and begin installation. Windows reads the answer file automatically.
- The setup process skips most interactive prompts, including the Microsoft account screen, and creates the local account you defined in the XML.
Community-generated autounattend.xml files are available from forums and GitHub repositories, but always review the contents before using them. Some files include additional settings like disabling telemetry, removing bundled apps, or skipping privacy prompts. Because the XML is plain text, you can open it in Notepad and verify every setting. If the installer ignores the file or still prompts for a Microsoft account, the XML structure may be incompatible with your build, and you’ll need to regenerate it with updated settings.
Windows 11 Pro and Domain-Join Workarounds to Avoid Microsoft Account Sign-In

Windows 11 Pro includes an option during OOBE to set up the device for a work or school account. When you choose this path, the installer offers a “Domain join instead” button that allows local account creation without requiring a Microsoft account or an actual domain. This workaround doesn’t exist in Windows 11 Home, and Microsoft has hidden or removed it in some Pro builds released after mid-2024.
The domain-join path is designed for IT administrators who will connect the PC to an Active Directory domain later, but it works equally well for creating a standalone local account. After choosing “Domain join instead,” you enter a local username and password, complete the security questions, and finish setup without ever signing in online. If the option is missing from your build, you’ll need to use one of the OOBE command methods or a Rufus installer instead.
-
Proceed through the initial Windows 11 setup screens (language, region, keyboard).
-
At “Let’s connect you to a network,” connect to Wi‑Fi or Ethernet.
-
On the “Sign in with Microsoft” screen, look for a small link that says “Set up for work or school” or “Sign in options.”
-
Click that link, then choose “Domain join instead” or “Offline account” if the wording differs.
-
Enter a local username and password, then complete the three security questions.
-
Finish the setup process. The PC won’t be joined to a domain unless you manually configure it later via Settings > Accounts > Access work or school.
This method only appears on Windows 11 Pro and Education editions. If you’re using Home, the installer skips straight to Microsoft account sign-in with no alternate path. In that case, disconnect the Internet and use the OOBE\BYPASSNRO or start ms-cxh:localonly command to force the limited setup option.
Troubleshooting Windows 11 Local Account Setup Problems

If you type OOBE\BYPASSNRO and see “command not found,” you’re on a build where Microsoft removed that script. Switch to start ms-cxh:localonly and try again. If both commands fail, your build may have blocked all known OOBE workarounds. Use a Rufus-created installer or an autounattend.xml file instead. Always type commands exactly, with the correct slash direction and no extra spaces, or Windows rejects them.
Another common issue is Wi‑Fi reconnecting automatically after you run ipconfig /release. Some laptops have a physical Wi‑Fi toggle or a function key (often Fn + F2 or Fn + Airplane icon) that disables the wireless adapter. Turn off Wi‑Fi before running the command, or unplug your Ethernet cable if you’re on a wired connection. If Windows still doesn’t show “I don’t have Internet,” restart the setup by closing the command window, then re-run the commands at the “Let’s connect you to a network” screen.
- OOBE\BYPASSNRO returns “command not found”: try start ms-cxh:localonly or use a Rufus installer.
- Wi‑Fi reconnects after ipconfig /release: disable the adapter using the physical switch, function key, or by choosing “I don’t have Internet” immediately after the command.
- Setup skips straight to Microsoft account screen: you may be on a build that blocks OOBE commands; use Rufus or autounattend.xml.
- Older email-error trick (no@thankyou.com) doesn’t work: Microsoft blocked most fake-email addresses; use OOBE commands or Rufus instead.
- Hardware-change activation prompt after setup: Windows activation is tied to hardware; removing RAM or changing core components can trigger reactivation, which may force a Microsoft account sign-in for validation.
- Rufus USB doesn’t boot: check your BIOS boot order (common keys: F2, Del, F8, F12) and confirm Secure Boot is disabled if required.
- Local account creation fails during OOBE: restart the installer and repeat the Shift+F10 command sequence from the beginning.
Microsoft changes OOBE enforcement with every major update, so a method that works today may stop working in the next feature release. If you’re setting up multiple PCs or planning a future install, keep a Rufus-created USB with the “Remove requirement for an online Microsoft account” toggle enabled. It’s the most reliable fallback when OOBE commands are blocked.
Understanding the Differences Between Local and Microsoft Accounts in Windows 11
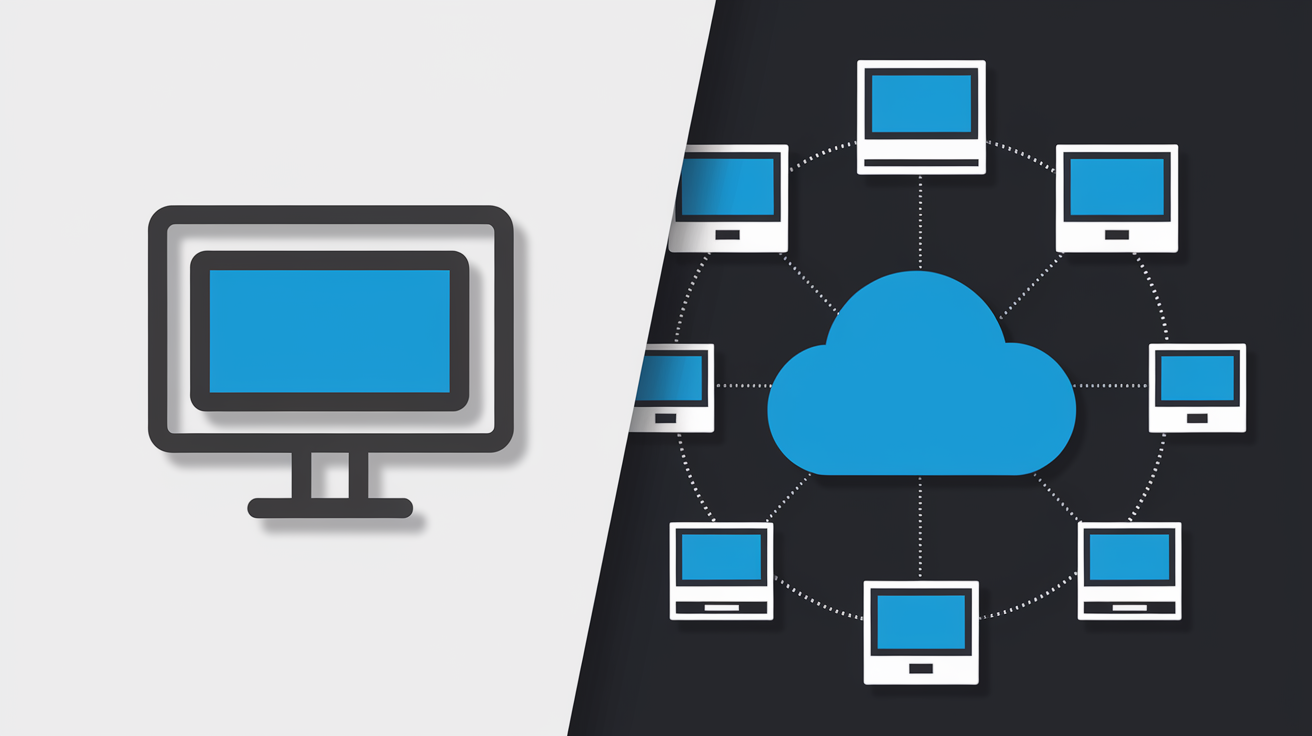
A local account stores your username and password only on the PC where it was created. Windows doesn’t sync settings, files, or preferences to the cloud, and Microsoft can’t recover your password if you forget it. This gives you full offline control but removes features like OneDrive integration, cross-device clipboard sync, and automatic app installation from the Microsoft Store on new devices.
A Microsoft account links your login to an email address and syncs your settings, browser favorites, app licenses, and OneDrive files across every Windows device where you sign in. Password recovery is handled through Microsoft’s online reset flow, and some apps and services like Xbox Game Pass, Microsoft 365, and certain Store apps require a Microsoft account to function. The trade-off is that Microsoft collects telemetry and account activity data as part of the service.
| Feature | Local Account | Microsoft Account |
|---|---|---|
| Password storage | Stored locally on the device only | Stored in the cloud; can reset online |
| Settings sync | No sync across devices | Syncs desktop, taskbar, browser, and app settings |
| OneDrive integration | Manual setup required | Automatic sign-in and folder sync |
| Microsoft Store | Browse and download free apps; paid apps may require account | Full access, licenses linked to account |
| Privacy and telemetry | Reduced data collection (local only) | Full telemetry and activity tracking enabled |
| Password recovery | Three security questions only; no online reset | Email or SMS recovery through Microsoft |
Leaving a local account password blank is allowed during setup, but Windows will sign in automatically every time the PC starts, which is a security risk if anyone else has physical access to the device. It’s recommended to set a password and complete the three security questions so you can reset it locally if needed. Some Group Policy and BitLocker features work differently with local accounts, and Windows may prompt you to sign in with a Microsoft account when configuring encryption or using advanced security settings.
Post‑Installation Local Account Management in Windows 11
If you installed Windows with a Microsoft account and want to convert it to a local account, go to Settings > Accounts > Your info and click “Sign in with a local account instead.” Windows asks you to verify your Microsoft account password, then prompts you to create a new local username and password. After the conversion, your files and apps remain intact, but settings sync and OneDrive stop automatically. You’ll still be able to sign back in to OneDrive and the Microsoft Store manually if needed.
Before converting, back up your BitLocker recovery key if you have encryption enabled. The recovery key is stored in your Microsoft account by default, and switching to a local account can prevent automatic recovery if you lose access to the key. Windows warns you about this during the conversion, but it’s easy to miss. Go to Settings > Privacy & security > Device encryption or search for “BitLocker” to locate and save your recovery key before making the switch.
-
Open Settings and go to Accounts > Your info.
-
Click “Sign in with a local account instead.”
-
Enter your current Microsoft account password to verify.
-
On the next screen, enter a new local username (it can match your old one).
-
Enter a password, or leave it blank, though that’s not recommended.
-
Complete the three security question prompts for local password recovery.
-
Click Next, then Sign out and finish.
-
Windows signs you out and signs you back in with the new local account. Your files and apps will be in the same place.
If you want to remove the Microsoft account entirely from the device, you must first create a second local account and give it administrator privileges. Sign in to that second account, then go to Settings > Accounts > Family & other users, select the Microsoft account, and click Remove. This deletes all files, apps, and settings associated with the Microsoft account, so back up anything you need before removing it. The new local administrator account will be the only way to access the PC after the Microsoft account is gone.
Final Words
In the action, you ran through quick steps to use a local account during setup, plus simple tricks like cutting networking or using OOBE commands.
You also covered higher-level options (Rufus, autounattend.xml, domain-join), a deep OOBE command prompt guide, and common troubleshooting for different builds.
If you need to install windows 11 without microsoft account, pick the method that matches your build, back up first, and you’ll have a safe local setup in minutes — confident and in control.
FAQ
Q: Can I install Windows 11 without a Microsoft account? Is Windows 11 forcing me to add a Microsoft account?
A: You can install Windows 11 without a Microsoft account; recent builds push Microsoft sign-in, but disconnecting internet, using offline setup, Rufus installers, or OOBE command tricks lets you create a local account.
Q: Does OOBE\BYPASSNRO work?
A: OOBE\BYPASSNRO works on many builds (tested through 24H2 and up to build 26200); newer builds may require start ms-cxh:localonly or alternate methods for the same outcome.
Q: How to activate Windows 11 for free legally?
A: You can activate Windows 11 for free legally if your PC has a digital license from an eligible Windows 10 upgrade, an OEM preinstalled license, or by using Windows Insider previews; otherwise buy a valid product key.