


You bought a mesh WiFi system to kill dead zones and stop buffering. But if you don’t set it up right, you’ll get the same slow speeds and dropouts you’re trying to escape. Most people place nodes randomly, skip wired connections, and wonder why coverage still stinks. This guide walks you through the setup that actually works: where to put nodes, how to wire backhaul if you can, and which settings matter for speed and security.
Preparing Your Home Before Mesh Network Installation

Before you open the box, figure out if you’re replacing your current router completely or running the mesh system in bridge mode. Full replacement works better for most people. It’s simpler, and it gives the mesh system total control over your network. Bridge mode makes sense in specific situations: your ISP insists on using their router for TV service or a landline, or you’ve got custom router settings you can’t give up. Just know that in bridge mode, you’ll disable most of the routing features on your mesh gateway so the two systems don’t fight each other.
Check with your ISP to make sure your modem plays nice with mesh systems. Some ISP gateway units (the ones that combine modem and router) need to be switched into bridge mode. Most cable and fiber modems work fine with any mesh system, but some ISP gateways are picky. If your ISP locks you into their equipment, you’re almost always using bridge mode instead of tossing their device entirely.
Walk through your house and look for Ethernet cables. Where do they run? Where could you add them without tearing into walls? Wired backhaul (connecting nodes with cables instead of wireless) makes a massive difference, especially in multi-story homes. Mark spots where you’ve got Ethernet ports available. Do those cables trace back to a central point where your modem sits? Even if you can wire just one or two nodes, do it. It’s worth the effort.
Gather what you need now: Ethernet cables long enough to reach from your modem to the main node and between any nodes you plan to connect with wire. Count your power outlets near each planned node location. Most nodes eat up a whole outlet without a pass-through, so if you’re short on outlets, grab a power strip before starting.
Complete Installation Process for Your Mesh Network

You need three things ready: your modem or ISP gateway already working and connected to the internet, your phone with enough storage to download the app, and 15 uninterrupted minutes. Don’t skip steps or jump around. It causes failures that waste your time.
Here’s how it goes:
-
Download the mesh app from Google Play or the iOS App Store. Create an account or sign in.
-
Connect the primary mesh node to your modem with the included Ethernet cable. One end goes into any port on the modem, the other into the WAN or Internet port on the node (usually a different color or labeled).
-
Plug in the primary node. Wait 60 to 90 seconds for it to boot up. Watch the LED. It’ll blink, then go solid or change colors. Your manual shows what pattern to expect.
-
Open the app and follow the setup wizard. Scan the QR code on the bottom of the node or type in the serial number when asked.
-
Grab your first satellite node and put it in another room. Don’t worry about the final spot yet. Just place it within 30 feet of the primary node so they can connect easily during setup.
-
Use the app to add the satellite node. Scan its QR code or punch in the serial number. Give it a room name. Wait for the app to confirm connection before adding more nodes. Repeat one at a time.
After all nodes show connected in the app, check the LED on each one. They should show solid colors or whatever “connected” looks like for your system. Open a browser on your phone while connected to the new mesh network and load a few sites to confirm internet access works. Then walk around and run speed tests using the mesh app’s built-in tool or a third-party site. You’re checking that coverage reaches everywhere, not comparing speeds between rooms yet.
Strategic Node Placement for Maximum Coverage
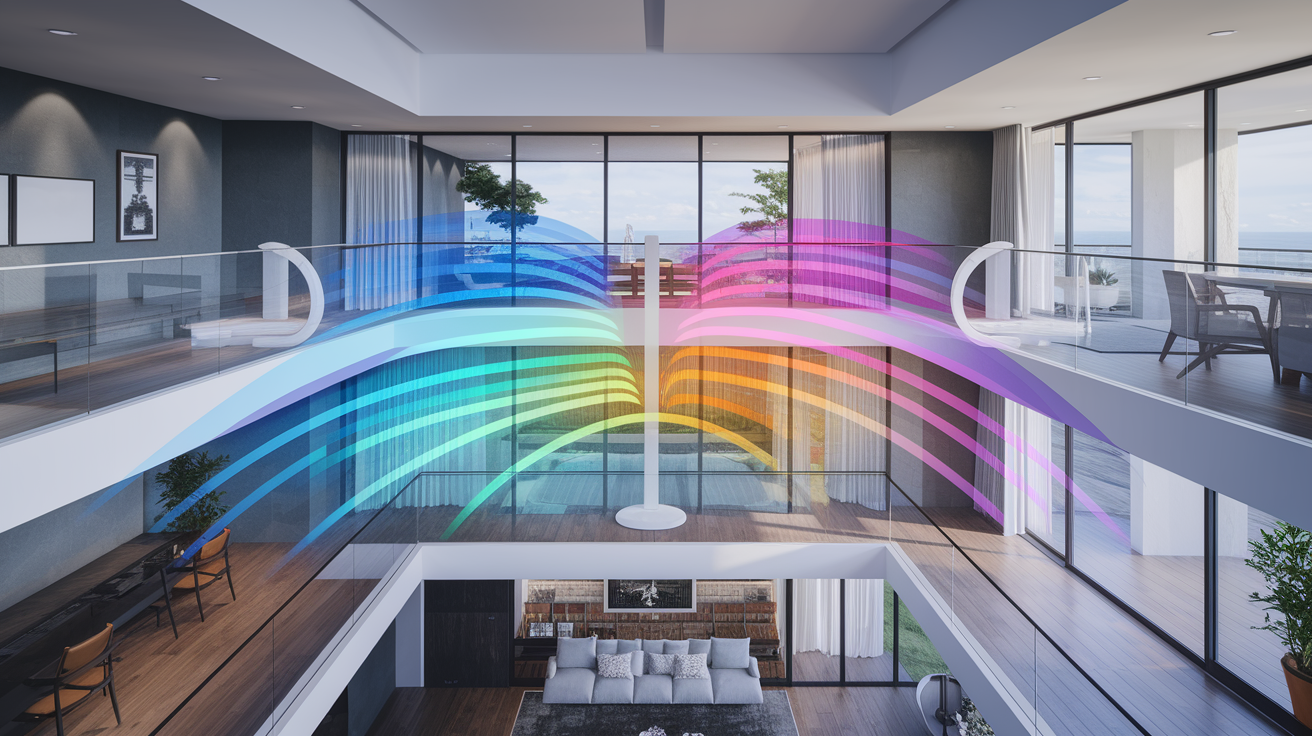
Where you put nodes determines if your mesh network actually fixes your WiFi problems or creates new ones. Mesh systems relay signals between nodes, so if they’re too far apart or blocked by too much stuff, the whole thing falls apart. Bad placement is the top reason people think their mesh system sucks. Usually the hardware’s fine. The nodes just can’t talk to each other.
Follow these guidelines:
-
Put your primary router in a central spot on the floor where you spend the most time. Not in a closet. Not in the basement corner.
-
Space nodes 30 to 50 feet apart in straight-line distance, not walking distance through hallways. Two rooms apart usually works. Three rooms is too far.
-
Mount nodes or place them halfway between floor and ceiling. On a shelf, wall-mounted, or on top of furniture. Not on the floor or ceiling.
-
Keep nodes away from metal filing cabinets, refrigerators, big mirrors, and metal wall studs. At least three feet from microwave ovens.
-
Put nodes in the open on shelves or tables, not inside cabinets, closed entertainment centers, or tucked behind TVs.
-
For multi-story homes, stack nodes roughly above and below each other between floors instead of clustering them all on one level. Signals need to travel vertically too.
-
Thick walls matter. Brick, concrete, or old plaster with metal lath weakens signals more than drywall. You might need nodes closer together in older homes.
-
If you want outdoor coverage for a patio or driveway, place a node near an exterior wall or window facing that area. Or use an outdoor-rated mesh node if your system offers one.
After placing all nodes, open your mesh app and check the signal strength indicator for each one. Most apps show how strongly each satellite node connects to the primary router or to other nodes. If any node shows weak or poor connection, it’s too far from its nearest neighbor.
Use the app’s coverage map or signal strength feature to find remaining dead zones. Adjust node positions before mounting them permanently. Move one node at a time and recheck the coverage map after each move. Sometimes shifting a node 10 feet or raising it onto a higher shelf solves coverage gaps without buying another node.
Configuring Ethernet Backhaul for Enhanced Performance
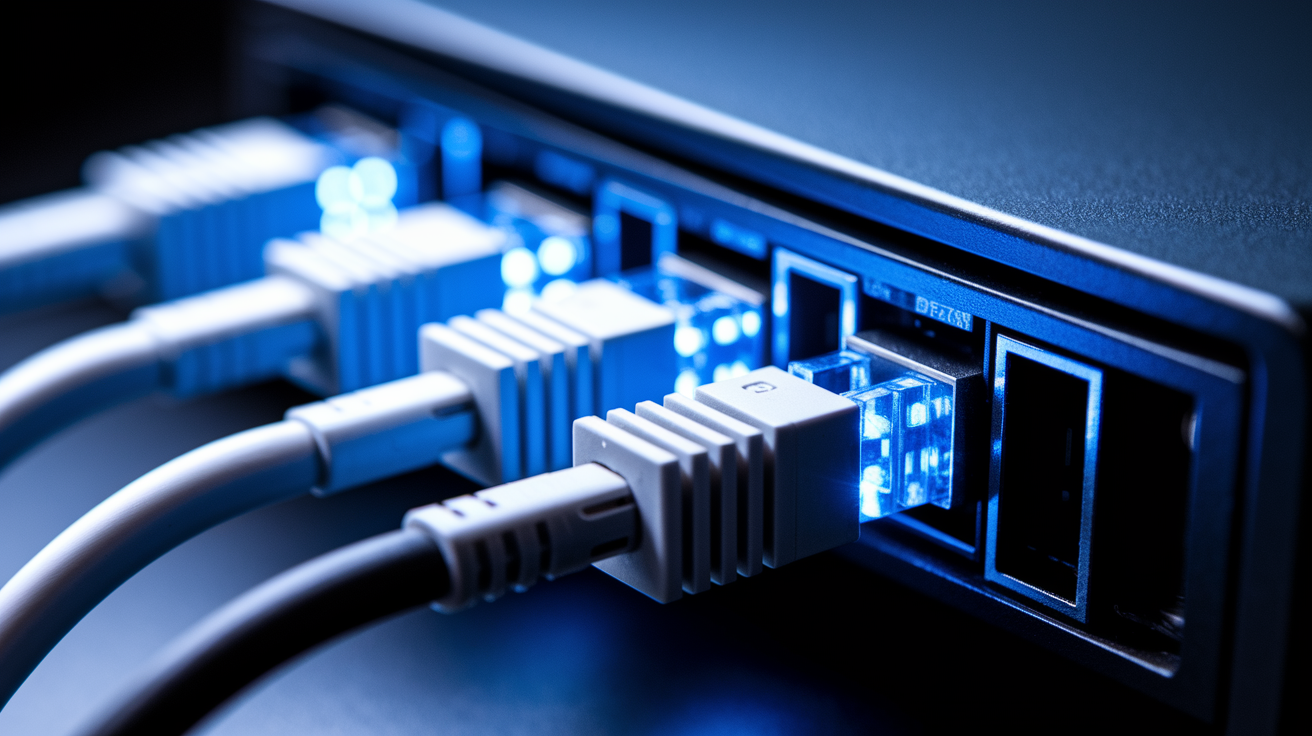
Wireless backhaul means satellite nodes connect to the main router or each other using WiFi, just like your phone connects. Wired Ethernet backhaul means you run cables between nodes so they communicate over wires instead. Wired is faster, more stable, and doesn’t eat up wireless bandwidth. If you’ve got Ethernet cables already in your walls or can easily add them, wired backhaul turns a good mesh system into an excellent one.
Look at the back of each node and find the Ethernet ports. Most have two to four. One’s usually labeled WAN, Internet, or marked in a different color. That’s what your primary node uses to connect to your modem. The rest are LAN ports for wired backhaul or plugging in devices like computers or game consoles. To set up wired backhaul, plug an Ethernet cable from any LAN port on your primary node into any LAN port on a satellite node. The mesh system detects the wired connection automatically and uses it. Repeat for additional satellite nodes if you’ve got cables that reach.
Tri-band mesh systems have a 2.4GHz band, a 5GHz band for devices, and a second 5GHz band dedicated exclusively to backhaul between nodes. If you’ve got a tri-band system without wired backhaul, that dedicated wireless band keeps backhaul traffic separate from your devices. Dual-band systems share the 5GHz band for both backhaul and device connections. That’s why wired backhaul makes a bigger difference on dual-band systems. It frees up that 5GHz band entirely for your devices. Even on tri-band systems, wired backhaul still improves performance because wired connections beat wireless every time.
Wired backhaul matters most in multi-story homes, homes with thick walls, or when you’re doing bandwidth-heavy stuff like 4K streaming, large file transfers, or online gaming on devices connected to satellite nodes far from the main router. If your satellite nodes are close to the primary router and you’re mainly browsing or streaming standard HD video, wireless backhaul works fine. Expect wired backhaul to deliver speeds 30 to 50 percent faster on devices connected to wired satellite nodes compared to wireless-only, with near-zero added latency.
Essential Network Configuration and Security Settings

During setup, you’ll pick a network name (SSID) and password that all nodes share. Choose a name you’ll recognize easily in your device’s WiFi list. Don’t use personal info like your street address. Your password needs strength. At least 12 characters mixing uppercase, lowercase, numbers, and symbols. This password protects every device on your network.
Your mesh system will offer WPA3 or WPA2 encryption. Choose WPA3 if your system supports it and all your devices are relatively new (made after 2019). WPA3 fixes security holes in WPA2 and makes it way harder for attackers to crack your password. If you’ve got older devices that can’t handle WPA3, most systems offer WPA2/WPA3 mixed mode that accepts both. This reduces some of WPA3’s security advantages though. WPA2 is still secure enough for home networks if WPA3 causes compatibility headaches.
| Setting | Purpose | Recommended Action |
|---|---|---|
| SSID (Network Name) | Identifies your network in device WiFi lists | Choose unique name without personal information, avoid default names like “NETGEAR” or “TP-Link” |
| Network Password | Prevents unauthorized network access | Use 12+ character password with mixed case, numbers, and symbols |
| Encryption Type | Protects data traveling over your network | Enable WPA3 if supported, fall back to WPA2/WPA3 mixed mode for older devices |
| Admin Password | Protects mesh system settings from changes | Set different password than network password, store securely |
| Automatic Firmware Updates | Keeps security patches and features current | Enable automatic updates and allow system to restart during overnight hours |
| Guest Network | Gives visitors internet access without main network password | Enable guest network with separate password, disable guest access to local devices and printers |
Enable automatic firmware updates in your mesh app so your system gets security patches and improvements without you remembering to check. Set updates to install overnight so they don’t interrupt your work or streaming. Guest network setup takes two minutes and lets visitors connect to the internet without your main password or access to devices on your network. Label it clearly like “Smith Family Guest” and use a simple password you can share easily. If you’ve got kids, check out the parental controls to set up scheduled internet times or pause internet to specific devices during homework or bedtime.
Understanding Mesh System Technical Specifications

The bands your mesh system uses and the WiFi generation it supports determine how fast it goes, how many devices it handles well, and how far signals reach. Understanding specs helps you set realistic expectations and decide if your current system meets your needs or if an upgrade makes sense when it’s time.
Dual-Band Mesh Network Configuration
Dual-band mesh systems broadcast on both 2.4GHz and 5GHz frequencies at once. The 2.4GHz band travels farther and punches through walls better but tops out around 300 to 600 Mbps in real conditions. It’s fine for web browsing, email, and standard definition streaming, but crowded with interference from neighboring networks and stuff like baby monitors and microwave ovens. The 5GHz band delivers 600 to 1200 Mbps with less interference but doesn’t travel as far or penetrate obstacles as well. Most dual-band systems use automatic band steering. They pick the best band for each device and situation without you managing it. Your phone and laptop see one network name, not separate 2.4GHz and 5GHz networks. Dual-band systems handle 20 to 40 devices comfortably in typical homes where most devices aren’t all moving data at once.
Tri-Band Mesh Network Configuration
Tri-band systems add a second 5GHz band to the 2.4GHz and 5GHz bands dual-band systems use. That extra 5GHz band usually serves as dedicated wireless backhaul for node-to-node communication. Your devices get the full speed of the 2.4GHz and 5GHz bands without sharing bandwidth with backhaul traffic. This setup dramatically improves performance for 4K streaming, video conferencing, and large file transfers on devices connected to satellite nodes far from the main router. Tri-band systems handle 50 to 100+ connected devices well. Important if you’ve got a smart home with dozens of light bulbs, sensors, cameras, and appliances all fighting for bandwidth. The performance advantage shows up most in larger homes or when you’ve got multiple people streaming 4K video or gaming at the same time in different rooms.
WiFi 6, WiFi 6E, and Standards Comparison
WiFi 6 (also called 802.11ax) improves on WiFi 5 (802.11ac) in ways that matter for mesh networks: faster top speeds (up to 9.6 Gbps theoretical versus 3.5 Gbps for WiFi 5), better efficiency when handling many devices through technologies like OFDMA and improved MU-MIMO, and reduced latency that makes video calls and gaming feel more responsive. WiFi 6 also uses target wake time to let battery-powered devices like phones and tablets sleep longer between transmissions, which extends battery life. WiFi 6E adds access to the 6GHz frequency band on top of 2.4GHz and 5GHz, giving you more available channels with less interference from neighbors. Think of it like adding a new, empty highway alongside the crowded ones. WiFi 6E matters most in dense apartment buildings or neighborhoods where the 2.4GHz and 5GHz bands are saturated with competing networks. All WiFi 6 and WiFi 6E systems work with older WiFi 5, WiFi 4, and even WiFi 3 devices through backward compatibility. Your old laptop from 2015 will connect fine. It just won’t get the new speeds and efficiency features.
Upgrading to WiFi 6 or 6E makes sense if you’ve got 20+ devices connected regularly, do a lot of 4K streaming or gaming, or experience slowdowns during peak times with your current system. If most of your devices are older WiFi 5 gear and you’re just browsing and streaming HD video, WiFi 6 won’t feel much faster. Band steering on dual-band systems automatically switches devices between 2.4GHz and 5GHz as you move around and as network conditions change. It works well most of the time, but some mesh apps let you disable band steering and create separate network names for each band if you want manual control over which band specific devices use.
Testing and Optimizing Your Mesh Network Performance

Testing after setup confirms your mesh network delivers the coverage and speeds you expected and finds problem areas before you mount nodes permanently or assume everything works. Without testing, you might discover dead zones or slow speeds weeks later when you’re trying to work or stream in a room you don’t use often.
Run these tests room by room:
-
Use the speed test feature in your mesh app or open a browser and go to a speed test site like fast.com or speedtest.net. Run tests in every room where you regularly use WiFi. Record results for each location.
-
Check the signal strength indicator in your phone’s WiFi settings or in the mesh app while standing in different rooms to see how signal degrades with distance from nodes.
-
Test seamless roaming by starting a video call or streaming a video on your phone, then walk from one end of your home to the other while watching for buffering or call quality drops as your phone switches between nodes.
-
Try actual high-bandwidth activities like starting a 4K video stream or downloading a large file instead of trusting speed test numbers alone. Real-world performance sometimes differs from synthetic tests.
-
Connect 5 to 10 devices at once and use them simultaneously (multiple people streaming, gaming, and video conferencing) to see if the system handles realistic load without slowdowns.
-
Open your mesh app’s coverage map or network topology view to see how devices spread across nodes and identify nodes that aren’t getting used or areas where devices struggle to connect.
-
Check which node each device connects to in the mesh app’s device list. Verify that devices in each room connect to the nearest node instead of holding onto a distant node they connected to earlier.
Speed test results below 50 percent of your ISP’s advertised speeds in rooms near nodes indicate a problem. Check that nodes are properly connected and positioned. Verify your modem and ISP connection deliver expected speeds at the source. Signal strength that drops to “weak” or one bar in rooms where you regularly use WiFi means you need to add another node or reposition existing nodes closer to that area.
Use your app’s diagnostics tools to identify issues. Most mesh apps show real-time bandwidth usage, which nodes handle the most traffic, interference from neighboring networks on each channel, and connection quality between nodes. If a specific node consistently shows poor connection quality to its nearest neighbor, move it closer or rotate it to point in a different direction. Small position changes sometimes make big differences in signal strength.
Advanced Features and Network Management

Beyond basic connectivity, most mesh systems include features that give you more control over how your network behaves and which devices get priority.
Quality of Service and Device Prioritization
Quality of Service (QoS) settings let you allocate bandwidth to specific devices or applications so they get consistent performance even when your network is busy. Set up QoS by identifying devices that need priority: your work laptop during video conferences, your gaming console, or your smart TV during movie night. Assign them high priority in your mesh app’s QoS settings. The system will give those devices first access to available bandwidth when multiple devices compete at the same time. This matters most if your household regularly maxes out your internet connection’s bandwidth. For example, prioritizing your work computer prevents video call freezes when someone else starts downloading a large file. If your internet connection has plenty of headroom for all your devices, QoS won’t make a noticeable difference.
Smart Home Integration and Voice Control
Some mesh systems work with Alexa or Google Home voice assistants, letting you check network status, pause internet access to specific devices, or reboot your network with voice commands. “Alexa, pause internet to the kids’ devices” or “Hey Google, what’s my internet speed?” To set this up, enable the mesh system skill or action in your Alexa or Google Home app, link your mesh account, and assign voice commands to common tasks you want hands-free control over. Some systems like Eero 6 Plus include built-in smart home hubs that support Thread and Zigbee protocols, which lets smart home devices like locks, lights, and sensors connect through your mesh nodes without needing a separate hub device. This simplifies smart home setup and reduces the number of devices you need plugged in.
Port Forwarding and Advanced Network Settings
Port forwarding lets specific internet traffic reach devices on your home network by opening network ports. You’ll need this for hosting game servers, running security camera systems accessed from outside your home, or using remote desktop software. Find port forwarding in the advanced settings section of your mesh app. Create rules specifying which ports to forward to which device’s IP address. Static IP address assignment prevents devices from changing their IP address every time they reconnect. This matters for port forwarding rules, networked printers, and home servers that other devices need to find at a consistent address. Assign static IPs through your mesh app’s device list by selecting a device and choosing “reserve IP address” or similar wording.
Expanding Coverage by Adding Additional Nodes

If you discover dead zones after initial setup, or if you add a new room, garage, or outdoor area that needs coverage, add satellite nodes instead of dealing with weak signals. Most people initially underestimate how many nodes they need, especially in homes with complex layouts, multiple floors, or outdoor spaces they want covered.
Signs you need another node: persistent dead zones where signal drops to one bar or zero, devices that disconnect frequently in certain areas, speeds that drop below 20 percent of what you get near the main router, or new areas you want to cover like a converted garage or backyard patio. Even if signal technically reaches everywhere, adding another node improves performance in rooms far from existing nodes by giving devices a closer connection option with stronger signal. The mesh system automatically redistributes device connections when you add nodes.
Open your mesh app and look for an “add node” or “add device” option. It usually walks you through the same process you used during initial setup. Plug in the new node somewhere between your existing coverage and the problem area. Usually halfway between the nearest existing node and the dead zone. The new node will power up, broadcast a setup signal, and appear in the app’s node discovery screen within a minute or two. Tap the node in the app, scan its QR code or enter its serial number, assign it a room name, and wait for the app to confirm it joined the mesh network.
New nodes automatically sync your network name, password, and all configuration settings from the system controller. You don’t recreate settings manually on each node. The mesh system’s routing algorithms immediately recognize the new node and start directing nearby devices to connect through it if that provides a stronger signal. Within a few minutes, devices in the previously weak area should show improved signal strength and faster speeds.
Each additional node makes the mesh network more resilient through self-healing capability. If one node loses power or fails, the system automatically reroutes traffic through other nodes to maintain connectivity. More nodes mean more alternate paths for data to travel, so temporary outages in part of your network don’t bring down the whole system. This redundancy matters most in larger homes where some nodes sit several hops away from the main router.
Common Setup Problems and Solutions

Most mesh network setup problems come from incorrect sequence steps, positioning issues, or conflicting network equipment instead of defective hardware.
| Problem | Cause | Solution |
|---|---|---|
| Satellite nodes won’t connect to main router | Nodes too far apart during initial pairing, or nodes positioned near interference sources | Move satellite node within 10 feet of main router during setup, complete pairing, then move to final location |
| Mobile app cannot find nodes | Phone connected to wrong network, Bluetooth disabled, or firewall blocking app | Verify phone connects to mesh network WiFi, enable Bluetooth and location permissions for app, disable VPN temporarily |
| Slow speeds after setup | Nodes too far apart creating weak backhaul connection, or ISP connection problem | Check speed directly at modem with wired connection first to verify ISP delivers expected speeds, then reposition nodes closer together |
| Devices connecting to wrong nodes | Device “sticky” to node it first connected to, or node placement creates overlapping strong signals | Disconnect and reconnect device to force new node selection, adjust node positions to reduce overlap, enable fast roaming if available |
| Intermittent disconnections | Firmware bugs, interference from neighboring networks, or failing Ethernet cable | Update firmware first, then change WiFi channels in app settings, test with different Ethernet cables if using wired backhaul |
| Firmware update failures | Interrupted power or internet during update, or insufficient storage on node | Ensure stable power and internet connection, manually retry update from app, factory reset node if update repeatedly fails |
| Cannot access admin settings | Forgotten password or account locked after too many wrong login attempts | Use password reset link in app or web interface, check email for reset instructions, factory reset as last resort |
When basic troubleshooting doesn’t solve your problem, factory reset lets you start over with fresh configuration. Find the physical reset button on each node. Usually a small recessed button you press with a paperclip. Press and hold for 10 seconds until the LED flashes rapidly or changes color, then release. The node will restart with default factory settings, erasing all configuration including network name, password, and any custom settings. After resetting individual nodes, remove them from your mesh app and add them again following the initial setup process. To factory reset your entire system, reset every node including the main router, then set up the system from scratch.
Contact your mesh system manufacturer’s support when you’ve tried troubleshooting steps and factory resets without success. Before calling, gather this info: your mesh system model and number of nodes, LED status colors on all nodes, whether the problem happens on all devices or just specific ones, internet speed from your ISP and speeds you’re getting at various locations, and any error messages from the app. Support can remotely access diagnostic logs if you grant permission, which usually identifies problems faster than describing symptoms over the phone.
Mesh Network Versus WiFi Extender Systems
Mesh networks and WiFi extenders both expand wireless coverage, but they work differently and deliver very different user experiences.
| Feature | Mesh Network | WiFi Extender |
|---|---|---|
| Network Name | Single SSID shared by all nodes | Creates separate network name (SSID) you manually switch to |
| Roaming Behavior | Seamless automatic switching as you move between nodes | Manual network switching required, or device stays connected to weak signal |
| Bandwidth Handling | Intelligent routing through multiple paths, tri-band systems dedicate band to backhaul | Shares and retransmits on same channels, cutting bandwidth in half |
| Setup Complexity | Moderate, app-based setup takes 15 to 20 minutes | Simple, plug in and press WPS button or use web interface |
| Total Cost Large Homes | 200 to 400 dollars for 3-node system covering 4,000 to 6,000 sq ft | 40 to 80 dollars per extender, need 2 to 3 for similar coverage totaling 120 to 240 dollars but with compromised performance |
| 4K Streaming Performance | Handles multiple 4K streams without buffering through efficient bandwidth allocation | Bandwidth halving causes buffering during 4K streaming, especially on devices two hops from router |
The seamless roaming difference matters most when you move through your home during video calls or while streaming media. With mesh networks, your phone or laptop automatically switches to the nearest node as you walk around without dropping the connection or pausing your video. The transition happens in milliseconds using standards like 802.11k and 802.11r that let devices scout for better connections before switching. WiFi extenders force you to manually switch networks when you move from the main router’s coverage to the extender’s coverage area, or your device stubbornly holds onto a weak signal from the wrong access point until the connection becomes unusable.
A single WiFi extender makes sense for simple coverage gaps. If you’ve got one room or garage that’s just out of reach of your router and you rarely move between areas during active use, extenders work fine for that scenario at low cost. Mesh networks become the better investment when you need coverage throughout a larger home, when you regularly move between rooms during video calls or streaming, when you’ve got multiple people using bandwidth-heavy applications at the same time, or when you want features like whole-home parental controls and network management. The price difference narrows when you need multiple extenders to cover a large home. At that point, a mesh system costs about the same but performs dramatically better.
Final Words
Your mesh wifi setup doesn’t end when the last node powers on.
Test coverage in every room. Check speeds where you actually use devices. Move nodes if the app shows weak connections between them.
Enable automatic firmware updates so security patches install without you thinking about it. Set up your guest network now, before you need it.
Walk through your home with your phone and watch it switch between nodes. If it hesitates or drops, adjust node placement by a few feet.
The system learns your usage patterns over the first few days, so performance keeps improving as it runs.
FAQ
How do I set up a WiFi mesh?
To set up a WiFi mesh system, download the manufacturer app, connect the main node to your modem via Ethernet cable, power it on, create an account, and then add satellite nodes one at a time through the app. The setup wizard walks you through positioning nodes and configuring your network name and password.
What is better, a WiFi extender or mesh system?
A mesh system is better than a WiFi extender because it creates one seamless network that automatically connects devices to the strongest node, while extenders create multiple network names and reduce bandwidth. Mesh networks handle high-bandwidth activities like 4K streaming more efficiently without buffering.
Can I connect a mesh WiFi to an existing router?
Yes, you can connect a mesh WiFi system to an existing router by enabling bridge mode on the main mesh node, which disables the router functions in the gateway node. Connect the gateway node to your router via Ethernet cable and configure bridge mode through the device app’s advanced networking section.
What are the disadvantages of mesh WiFi?
Mesh WiFi systems typically cost more upfront than single routers or extenders, and wireless backhaul connections between nodes cannot match the speed and reliability of wired Ethernet connections. Each additional node also increases potential security vulnerabilities that require attention.
How far apart should mesh nodes be placed?
Mesh nodes should be placed no more than 30 to 50 feet apart, typically within two rooms of each other, to maintain strong wireless connections. Position nodes in open areas halfway between floor and ceiling, avoiding metal objects, microwaves, and thick walls.
What is Ethernet backhaul in a mesh network?
Ethernet backhaul in a mesh network means connecting nodes with physical Ethernet cables instead of wireless connections, which significantly improves speed and reliability by eliminating latency and signal interference. Wired backhaul maintains stable connections at full gigabit speeds between floors and distant nodes.
Do all mesh nodes need the same SSID?
Yes, all mesh nodes share the same SSID (network name) and password, which eliminates the need to manually switch networks when moving around your home. This single-network approach enables seamless roaming as devices automatically connect to the strongest available node.
What is the difference between dual-band and tri-band mesh systems?
Dual-band mesh systems use 2.4GHz and 5GHz bands for device connections, while tri-band systems add a second 5GHz band dedicated to backhaul communication between nodes. Tri-band systems deliver better performance for homes with many connected devices or high-bandwidth activities like 4K streaming.
Should I upgrade to WiFi 6 mesh system?
You should upgrade to a WiFi 6 mesh system if you have multiple WiFi 6 compatible devices and need higher speeds, better efficiency with many simultaneous connections, and reduced latency. WiFi 6 systems work with older WiFi 5 devices through backwards compatibility.
How do I test my mesh network performance?
To test your mesh network performance, run speed tests in multiple rooms using the mesh app or third-party tools, check signal strength indicators, verify seamless roaming by walking through your home with a connected device, and review the coverage map in the manufacturer app.
Can I add more nodes to my mesh network later?
Yes, you can add more nodes to your mesh network later through the manufacturer app, which automatically discovers new nodes and syncs network settings. Additional nodes improve coverage in dead zones, extend to outdoor areas, and increase network redundancy with self-healing capabilities.
How do I reset a mesh node that won’t connect?
To reset a mesh node that won’t connect, press and hold the reset button for 10 seconds until the LED indicator changes, which restores the node to default settings. After resetting, add the node again through the manufacturer app following the initial setup process.