


You probably have 60 passwords right now. Maybe more. Email, banking, shopping, work apps, social media. And if you’re like most people, you reuse the same 3 passwords everywhere because remembering 60 unique ones is impossible. LastPass changes that. It stores all your passwords in one encrypted vault, fills them automatically when you need them, and generates uncrackable new ones for every account. You’ll set it up in 10 minutes, memorize one master password, and never have to remember another password again.
Getting Started: Account Setup and Installation

In this section, you’ll create your LastPass account, set up your master password, and install LastPass on every device you use. Proper setup now prevents headaches later, especially since your master password can’t be recovered if you forget it.
Complete LastPass Setup Process:
- Visit lastpass.com and click “Get LastPass Free” or choose your subscription plan (Free, Premium, Families, Teams, or Business based on your needs).
- Enter your email address to create your account and check your inbox for the verification email.
- Create your master password using at least 20 characters, but 25 or more is better for security.
- Use 2 to 3 random phrases or words combined with numbers and punctuation (like “BlueSky@Home29$Morning” or “Coffee!Lamp#River82”).
- Type your new master password 10 times right now to start memorizing it.
- Type it 10 more times later the same day, then 10 times again the next day to lock it into memory.
- Set up a password hint that helps you remember without giving away the actual password.
- Install the browser extension for Chrome by visiting the Chrome Web Store and searching “LastPass,” then click “Add to Chrome.”
- Install extensions for any other browsers you use (Firefox, Safari, Edge, or Opera) by visiting their extension stores.
- Download the mobile app from the App Store (iPhone) or Google Play (Android) and log in with your master password.
- Enable biometric authentication on your phone by going to Settings in the mobile app and turning on fingerprint or face recognition.
- Confirm the LastPass icon appears in your browser toolbar (it looks like three dots in a circle or the LastPass logo).
Your master password is the single most important security decision you’ll make with LastPass. It’s the only password you’ll need to remember, and LastPass uses it to unlock everything else. Because your data is encrypted with AES 256 bit encryption before it leaves your device, even LastPass employees can’t access your passwords. This zero knowledge architecture protects you, but it also means there’s no password recovery if you forget your master password. The memorization strategy matters. Type it 10 times immediately after creating it, 10 times later the same day, and 10 times the next day. This repetition builds muscle memory so you won’t forget it.
After clicking the verification link in your email, log into LastPass in your browser and check for the icon in your toolbar. On mobile, open the app and confirm it synced your (currently empty) vault. If you don’t see the browser icon, the extension didn’t install correctly. Go back to your browser’s extension store and try again.
Your LastPass vault automatically syncs across all devices where you’re logged in. When you save a password on your laptop, it appears on your phone within seconds (as long as you’re connected to the internet). This real time syncing means you can add a password on your computer at work and use it on your phone at home without any extra steps. The sync happens in the background, so you don’t have to trigger it manually.
| Platform | Extension/App Name | Biometric Support | Auto-Sync |
|---|---|---|---|
| Chrome | LastPass Browser Extension | No (desktop browsers don’t support biometrics) | Yes |
| Firefox | LastPass Browser Extension | No | Yes |
| Safari | LastPass Browser Extension | No | Yes |
| Edge | LastPass Browser Extension | No | Yes |
| iOS | LastPass Mobile App | Yes (Face ID or Touch ID) | Yes |
| Android | LastPass Mobile App | Yes (Fingerprint or Face Unlock) | Yes |
Saving, Autofilling, and Updating Passwords
For the first 2 weeks with LastPass, you’ll build your password vault by logging into websites normally. LastPass watches for password fields and offers to save your credentials automatically when it sees them.
When you log into any website, LastPass detects the username and password fields. After you click the login button, a notification bar appears at the top of your browser asking “Add site to LastPass?” or showing a popup with the “Save Site” button. Click it, and LastPass stores that login in your vault. During new account creation, the same thing happens. When you fill out a registration form with a new password, LastPass notices and asks if you want to save it. You don’t need to do anything special. Just use the internet like you normally would, and LastPass captures your credentials automatically.
Autofill scenarios and how they work:
Automatic login happens when you visit a saved site. LastPass fills your username and password instantly if you have autofill enabled, and you can press Enter to log in. Form fills work the same way. LastPass can autofill addresses, phone numbers, and other form data you’ve saved in your vault.
If autofill doesn’t happen automatically, click the LastPass icon in the login field and select your account from the list. You can disable autofill for certain sites (like your bank) if you prefer to enter those passwords manually for extra caution. When you have multiple accounts for the same site, LastPass shows a list so you can pick which one to use. If LastPass doesn’t recognize a field, you can copy passwords from your vault and paste them manually.
Changing passwords on websites using LastPass:
- Click the LastPass icon in your browser and search for the account you want to update.
- Click “Go to site” or “Visit site” to open the website in a new tab.
- Navigate to the account settings or password change section on that website.
- When you see the “Current password” field, click it, then click the LastPass icon in the field and choose “Fill current.”
- When you see the “New password” field, click it, then click the LastPass icon and choose “Generate” to create a strong new password.
- Copy the new password if the site requires you to enter it twice, then click the website’s “Save” or “Update password” button.
- After the website confirms your password was changed, a LastPass notification bar appears at the top. Click “Confirm” to update the password in your vault.
You can edit saved credentials anytime by opening your LastPass vault, finding the account, and clicking the edit icon (it looks like a pencil). This opens a form where you can update the username, password, website URL, or add notes like “this is my work email account” or “renewal date: March 15.” You can also adjust autofill settings for specific sites if LastPass is filling the wrong account or if you want to disable autofill for sensitive accounts.
The confirmation step after changing a password is critical and easy to miss. If you don’t click “Confirm” on the notification bar, LastPass keeps the old password in your vault, and you won’t be able to log in next time. Don’t worry too much though. LastPass also saves generated passwords temporarily as “generated password for example.com” until you confirm them. So even if you forget to confirm, you can find the new password in your vault under that temporary name and manually update the entry later.
Creating and Organizing Your LastPass Vault

Your LastPass vault is the central hub where everything you save lives. Passwords, secure notes, credit card info, and more. Think of it like a digital filing cabinet that only you can unlock.
To organize login credentials, click the LastPass icon in your browser and choose “Open My Vault.” From there, click the folder icon or look for “Add Folder” to create categories like “Work Accounts,” “Personal Email,” “Shopping Sites,” or “Banking.” When you save or edit an account, you can assign it to a folder so you’re not scrolling through a giant unsorted list. You can also give accounts friendly names instead of just the website URL. Like naming your Amazon account “Amazon Personal” if you have multiple Amazon logins.
For sensitive information that isn’t a login, use Secure Notes. Click “Add Item” in your vault and choose “Secure Note.” You can store software license keys, Wi Fi passwords for your home network, bank account numbers, insurance policy details, or anything else that needs encryption. These notes are stored with the same AES 256 bit encryption as your passwords, so they’re just as safe. When you need that Wi Fi password for a guest or that software key to reinstall a program, it’s right there in your vault instead of buried in an old email.
Credit card information goes in the “Payment Cards” section of your vault. Add your card details once, and LastPass can autofill them on checkout pages. You can also add custom fields to any vault item. Like a “PIN” field for your debit card or “Customer Service Number” for quick reference. Tags help you find things faster (tag all your streaming services with “entertainment” or all your work tools with “business”). Use the search bar at the top of your vault when you need something fast. It searches names, URLs, notes, and tags all at once.
Importing Existing Passwords into LastPass

Importing your existing passwords saves hours of manual work and gets you secure faster than building your vault from scratch one login at a time.
Import existing passwords from browsers and other sources:
- Open your LastPass vault and look for “Advanced Options” or “More Options” in the menu (usually found by clicking the LastPass icon and selecting the vault).
- Click “Import” to see the list of import sources. Browsers like Chrome, Firefox, Safari, and Edge are listed, along with other password managers and a generic CSV option.
- If importing from a browser, follow the on screen instructions to export your browser’s saved passwords first (usually found in the browser’s Settings under “Passwords”).
- Upload the exported file (usually a CSV file) by clicking “Choose File” in the LastPass import window and selecting the file from your computer.
- After the import completes, delete the exported CSV file from your computer immediately since it contains unencrypted passwords.
You probably have more accounts than you remember. Go to your email inbox and search for terms like “welcome,” “account created,” “verify your email,” “password reset,” or “confirmation.” These messages reveal accounts you set up months or years ago and forgot about. Make a list of the ones you still use, then log into each one over the next week or two so LastPass can capture those passwords. This discovery process usually uncovers 20 to 30 accounts people didn’t realize they had.
If you’re switching from another password manager or just need to manually gather passwords before importing, create a temporary Google Sheet with columns for “Website,” “Username,” and “Password.” Fill it out as you discover accounts, then export it as a CSV and import it into LastPass using the steps above. Once the import is complete, delete that Google Sheet permanently (including from your trash) because it’s storing passwords in plain text. You can also share the sheet with yourself via email as a backup method, but delete the email and the attachment after importing. The goal is to get everything into LastPass, then destroy the unencrypted temporary storage.
Generating Strong Passwords Using LastPass

The password generator creates random, unique passwords so you never have to think up your own again. Every account should have a different password. If one site gets hacked, the others stay safe.
Click the LastPass icon while creating a new account or changing a password, then select “Generate Secure Password.” A window pops up showing a random password and settings to customize it. Set the length to at least 20 characters, but 25 is better if the website allows it. Longer passwords are harder to crack. A 25 character password is exponentially more secure than a 12 character one, even if both seem random. Check the boxes for uppercase letters, lowercase letters, numbers, and symbols unless the website specifically says it doesn’t accept symbols (some older sites have weird restrictions). If you think you’ll ever need to type this password manually (like on a TV or game console), turn off “ambiguous characters” so you don’t mix up 0 (zero) and O (letter O) or 1 (one) and l (lowercase L).
Some websites limit password length or ban certain special characters. If you generate a password and the site rejects it, go back to the generator and adjust the settings. Try reducing the length to 20 characters, or uncheck the symbols box if the site complains about special characters. A 20 character password without symbols is still extremely strong. Way better than a short password with symbols. After you adjust the settings and create the new password, LastPass remembers those custom settings for that site, so updates work smoothly next time.
| Use Case | Length | Include Symbols | Include Numbers | Include Uppercase | Include Lowercase |
|---|---|---|---|---|---|
| General Use | 25 characters | Yes | Yes | Yes | Yes |
| High Security (banking, email) | 30 characters | Yes | Yes | Yes | Yes |
| Sites with Restrictions | 20 characters | No (or limited) | Yes | Yes | Yes |
| Memorable Passwords (manual entry devices) | 20 characters | No | Yes | Yes | Yes (avoid ambiguous) |
Managing LastPass Security Settings and Two-Factor Authentication

Your master password is strong, but adding a second layer of security makes your account nearly impossible to break into. Two factor authentication (2FA) requires something you know (your master password) and something you have (your phone or a hardware key).
Setting up two factor authentication for your LastPass account:
- Open your LastPass vault and click your email address or profile icon, then select “Account Settings.”
- Look for “Multi-factor Options” in the left menu and click it.
- Choose your preferred method. LastPass Authenticator (free app), Google Authenticator (free app), or a YubiKey hardware token.
- If using an authenticator app, install it on your phone first (search “LastPass Authenticator” or “Google Authenticator” in your app store).
- Click “Enable” next to your chosen method and scan the QR code with your authenticator app.
- Enter the 6 digit code from the app to confirm it’s working correctly.
- Save your backup codes in a secure location (print them or save them in a secure note in your vault) in case you lose access to your phone.
On mobile devices, enable biometric login so you don’t have to type your master password every time. Open the LastPass app, go to Settings, and turn on “Unlock with Fingerprint” or “Unlock with Face ID.” Now you can access your vault with a quick fingerprint scan or face glance. The biometric data never leaves your phone. It’s just a convenient way to unlock the app instead of typing your master password dozens of times a day.
LastPass uses zero knowledge encryption, which means your data is encrypted on your device before it’s sent to LastPass servers. The company never sees your master password or the unencrypted contents of your vault. Even if LastPass gets hacked or receives a court order demanding your data, all the attackers or authorities get is an encrypted blob that’s useless without your master password. You can also set automatic logout timers so LastPass locks itself after 15 minutes of inactivity, or configure it to require your master password after your computer sleeps. These settings are in the same Account Settings area under “Security” or “General.”
Using LastPass Password Audit and Security Challenge
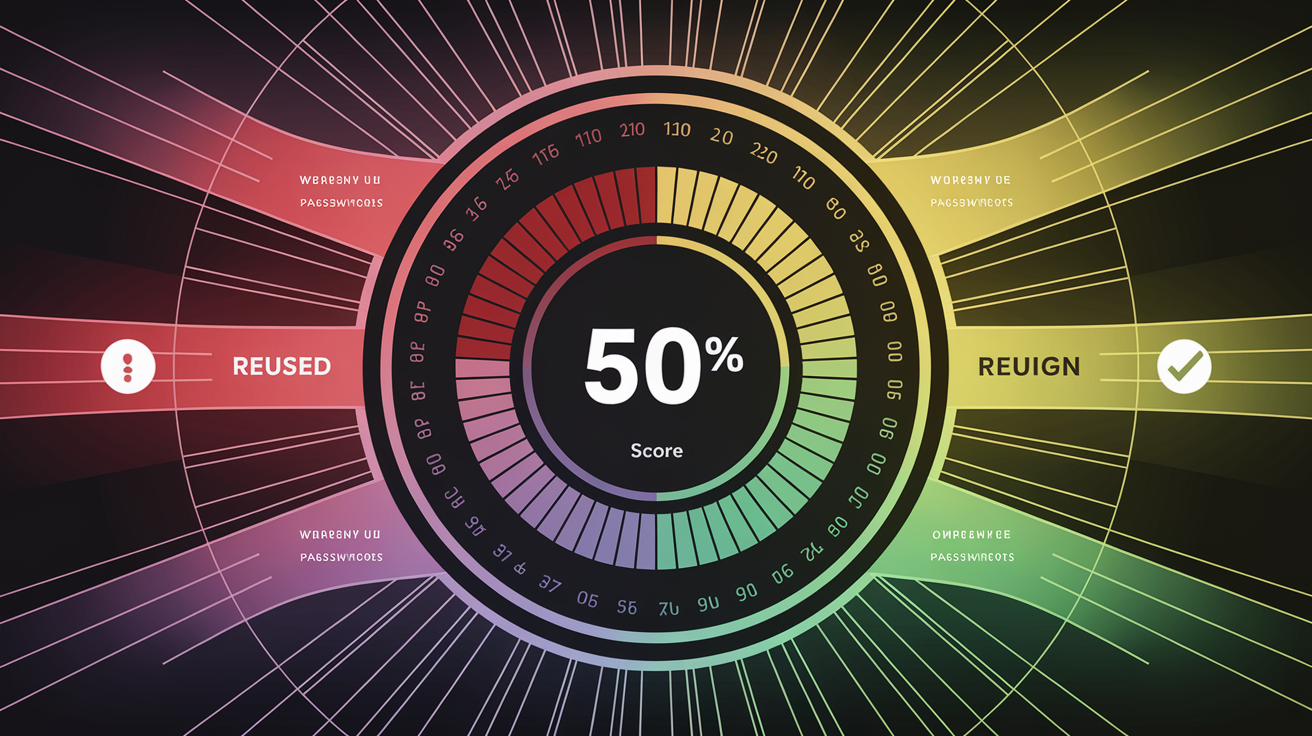
The Security Challenge analyzes every password in your vault and gives you a security score out of 100, showing exactly which passwords put you at risk and need updating.
Run the Security Challenge by opening your vault, clicking your email or profile icon, and selecting “Security Challenge” or “Security Dashboard.” LastPass scans your vault and generates a report within a few seconds. The security score considers several factors. Weak passwords (short or common passwords like “password123”), reused passwords (the same password used on multiple sites), old passwords (accounts you haven’t updated in over a year), and compromised passwords (credentials that appeared in known data breaches). Each category shows how many accounts need attention, and you can click into each section to see the specific accounts.
What the Security Challenge checks:
Weak passwords that are too short or use common patterns that are easy to guess. Reused passwords across different accounts (the same password for Netflix and your bank is a major risk). Compromised passwords that appeared in data breaches and are now publicly available. Old passwords that haven’t been changed in 12 months or more.
The security score calculation combines all factors into one overall grade. Priority recommendations show which passwords to change first based on the account type. Dark web monitoring checks if your email and passwords appear in breach databases. Breach alerts notify you immediately when a site you use reports a security incident.
Start with your highest priority accounts. Email, banking, shopping sites with saved payment methods. Use the password generator to create new 25 character passwords for each one, following the steps in the “Saving, Autofilling, and Updating Passwords” section above. You don’t need to fix everything in one day. Update 5 to 10 accounts per week, focusing on the ones marked “high risk” first.
Dark web monitoring runs continuously in the background. If your email address appears in a newly discovered data breach, LastPass sends you an email and an in app notification. The alert tells you which site was breached and which password is compromised, so you know exactly which account to update. Check your Security Dashboard every month or two to catch any new issues and keep your score high.
Sharing Passwords Securely Through LastPass
Sometimes you need to share access. Your spouse needs the Netflix password, your team needs the company social media login, or you want someone to access your accounts in an emergency.
Create a shared folder by opening your vault and clicking the “Sharing Center” icon (it might be under “More Options” or in the left sidebar). Click the plus sign in the bottom right corner to create a new folder, give it a name like “Family Accounts” or “Marketing Team,” then enter the email addresses of the people you want to invite. They’ll receive an email invitation and need a LastPass account to accept it. Once they’ve accepted, drag and drop accounts from your “Sites” list into the shared folder. Those accounts now appear in everyone’s vault who has access to that folder.
Permission levels control what people can do with shared passwords. Administrator permission lets users view passwords, edit them, delete them, and share them with others. Full control. Read only permission lets users see the passwords and use them to log in, but they can’t change or delete anything. Hide Passwords permission is meant to let users log into accounts without actually seeing the password, but here’s the catch. Anyone with basic HTML knowledge can inspect the page source and find the password anyway. Hiding passwords isn’t truly secure. It just stops casual viewing. If you need real security, don’t share the account at all. For family and trusted team members, read only or administrator access makes more sense.
Emergency Access lets you designate a trusted person who can request access to your vault if something happens to you. Set it up in Account Settings under “Emergency Access,” enter their email, and choose a wait time (usually 24 hours to 30 days). If they request access, you get notified and can approve or deny it. If you don’t respond within the wait time (because you’re incapacitated or deceased), they automatically get access. To revoke any shared access, go back to the Sharing Center, click on the folder or person, and click “Remove” or “Revoke Access.” The change happens immediately.
| Permission Level | Can View Passwords | Can Edit Passwords | Can Share with Others | Can Delete Items |
|---|---|---|---|---|
| Administrator | Yes | Yes | Yes | Yes |
| Read-Only | Yes | No | No | No |
| Hide Passwords | No (but easily bypassed) | No | No | No |
Understanding LastPass Premium Features and Plan Options

LastPass offers a free plan that covers basic password management on one device type (either mobile or computer), but Premium and higher tiers unlock features that make password management much easier across your whole digital life.
| Plan | Device Types | Multi-Factor Options | Emergency Access | Shared Folders | Admin Controls | Best For |
|---|---|---|---|---|---|---|
| Free | One type (mobile OR computer) | Basic (authenticator apps) | No | No | No | Single users trying LastPass |
| Premium | Unlimited devices | Advanced (YubiKey, biometric) | Yes | Limited sharing | No | Individuals using multiple devices |
| Families | Unlimited (up to 6 users) | Advanced | Yes | Yes (family sharing) | Basic (family manager) | Households with multiple people |
| Teams | Unlimited (per user) | Advanced | Yes | Yes (team folders) | Yes (basic admin dashboard) | Small businesses and work teams |
| Business | Unlimited (per user) | Advanced plus SSO | Yes | Yes (advanced controls) | Yes (full admin suite) | Larger companies needing compliance and reporting |
Premium features include 1GB of encrypted file storage (for scanned documents like your passport or insurance cards), advanced multi factor authentication with hardware keys like YubiKey, emergency access for a trusted contact, and priority tech support. Families plans give you 6 separate vaults so each family member has their own private password storage, plus shared folders for accounts everyone needs like streaming services or the Wi Fi password. Teams and Business plans add admin dashboards where IT managers can see who’s using LastPass, enforce security policies like minimum password lengths, and generate compliance reports for audits.
Teams accounts come with a 14 day free trial so you can test it with your team before committing. You can upgrade from Free to Premium anytime by clicking “Upgrade” in your vault and selecting a plan. If you start with Premium and want to add more family members, you can switch to a Families plan without losing any saved data. Downgrading works too. If you cancel Premium, you go back to the Free plan, but you’ll lose access to some features like emergency access and advanced 2FA until you resubscribe.
Troubleshooting Common LastPass Issues

Most LastPass problems have quick fixes, and you can solve them yourself without waiting for support.
Common issues and their solutions:
Autofill not working? Click the LastPass icon in the password field manually and select your account from the list. If that doesn’t work, refresh the page or clear your browser’s cache.
Extension not appearing? Right click your browser toolbar, select “Manage extensions,” and confirm LastPass is enabled. If it’s missing entirely, reinstall it from your browser’s extension store.
Sync delays across devices happen sometimes. Click the LastPass icon and look for “Refresh Sites” or log out and log back in to force a manual sync. Check that you’re using the same email on all devices.
Master password forgotten? There’s no recovery option because of zero knowledge encryption. Use your password hint if you set one, or check if you wrote it down anywhere. If you truly can’t remember it, you’ll need to create a new account and start over.
Duplicate entries happen when you save the same account twice. Open your vault, find the duplicates, and delete the extras by clicking the trash icon.
Browser compatibility issues pop up after updates. If LastPass stops working after a browser update, check for an updated version of the extension and install it. Sometimes you need to uninstall and reinstall the extension completely.
Password not saving? When the notification bar appears asking “Add site to LastPass?”, make sure you click “Save Site” before leaving the page. If you missed it, log out of the website, clear the password from your browser’s built in password manager, then log in again so LastPass can capture it properly.
Login loops are frustrating. If LastPass keeps autofilling the wrong credentials and the site logs you out repeatedly, edit the vault entry and make sure the URL matches exactly what’s in your address bar (some sites use “login.example.com” instead of “www.example.com”).
Mobile app issues? Force close the app completely and reopen it. If that doesn’t work, log out and log back in. Still broken? Uninstall the app, restart your phone, and reinstall it fresh.
Emergency access problems usually stem from email issues. The designated person must already have a LastPass account before you add them as an emergency contact. Double check their email is correct and ask them to check their spam folder for the invitation.
For issues that don’t match these common fixes, visit the LastPass Help Center by clicking your profile icon in the vault and selecting “Help.” The help center has step by step articles for specific error messages, video tutorials, and a support ticket system. Premium, Families, Teams, and Business users get priority support with faster response times. When contacting support, include your browser type and version, operating system, and a screenshot of any error messages you’re seeing so they can diagnose the problem faster.
Final Words
Open LastPass, create that master password, and start saving credentials as you log into your daily sites.
The vault builds itself over a couple weeks of normal browsing, and autofill takes over from there.
Run the Security Challenge once you’ve got accounts loaded so you know which passwords need fixing first.
Learning how to use LastPass doesn’t require memorizing features all at once. Just install it, let it capture passwords, and gradually add the extras like 2FA, shared folders, or secure notes as you need them.
You’ve got the steps. Now you’ve got control over your login mess.
FAQ
Is LastPass no longer safe?
A: LastPass remains safe due to its zero-knowledge encryption architecture, meaning the company cannot access your passwords even if breached. However, the service experienced security incidents in 2022 that affected some user data, prompting security-conscious users to evaluate alternatives.
Why are people leaving LastPass?
A: People are leaving LastPass primarily due to security breaches in 2022, subscription price increases, and the company’s decision to limit the free plan to one device type. Many users migrated to competitors offering better free tiers and perceived stronger security track records.
Why is Chrome no longer supporting LastPass?
A: Chrome still supports LastPass through its browser extension. However, Google’s Manifest V3 requirements changed how extensions function, which temporarily affected LastPass autofill performance. LastPass has updated its extension to maintain full compatibility with current Chrome versions.
What is the safest free password manager?
A: Bitwarden is widely considered the safest free password manager, offering unlimited passwords across all devices, zero-knowledge encryption, open-source code for security audits, and two-factor authentication. Bitwarden provides comprehensive security features without device restrictions or premium limitations that affect other free options.