


Most people protect their entire digital life with the same handful of weak passwords across dozens of accounts. That’s like using one key for your house, car, bank vault, and office, then hiding copies under the doormat. A password manager is your locked notebook that remembers strong, unique passwords for every account and fills them in for you. This guide walks you through setup from download to your first saved password, with security checkpoints at each step so nothing gets skipped.
Choosing and Downloading Your Password Manager

Pick your password manager based on what actually matters for your situation. 1Password works well for most people with its clean design and strong security. Bitwarden gives you a solid free plan and lets you self-host if you want full control. LastPass handles business needs with team features and admin controls. Dashlane includes a built-in VPN with premium plans. NordPass sets up fast and keeps things simple. Keeper meets government security standards if you need that level of compliance.
Download only from official sources to avoid fake versions with hidden malware. For desktop apps, go straight to the company’s website. For phones, use the Apple App Store on iOS devices or Google Play Store on Android. Check that the publisher name matches exactly before you install. Most password managers work on Windows 10 or 11, macOS 11 and up, iOS 14 or newer, and Android 8 or later. Browser extensions support Chrome, Firefox, Safari, Edge, and Brave.
Check system requirements before you download. If your device runs an older operating system, look at the password manager’s support page to confirm it’ll work. Some features like biometric unlock need specific hardware, like a fingerprint reader or Face ID camera.
| Password Manager | Best For | Starting Price | Free Plan Available |
|---|---|---|---|
| 1Password | Overall features and ease of use | $2.99/month | No |
| Bitwarden | Self-hosting and budget users | $10/year | Yes |
| LastPass | Business teams and enterprises | $3/month | Yes (limited) |
| Dashlane | VPN included with password management | $4.99/month | No |
| NordPass | Quick setup and simplicity | $1.49/month | Yes |
| Keeper | Government and high-security needs | $2.92/month | No |
Creating Your Account and Master Password

Your master password is the single key that unlocks your entire password vault. Make it both secure and memorable, because you’ll need to remember it without the password manager’s help.
Account Registration Process
Start by going to your chosen password manager’s website or app. Enter your email address when prompted. You’ll receive a verification email within a few minutes. Click the link in that email to confirm your address. Accept the terms of service after reading through the main points about data handling and recovery limits. Pick your subscription plan or stick with the free tier if that covers what you need. Most services offer a trial period for premium features, usually 14 to 30 days.
Master Password Creation Best Practices
Use the passphrase method to build something memorable and strong. Pick 5 or more completely random words that don’t relate to each other. Add random numbers between the words. Then swap some letters for symbols. Something like Cloud$9laptop3UMBRELLA7cookie1window works well.
Aim for 15 or more characters instead of stopping at the 12 character minimum. Longer passwords take exponentially longer to crack. Skip personal information like birthdays, pet names, addresses, or anything someone could guess from your social media. Never reuse this password anywhere else, not even a variation of it. Your master password protects everything, so treat it differently.
Write your master password on paper and lock it somewhere safe until you’ve memorized it. A locked drawer, home safe, or safety deposit box works. Test yourself by typing it from memory a few times before you rely on it fully.
Password managers can’t recover forgotten master passwords because of zero-knowledge encryption. The company literally cannot see or reset your password. If you forget it, you lose access to your entire vault. Some managers offer account recovery through emergency contacts or recovery keys, but setup for those happens now, not after you forget the password.
Securing Your Account with Recovery Options and Two-Factor Authentication

Set up recovery options and extra security layers before you start filling your vault with passwords.
Recovery Key and Emergency Access Setup
Download your recovery key right after creating your account. This is usually a long string of random characters or a PDF file with a QR code. Save it somewhere offline, not in cloud storage or email. A USB drive in a locked drawer works well. Print a physical copy if your password manager provides a printable recovery sheet.
Set up emergency contacts who can request access to your vault if you’re locked out or incapacitated. Navigate to security settings and look for “emergency access” or “trusted contacts.” Add their email addresses. Set a waiting period, typically 24 to 72 hours, before they can actually access your vault after requesting it. This delay lets you deny the request if it wasn’t legitimate.
Store your backup codes in a secure physical location separate from your devices. When you enable two-factor authentication, the system generates several one-time codes. Write these down or print them. Keep them with your recovery key.
Two-Factor Authentication Configuration
Open your password manager’s settings menu. Find the security or privacy section. Look for “Two-Factor Authentication,” “2FA,” or “Multi-Factor Authentication.” Click enable.
Pick an authenticator app if you don’t have one already. Google Authenticator, Authy, and Microsoft Authenticator all work. Download and install your chosen app on your phone.
Your password manager will show a QR code on screen. Open your authenticator app and tap the option to add a new account, usually a plus sign or “add” button. Point your phone camera at the QR code. The authenticator app will start generating 6 digit codes that refresh every 30 seconds.
Enter the current 6 digit code from your authenticator app into your password manager to confirm the pairing. The password manager will show you backup codes. Save these somewhere secure before closing the window.
Biometric and Device Authentication
Enable biometric unlock on your phone or tablet for faster access. Go to the password manager’s mobile app settings. Find “Unlock Options” or “Security.” Select fingerprint, Face ID, or Touch ID depending on your device.
You’ll need to enter your master password first to set this up. After that, biometric unlock works only on that specific device. If you log in on a new phone, computer, or tablet, you’ll need your master password again before you can enable biometrics there.
Register a hardware security key if you want the strongest protection available. YubiKey and similar devices plug into your USB port or connect via NFC. Your password manager’s security settings will have an option to add a hardware key. Follow the prompts to register it. Keep the physical key somewhere you won’t lose it.
| Security Setting | Recommended Configuration | Purpose |
|---|---|---|
| Auto-lock timeout | 15 minutes of inactivity | Locks vault automatically when you step away from device |
| Clipboard auto-clear | 30 seconds after copying password | Removes sensitive data from clipboard to prevent accidental pasting |
| Session timeout | Require master password daily | Forces re-authentication to confirm you still control the device |
| Password reprompt | Enabled for financial accounts | Requires master password again before revealing sensitive passwords |
| Login notifications | Email for every new device | Alerts you to unauthorized access attempts |
| Device authorization | Manual approval for new devices | Prevents automatic access from stolen or compromised devices |
Check your device management list regularly. Most password managers show all devices that have accessed your vault. Look for phones, tablets, or computers you no longer use or recognize. Remove any device you’ve sold, lost, or don’t remember authorizing. This forces a new login with your master password if someone tries to access your vault from that device.
Login notification emails arrive whenever your vault is accessed from a new location or device. These emails show the time, device type, and approximate location. If you receive a notification for a login you didn’t make, change your master password immediately and review your account activity logs. Activity logs track every time someone opens your vault, showing timestamps and IP addresses for suspicious pattern detection.
Installing Browser Extensions for Password Manager Access

Browser extensions put your password manager directly into login pages where you actually need passwords.
Open your browser and navigate to the extension store. Chrome users go to Chrome Web Store, Firefox users visit Firefox Add-ons, Safari users open Safari Extensions, Edge users head to Edge Add-ons. Type your password manager’s exact name in the search box. Look carefully at the results.
Check the publisher name before you install anything. It should match your password manager’s company exactly. Check the number of users and reviews to spot fakes. Click “Add to Browser,” “Get,” or “Install” depending on your browser. When the extension installs, a login window will pop up. Enter your master password to connect the extension to your vault.
After installation, you’ll see a small icon for your password manager in your browser’s toolbar, usually in the top right corner next to the address bar. When you visit a login page and enter your username and password, a prompt will appear asking if you want to save these credentials. Click yes, and the password manager stores the login information linked to that specific website.
The extension icon shows a number badge when you’re on a site where you have saved credentials. Click the icon to see a list of accounts for that site. Click any account to fill the username and password fields automatically. This works on Chrome, Firefox, Safari, Edge, and Brave browsers. Some password managers support additional browsers like Opera or Vivaldi. Check your password manager’s compatibility page if you use something less common.
Setting Up Password Manager Mobile Apps
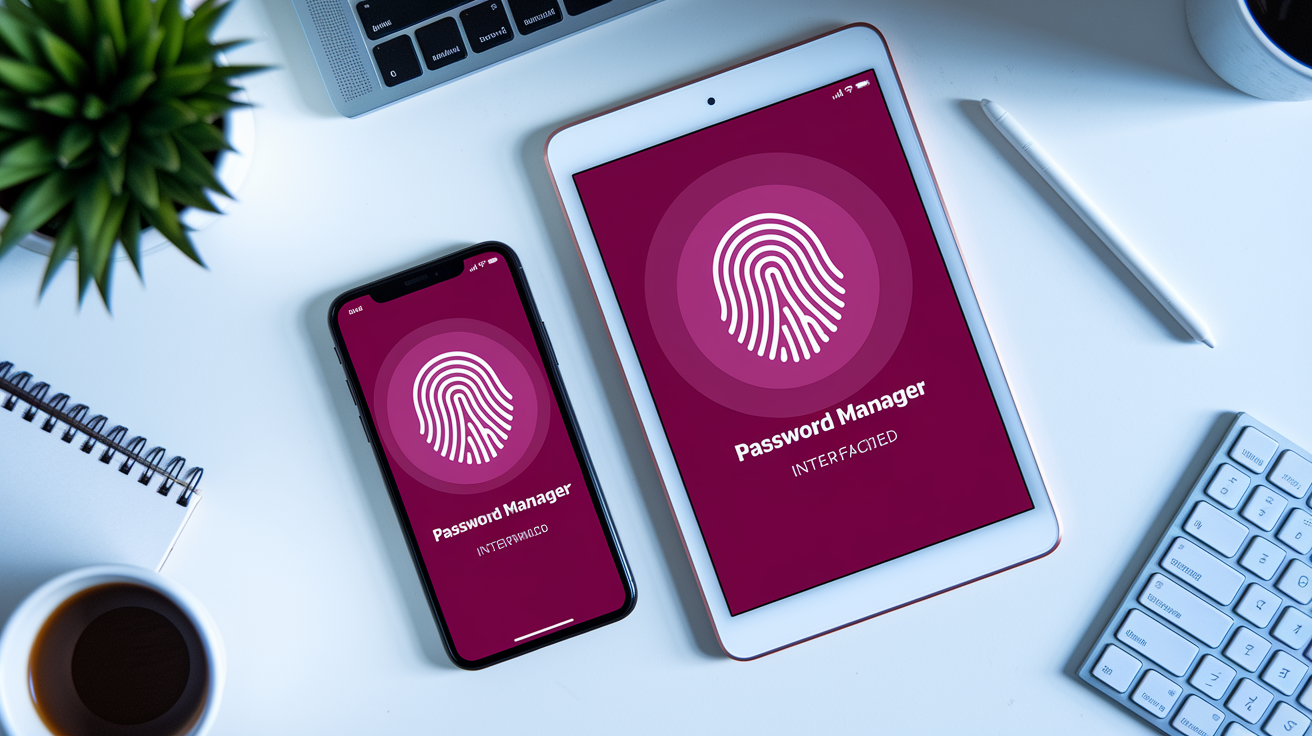
Download the mobile app from the Apple App Store if you use an iPhone or iPad. Android users grab it from the Google Play Store. Before you install, check that the developer name matches your password manager’s company exactly. Fake apps exist, so verify the publisher.
Open the app after it installs. Log in with your master password, the same one you created during account setup. After your first successful login, the app will offer to enable biometric unlock. On iPhones with Face ID, you’ll scan your face. On iPhones with Touch ID or Android phones with fingerprint readers, you’ll scan your finger. This lets you unlock your password vault with your face or fingerprint instead of typing your master password every time.
Set up mobile autofill to use your passwords in other apps and browsers on your phone. On iOS, open Settings, scroll down to Passwords, tap AutoFill Passwords, and turn on AutoFill Passwords. Select your password manager from the list of apps. On Android, the steps vary by version. On Android 8 and up, open Settings, search for “Autofill service,” tap it, and select your password manager app. Some Android versions use accessibility services instead. Your password manager’s help section will show the exact path for your Android version.
Your mobile vault syncs automatically with your desktop whenever you connect to the internet. Changes you make on your phone appear on your computer within seconds. The password manager encrypts everything on your device before sending it through the internet to the cloud. This means your passwords travel as scrambled data that only your devices can unscramble using your master password.
Importing Existing Passwords into Your Password Vault

Most people have 100 or more passwords scattered across browsers, spreadsheets, or old password managers before they switch to a proper password vault.
Importing from Web Browsers
Chrome users open Settings, click “Passwords” in the left sidebar under “Autofill and passwords,” click the three dot menu icon next to “Saved Passwords,” then select “Export passwords.” Chrome downloads a CSV file of all your saved passwords. Save this file somewhere you’ll remember, like your desktop or downloads folder.
Firefox users type about:logins in the address bar and press enter. Click the three dot menu in the top right corner of the logins page. Select “Export Logins.” Firefox asks you to confirm because this creates an unencrypted file. Click through the warning and save the CSV file.
Safari users on Mac open Safari, go to Safari menu, click Preferences, select the Passwords tab, click the three dot menu at the bottom of the password list, and choose “Export Passwords.” Enter your Mac password to authorize the export. Save the CSV file.
Import the CSV file into your password manager by opening the settings or preferences menu. Look for “Import” or “Import Data.” Select your browser from the list of import sources. Choose the CSV file you just exported. The password manager reads the file and adds all your passwords to the vault. Delete the CSV file from your computer after import succeeds. These export files contain all your passwords in plain text.
Importing from Another Password Manager
Open your old password manager and find the export function in settings. Most password managers let you export your vault as a CSV or JSON file. Export the data, making note of the export format. Open your new password manager’s import function. Select your old password manager from the list of supported import sources. Upload the exported file. The import wizard matches the fields and brings over all your passwords, notes, and custom fields. Delete the export file immediately after successful import.
Manual Password Entry
Use the browser extension for accounts you access regularly. Log into the website normally by typing your username and password. When you submit the login form, your password manager’s extension will show a popup asking “Save password for this site?” Click yes. The password manager captures the username, password, and website URL automatically.
For accounts you don’t visit often, like annual subscription renewals or old forum accounts, add them manually. Click your password manager’s browser extension icon or open the desktop app. Find the button labeled “Add item,” “New login,” or the plus sign. Fill in the website name, URL, username, and password. Save the entry. Manual entry works well for accounts where the auto-capture didn’t trigger or for credentials you have written down somewhere.
Configuring Auto-Fill Settings and Password Generator Features

Navigate to your password manager’s settings or preferences section. Look for “Autofill,” “Auto-fill options,” or “Browser integration.” You’ll see options for automatic behavior versus click-to-fill. Automatic mode fills login fields as soon as the page loads. Click-to-fill mode waits for you to click the password manager icon before filling anything. Click-to-fill gives you more control and prevents accidental fills on phishing sites that mimic real login pages.
Check the subdomain matching rules while you’re in autofill settings. Strict matching only fills passwords on exact URL matches. Relaxed matching fills passwords on subdomains of the same main domain. For example, mail.google.com and drive.google.com would both use your Google password with relaxed matching. Strict matching is more secure but requires saving the same password separately for each subdomain.
Open the password generator settings to customize how your password manager creates new passwords. Set the length between 16 and 20 characters for a good balance of security and compatibility. Some older systems don’t accept passwords longer than 20 characters. Enable uppercase letters, lowercase letters, numbers, and symbols. Some password managers let you exclude ambiguous characters like 0/O or 1/l/I to avoid confusion when you need to type a password manually. Toggle the pronounceability option if you want passwords that are slightly easier to remember, though this reduces randomness slightly.
Use the password generator when creating new accounts. Right-click in the password field on the signup form. Your password manager’s context menu appears. Select “Generate password” or “Suggest strong password.” The manager fills the field with a random password and automatically saves it to your vault linked to that website. You never need to see or remember this password. When you return to log in, the password manager fills it for you.
Set up form-filling for addresses, phone numbers, and credit card information to speed up checkout processes. Open your password manager’s settings and find “Personal Information,” “Identities,” or “Wallet.” Add your home address, work address, phone number, and email. Add credit card details in the payment cards section. When you reach a checkout form, your password manager detects the fields and offers to fill your saved information. You can store multiple addresses and cards, then select which one to use each time. Add custom fields to any entry if the standard fields don’t cover what you need. Click “Add field” or “Custom field” when editing an entry, name the field, and enter the value.
Organizing Your Password Vault with Folders and Categories

Create folders or collections to group related passwords together. Most password managers let you right-click in the vault view or click a “New Folder” button. Name folders by category like Work, Personal, Finance, Shopping, or Social Media. Move passwords into folders by dragging them or by editing each password entry and selecting the folder from a dropdown menu.
Add tags to passwords for cross-folder organization. Tags work like keywords that let one password appear in multiple searches without duplicating it. A work email account might get tagged with both “work” and “email” so you can find it by searching either tag. Add tags by editing a password entry and typing tag names in the tags field, usually separated by commas.
Use these vault organization features to keep everything findable. Create nested folders when you have subcategories, like a Finance folder containing separate folders for Banks, Credit Cards, and Investments. Assign multiple tags per entry so one account can be categorized in different ways, like tagging your work VPN with “work,” “security,” and “network.” Use favorites or bookmarks for frequently accessed accounts to pin them to the top of your vault regardless of folder structure. Add secure notes for non-login information like software license keys, WiFi passwords, alarm codes, or passport numbers. Attach files to entries, including PDFs like insurance documents or images like photos of credit cards or ID cards. Store payment cards in the digital wallet section with card number, expiration date, CVV, and billing address. Use the search function with filters to find entries by name, URL, username, folder, tag, or custom field values.
Enabling Cloud Backup and Cross-Device Synchronization

Cloud sync uses end-to-end encryption with zero-knowledge architecture. This means your password manager company cannot access your passwords even though they store your encrypted vault on their servers. Your master password stays on your device and never travels to the cloud. The encryption and decryption happen entirely on your phone, tablet, or computer before any data moves through the internet.
Automatic sync happens whenever you connect to the internet after making changes to your vault. Add a password on your phone and it appears on your computer within seconds. The password manager checks for changes every few minutes when you’re online. Force a manual sync by opening settings and looking for “Sync now” or a refresh button if you need immediate synchronization before automatic sync triggers.
Your password manager encrypts your vault using 256 bit AES encryption, the same standard banks and governments use. Here’s what happens when you save a password. You type your master password to unlock your vault. You add or edit a password entry. The password manager encrypts that change on your device using your master password as the encryption key, then sends the encrypted data to the cloud server. Your master password never leaves your device. The cloud server stores scrambled data it cannot read. When you open your vault on another device, that device downloads the encrypted data, you enter your master password, and your device decrypts the vault locally.
Create local backup exports to protect against account problems or sync failures. Open settings in your password manager. Find “Export,” “Backup,” or “Export Vault.” Choose the export format, usually encrypted or unencrypted. Encrypted exports require a password to open. Unencrypted exports save as CSV files anyone can read. Pick encrypted unless you need to import into a different password manager that doesn’t support encrypted imports. Save the backup file to an external USB drive or upload it to secure cloud storage separate from your password manager, like an encrypted folder in Dropbox or Google Drive. Set a monthly reminder to create fresh backups. Your vault grows and changes over time, so old backups become less useful.
Password Security Audit: Checking for Weak and Reused Credentials

Security audit tools scan your entire vault for passwords that put you at risk across your 100 or more saved accounts.
The audit detects five main security issues. Weak passwords under 12 characters or missing uppercase, lowercase, numbers, and symbols. Identical passwords used across multiple sites, where one breach exposes several accounts. Similar passwords with minor variations like Password1, Password2, Password3. Old passwords unchanged for 12 or more months, which should be rotated regularly for sensitive accounts. Passwords found in known data breaches that hackers already have access to.
Find the security dashboard by opening your password manager and looking for “Security,” “Password Health,” “Vault Health,” or “Security Checkup” in the main menu or settings. Click it to run a full scan of your vault. The scan takes a few seconds to a minute depending on how many passwords you have.
The security report ranks issues by priority. Critical issues need immediate attention because they represent active risks like breached passwords or identical passwords on financial accounts. High priority issues include weak passwords on important accounts or passwords used across multiple sites. Medium priority issues are old passwords that should be updated but don’t represent immediate danger. Start with critical issues first. Click any flagged password to see why it was flagged and what you should do about it.
Use your password generator to create strong replacements for flagged passwords. Click the flagged entry, click edit, place your cursor in the password field, click the generate button, and save the new password. Then log into that website and update your password there to match. Work through critical issues in one session, then tackle high-priority issues over the next few days.
Breach monitoring features continuously check your email addresses and passwords against databases of leaked credentials from data breaches. When your password manager finds a match, you’ll receive an alert by email or push notification. Act on breach alerts immediately. Change the compromised password right away, and check if you used similar passwords on other accounts. Hackers test leaked credentials across many websites, so speed matters when your information appears in a breach.
Sharing Passwords Securely with Family or Team Members
Family plans typically include 5 to 6 user accounts under one subscription. Each person gets their own vault with a separate master password. Team and business plans support unlimited users with admin controls that let managers oversee access, enforce security policies, and monitor usage. Check your password manager’s pricing page to compare plan limits and features.
Shared folders or collections let multiple users access the same credentials without sending passwords through insecure channels like email or text messages. Create a shared folder, add passwords to it, and invite other users. Everyone with access to that shared folder sees the same passwords, and changes sync across all members. A family might share Netflix, utilities, and home WiFi passwords in one shared folder. A business team might share social media accounts, company credit cards, and admin credentials in a work shared folder.
Permission levels control what each user can do with shared passwords. View-only permission lets someone see and use a password but not change or delete it. Edit permission allows modifying password entries, adding new ones, and removing old ones. Admin permission adds user management capabilities like inviting new members, removing users, and changing permission levels. Set appropriate permissions based on trust and need. Family members usually get edit permissions. Contractors or temporary team members might only get view access.
Share passwords securely in four steps. Create a shared folder or collection from your vault’s folder menu, usually by clicking a sharing icon or “New shared folder” option. Add specific passwords to the shared space by dragging them into the shared folder or editing each entry and selecting the shared folder from the dropdown. Invite users by email with permission level selection, entering their email addresses and choosing view-only, edit, or admin permissions for each person. Manage access from the admin dashboard by viewing who has access, changing permission levels as needs change, and removing users who no longer need access.
Common Password Manager Setup Problems and Solutions
Setup issues happen to everyone, and most have quick fixes.
Browser Extension Not Detecting Login Fields
Refresh the webpage after installing the browser extension. Sometimes the extension needs a fresh page load to start working. Press F5 or click the refresh button in your browser.
Check extension permissions in your browser settings. Chrome users click the three dots, go to Extensions, click Manage Extensions, find your password manager, and verify that “Site access” is set to “On all sites” or “When you click the extension.” Firefox users click the menu, select Add-ons and Themes, click your password manager, and check the Permissions tab.
Disable conflicting extensions that might interfere with password detection. Other form-filler extensions, privacy tools that block scripts, or ad blockers sometimes prevent password managers from working. Disable these one at a time to identify conflicts.
Update to the latest extension version. Browser extension stores show an update button if a newer version exists. Click it and restart your browser.
Vault Not Syncing Across Devices
Check your internet connection first. Your vault needs an active internet connection to sync through the cloud. Try loading a website to confirm you’re online.
Force a manual sync from the settings menu. Open your password manager, find Settings or Preferences, and look for a “Sync now” button. Click it and wait for the sync to complete.
Log out and back in on the device that’s not syncing. This forces a fresh connection to the cloud and often resolves stuck sync states. Close the app completely, reopen it, and log in with your master password.
Verify your account is using cloud sync mode, not local-only mode. Some password managers offer offline-only vaults that never sync. Check your settings to confirm cloud sync is enabled.
Master Password Not Working
Check if caps lock is enabled. Master passwords are case-sensitive. Look for the caps lock indicator light on your keyboard or the on-screen indicator when you type.
Verify your keyboard language hasn’t switched accidentally. Windows users press Windows + Space to see the active keyboard layout. Mac users check the menu bar flag icon. Special characters might be in different positions on non-English keyboard layouts.
Look for extra spaces before or after your password. Tap backspace a few times in the password field before typing to clear invisible spaces.
Use account recovery options if you’re certain you’re typing the password correctly. Find “Forgot master password” or “Account recovery” on the login screen. Follow the recovery process using your emergency key, trusted contacts, or email recovery if you set those up.
Mobile Autofill Not Working
On iOS, open Settings, scroll to Passwords, tap AutoFill Passwords, and make sure AutoFill Passwords is turned on. Below that, check that your password manager app has a checkmark next to it in the list of apps.
On Android 8 and newer, open Settings, search for “Autofill service” using the search bar at the top. Tap the result. Select your password manager from the list of apps. If you don’t see an “Autofill service” option, your Android version might use accessibility services instead. Open Settings, search for “Accessibility,” tap it, find your password manager in the list of services, and enable it.
Review app permissions on both platforms. Your password manager needs permission to access other apps for autofill to work. Open your phone’s Settings, find Apps, select your password manager, tap Permissions, and enable all requested permissions.
Best Practices for Long-Term Password Manager Maintenance
Password managers need minimal maintenance, but regular attention keeps your vault secure and useful. Good habits prevent security problems from building up and keep your password collection organized as it grows past 100 entries.
Set aside time every few months to check your vault’s health. This doesn’t need to happen weekly or even monthly. Quarterly reviews catch problems before they become serious.
Run the security audit quarterly to identify weak, reused, or old passwords that need updating. Update breached passwords immediately when your password manager sends a breach notification, usually within the same day. Review and remove unused accounts every 6 months by sorting your vault by last-used date and deleting passwords for services you no longer use. Change critical passwords for banking, email, and password manager accounts annually even if they haven’t been breached. Export a vault backup monthly to an external USB drive or secure cloud storage separate from your password manager. Update password manager software when you see update notifications, usually within a week of release to get security patches. Review your trusted devices list quarterly in your account settings, removing old phones, sold computers, and devices you don’t recognize. Enable breach monitoring alerts in your security settings for real-time notifications when your credentials appear in data breaches.
Create calendar reminders for your quarterly security audits so you don’t forget. Set them for the first week of January, April, July, and October. Each session takes only 15 to 30 minutes but catches weak passwords, identifies unused accounts cluttering your vault, and keeps your backups current.
Final Words
Once you set up a password manager with proper recovery options, browser extensions, and mobile apps, you’ve built a security foundation that gets stronger with use.
Run that first security audit soon. You’ll likely find passwords that need attention.
Set a quarterly reminder to check for weak credentials and export a backup to external storage.
The setup work you just completed means stronger security without the memory burden, and every password you generate or update from here makes your accounts harder to compromise.
FAQ
Q: What is the downside of using a password manager?
A: The main downside of using a password manager is the single point of failure risk. If you forget your master password, lose your device, or your vault is compromised, all your stored passwords could become inaccessible or exposed at once.
Q: How long does it take to set up a password manager?
A: Setting up a password manager typically takes 15 to 30 minutes. This includes downloading the app, creating your account, establishing a strong master password, enabling two-factor authentication, and installing browser extensions on your main devices.
Q: How do I set up a password manager?
A: To set up a password manager, download the app from the official website or app store, create an account with a strong master password of 15+ characters, enable two-factor authentication for security, install browser extensions, and import your existing passwords from browsers or other managers.
Q: What is the best password manager for beginners?
A: The best password manager for beginners depends on your needs. NordPass offers easy browser integration and quick setup, Bitwarden provides a generous free plan with core features, and 1Password delivers intuitive design with strong security, making all three excellent starting points.
Q: Can I use a password manager on multiple devices?
A: Yes, you can use a password manager on multiple devices. Cloud-based password managers automatically sync your vault across computers, phones, and tablets using encrypted connections, allowing seamless access to your passwords wherever you log in.
Q: How secure is the master password in a password manager?
A: The master password in a password manager is extremely secure when properly created. It should be 15+ characters using the passphrase method with random words, numbers, and symbols. Password managers use zero-knowledge encryption, meaning they cannot access or recover your master password.
Q: Do I need to back up my password manager vault?
A: Yes, you should back up your password manager vault monthly. Export your vault as an encrypted CSV file to an external USB drive or secure storage separate from the password manager to protect against account lockouts or service disruptions.
Q: What happens if I forget my password manager master password?
A: If you forget your password manager master password, most services cannot recover it due to zero-knowledge encryption. This is why setting up recovery options like emergency access contacts, recovery keys, and backup codes during initial setup is critical.
Q: How does two-factor authentication work with password managers?
A: Two-factor authentication with password managers adds a second verification step beyond your master password. After enabling 2FA in security settings, you’ll pair an authenticator app, scan a QR code, and enter verification codes when logging in from new devices.
Q: Can password managers autofill passwords on mobile devices?
A: Yes, password managers can autofill passwords on mobile devices. On iOS, enable autofill in Settings > Passwords > AutoFill Passwords. On Android, enable the accessibility service or autofill framework depending on your version, and grant necessary app permissions.
Q: Should I import passwords from my browser to a password manager?
A: Yes, you should import passwords from your browser to a password manager for better security. Export your browser passwords as a CSV file from Chrome, Firefox, or Safari, then import the file through your password manager’s settings to consolidate all credentials.
Q: How often should I update passwords in my password manager?
A: You should update passwords in your password manager quarterly for regular accounts and immediately when breach notifications occur. Change critical passwords like banking and email annually, and run security audits every three months to identify weak or reused credentials.