

Your mesh system might cover your whole house, but if you set it up wrong, you’re still going to have dead zones and dropped connections. The difference between smooth, whole-home WiFi and frustrating gaps often comes down to a few simple setup steps most people skip or rush through. This guide walks you through the complete TP-Link Deco mesh setup process step by step, from unpacking the first unit to positioning satellites for maximum coverage, so you get the reliable WiFi you’re paying for.
Required Hardware and Prerequisites for Mesh WiFi Installation
Before you start, gather what you’ll need. This saves time and keeps you from stopping halfway through because you’re missing something.
Good news: TP-Link packs most of what you need right in the Deco box. Power adapters and at least one Ethernet cable come included. You won’t be hunting around for extra stuff just to get a basic setup running.
You’ll need internet service from your ISP and a modem (or a direct Ethernet outlet if you’ve got fiber or certain cable setups). You also need a smartphone or tablet running iOS or Android to download the Deco app, which walks you through everything. The app isn’t optional. There’s no way around it for initial configuration.
Here’s your checklist:
- Smartphone or tablet with iOS or Android and the Deco app installed
- Active internet service and modem (or direct Ethernet outlet for fiber/cable)
- Ethernet cable to connect modem to primary Deco unit (usually included)
- Wall outlet access for each Deco unit. They plug directly into the wall, not a power strip
- TP-Link ID account (you can create one during setup if you don’t have one)
- Open space with ventilation around each unit to prevent overheating
Planning to use wired backhaul connections between Deco units? You’ll need extra Ethernet cables. Not required for basic setup since units connect wirelessly by default, but wired connections can improve speed and stability if you’ve got Ethernet wiring in your walls or can run cables.
Complete TP-Link Mesh Setup Process Step by Step

TP-Link Deco and compatible mesh systems all use the same mobile app process. Doesn’t matter if you have an M5, S4, P9, or another model. The whole thing typically takes 10 to 15 minutes from start to finish.
-
Download and install the Deco app from Google Play (Android) or Apple App Store (iOS).
-
Open the app and log in with your TP-Link ID. Tap “Sign Up” if you need to create a new account.
-
Power off your modem completely and wait 10 seconds. This clears the modem’s memory so it recognizes the Deco unit as the new device.
-
Connect an Ethernet cable from your modem to the WAN port (usually yellow) on the main Deco unit. Got fiber or a direct Ethernet outlet instead? Plug that cable directly into the Deco’s WAN port.
-
Power on the modem first and wait until all its lights stabilize (usually 30 to 60 seconds). Then plug the Deco unit directly into a wall outlet. Not a power strip.
-
In the app, select or create a location name for your primary Deco unit. Pick from preset options like “Living Room” or “Office,” or create a custom name.
-
The app will detect your internet connection type automatically in most cases. If it asks, select your connection type: Dynamic IP (most common), PPPoE (DSL), Static IP (business), or DHCP. Contact your ISP if you’re not sure.
-
Enter ISP credentials if your connection type needs them. PPPoE users enter a username and password from their ISP. Static IP users enter specific IP address details. Dynamic IP and DHCP connections usually skip this entirely.
-
Create your Wi-Fi network name (SSID) and password. This single network name and password applies to the entire mesh system. All Deco units broadcast the same network, so devices roam between units without you switching anything.
-
Connect your smartphone to the new Deco network using the network name and password you just created. The app needs this connection to keep going.
-
Wait for setup to complete. The Deco unit’s LED will pulse different colors during setup, then turn solid green or white when ready. Usually takes 1 to 2 minutes.
-
Add additional Deco units by plugging them into wall outlets in other areas. Wait for each unit’s LED to pulse blue, then follow the app prompts to detect and connect each unit one at a time. The app guides you through positioning and verifying each satellite unit before moving to the next.
After setup completes, the app displays a network map showing all connected Deco units and their status. You’ll also get access to advanced features like Wi-Fi settings, parental controls, speed testing, and firmware updates. Main setup is done, but you can fine tune things whenever you want.
Optimal Deco Mesh Node Placement Throughout Your Home

Strategic placement makes the difference between full coverage and frustrating dead zones. The goal is overlapping coverage areas. Each unit’s signal should reach into the next unit’s coverage zone so devices hand off between units as you move around. Units too far apart create gaps. Too close together wastes units without improving performance.
Most Deco units cover approximately 1,500 to 2,000 square feet each under normal conditions. That number drops if you’ve got thick walls, metal studs, large appliances, or multiple floors. Concrete and brick cut through Wi-Fi signal more than drywall. Setting up a multi-floor home? Place at least one unit per floor, positioned above or below each other to maintain vertical coverage.
Specific placement tips for best results:
- Place the primary unit in a central, open location. Not tucked in a corner or closet
- Position units at counter or shelf height, not on the floor or in a cabinet
- Keep Deco units away from metal objects, fish tanks, mirrors, and large appliances that block signal
- Maintain 30 to 40 feet between units in open spaces, less if walls separate them
- Keep units visible and out in the open rather than hidden behind furniture
- Position satellite units closer to high use areas like home offices, bedrooms, or entertainment centers
- Use wall mounting brackets (sold separately) if counter space is limited or you need better signal angles
| Location Type | Placement Recommendation | Coverage Notes |
|---|---|---|
| Single floor home | Primary unit in center, satellite units at opposite ends or problem areas | Two units cover most homes under 2,500 sq ft; add third unit for 3,000+ sq ft or thick walls |
| Two-story home | Primary unit on main floor near center, one satellite upstairs and one in basement or far end | Vertical signal coverage weakens through floors; position units roughly above/below each other when possible |
| Large multi-level home | One unit per floor minimum, placed centrally on each level with additional units for wings or far corners | Consider wired backhaul between floors if Ethernet wiring exists; reduces wireless signal degradation across levels |
Creating and Configuring Your Mesh WiFi Network Settings
Your mesh system uses one network name (SSID) and password across all Deco units. This unified approach means devices automatically connect to whichever unit provides the strongest signal. You don’t manually switch networks as you move around.
When creating your network name, keep it simple. Avoid special characters that some older devices might not recognize. Most modern devices handle spaces and common punctuation fine, but stick to letters and numbers if you’ve got older smart home gadgets or IoT devices. Network name can be 1 to 32 characters long.
Create a strong network password that’s at least 12 characters long. Mix uppercase and lowercase letters, numbers, and symbols if you want. The Deco system requires a minimum of 8 characters, but longer is better for security. Avoid common mistakes like using “password123” or your address. Don’t use easily guessable information like birthdays or pet names. Write your password down and store it somewhere secure. You’ll need it every time you connect a new device. If you forget it, you can view it anytime in the Deco app under network settings.
The Deco system automatically uses WPA3 encryption if your devices support it, falling back to WPA2 for older devices that don’t. You don’t configure this manually. It’s handled automatically based on what connects to your network. Both encryption standards provide strong protection against unauthorized access. All Deco units in your mesh use the same security settings, so there’s no weaker link in the system.
Essential Firmware Updates and System Optimization

Firmware updates fix security vulnerabilities, improve performance, and sometimes add new features. TP-Link releases updates periodically, and keeping your Deco units current prevents problems before they start.
The Deco app includes automatic update settings that check for new firmware and can install it during overnight hours when you’re not using the network heavily. You’ll get a notification in the app when updates are available.
To manually check for updates, open the Deco app and tap the menu icon, then select “System” or “Settings” depending on your app version. Look for “Update Available” or “Check for Updates.” If an update exists, tap to start installation. The process takes 5 to 10 minutes, and all Deco units update together automatically. You don’t update each one individually. Don’t unplug units or turn off your phone during the update process. The LED indicators will pulse and change colors during installation, then return to normal when complete.
You can also access advanced settings through the web-based admin panel by typing your primary Deco’s IP address (usually 192.168.68.1) into a web browser while connected to the Deco network. Log in with your TP-Link ID credentials, the same ones you use in the mobile app. The web interface shows many of the same features as the app, including firmware updates, Wi-Fi settings, and connected device management. Some users prefer the web interface for detailed configuration work since it’s easier to view multiple settings on a larger screen, but the mobile app covers everything most people need.
Managing Connected Devices and Network Access

Monitoring which devices connect to your mesh network helps you spot unauthorized access and manage bandwidth effectively. Unknown devices could mean a neighbor guessed your password or someone’s using your network without permission.
The network map feature in the Deco app shows every device currently connected to your mesh system. Tap on any device to see its name, IP address, MAC address, whether it’s connected via 2.4GHz or 5GHz band, and which Deco unit it’s connected to. By default, devices show up with generic names like “Android-phone” or manufacturer names like “Apple-iPhone.” Tap a device and select “Edit” or the pencil icon to give it a recognizable name like “Living Room TV” or “Sarah’s Laptop.” This makes it much easier to identify devices later when you’re checking who’s using bandwidth or setting up parental controls.
Spot a device you don’t recognize? Tap it and select “Block” to immediately disconnect it and prevent it from reconnecting. The device will need the correct password to reconnect, and you can leave it blocked permanently or unblock it later if you realize it was actually your own device with an unfamiliar name.
The app also lets you prioritize specific devices for bandwidth allocation. Useful if you’re video conferencing or gaming and need reliable speed on one device. You can also schedule internet access for specific devices, turning off connectivity during certain hours. Works well for kids’ devices during homework time or bedtime.
Smart home devices and IoT gadgets connect to your Deco network the same way phones and computers do. Most modern smart devices support both 2.4GHz and 5GHz bands and will connect to whichever provides better signal. Some older smart home devices only work on 2.4GHz band. The Deco system broadcasts both bands under one network name, so these devices will automatically connect to 2.4GHz even though the network name doesn’t specify it. You don’t need to create a separate 2.4GHz network like you might have with older routers. The unified network makes smart home setup simpler since all devices connect to the same network name regardless of which band they use.
Setting Up Guest Network and Parental Controls

Guest networks and parental controls give you more control over who accesses your network and what they can do while connected. A guest network keeps visitors’ devices separate from your main network, protecting your smart home devices, computers, and network storage from unauthorized access.
Guest Network Configuration
To create a guest network, open the Deco app and tap “Guest Network” in the main menu or settings area. Toggle the guest network on and create a separate network name and password specifically for guests. This network keeps visitor devices isolated. They can access the internet but can’t see or connect to devices on your main network like printers, network drives, or smart home hubs.
You can set time limits so the guest network automatically turns off after a certain period, or restrict bandwidth so guest traffic doesn’t slow down your main network during heavy use. The guest network appears as a separate Wi-Fi network when people search for available networks on their devices, but it uses the same Deco mesh system for coverage.
Use the guest network for visitors, contractors doing work at your home, or any temporary device that doesn’t need access to your home network resources. Your main network stays more secure, and you can change the guest password frequently without affecting your own devices.
Parental Control Setup
Parental controls let you manage internet access for family members by creating individual profiles. In the Deco app, tap “Parental Controls” and add a profile for each person you want to manage. Assign their devices to their profile so all their phones, tablets, and computers follow the same rules.
You can set content filters that block adult content, gambling, or other categories based on age-appropriate settings. Time limits let you schedule when internet access is available. Turn off access during homework hours, at bedtime, or during family meal times. You can pause internet access instantly with one tap if you need to get someone’s attention or during discipline situations.
The app tracks browsing activity and shows monthly reports of which sites were visited and how much time was spent online, though this feature works better with some devices than others depending on whether they use encrypted DNS.
The reporting features show usage patterns over time, helping you spot if someone’s spending excessive time on certain sites or apps. You’ll get notifications when parental control events happen, like when time limits are reached or blocked content is accessed. The controls apply across the entire mesh system, so moving to a different room doesn’t bypass restrictions.
Troubleshooting Common Mesh Setup Problems

Setup issues happen, but most are straightforward to fix. If something’s not working right, there’s usually a simple explanation and quick solution.
| Problem | Possible Cause | Solution |
|---|---|---|
| App cannot find Deco unit | Phone not connected to Deco’s setup network, Bluetooth turned off, or unit not powered on correctly | Turn on Bluetooth on your phone, make sure Deco LED is pulsing blue, and stay within 6 feet of the unit during setup. Reset the unit if the LED shows a different color. |
| Units won’t pair together | Satellite unit too far from primary unit or main network, or previous configuration still saved | Move satellite unit closer to primary unit temporarily during setup, then relocate after pairing succeeds. Factory reset the satellite unit if it was previously configured for a different network. |
| No internet after setup | Modem hasn’t fully released old connection, wrong internet connection type selected, or ISP credentials incorrect | Power cycle the modem completely (unplug 30 seconds, plug back in), verify connection type with ISP, and double-check username/password for PPPoE connections. Some ISPs need you to call and register the new device’s MAC address. |
| Devices can’t connect to network | Password entered incorrectly, device using saved network settings from old router with same name, or device only supports older security standards | Forget the network on the device and reconnect from scratch, entering the password carefully. For older devices that don’t support WPA2/WPA3, check if the Deco app has a legacy device mode in advanced settings. |
Factory reset is the nuclear option when other troubleshooting steps fail. Press and hold the reset button on the bottom of the Deco unit for 10 seconds until the LED turns red, then release. The unit will reboot and return to factory default settings, erasing all configuration. Use reset when a unit won’t respond to the app, won’t pair with other units after trying closer placement, or if you’re setting up a used Deco unit that was previously configured for someone else’s network. After reset, you’ll need to set up that unit again from the beginning as if it were brand new.
If you’ve tried troubleshooting steps and reset without success, TP-Link provides support resources including online documentation, setup video tutorials, and active community forums where other users share solutions. The official TP-Link support site has detailed guides for specific error messages and problems. If problems persist after trying documented solutions, contact TP-Link technical support directly through the app’s help section or the support website. Have your Deco model number and a description of the specific problem ready when you reach out.
Understanding Wired and Wireless Backhaul Options
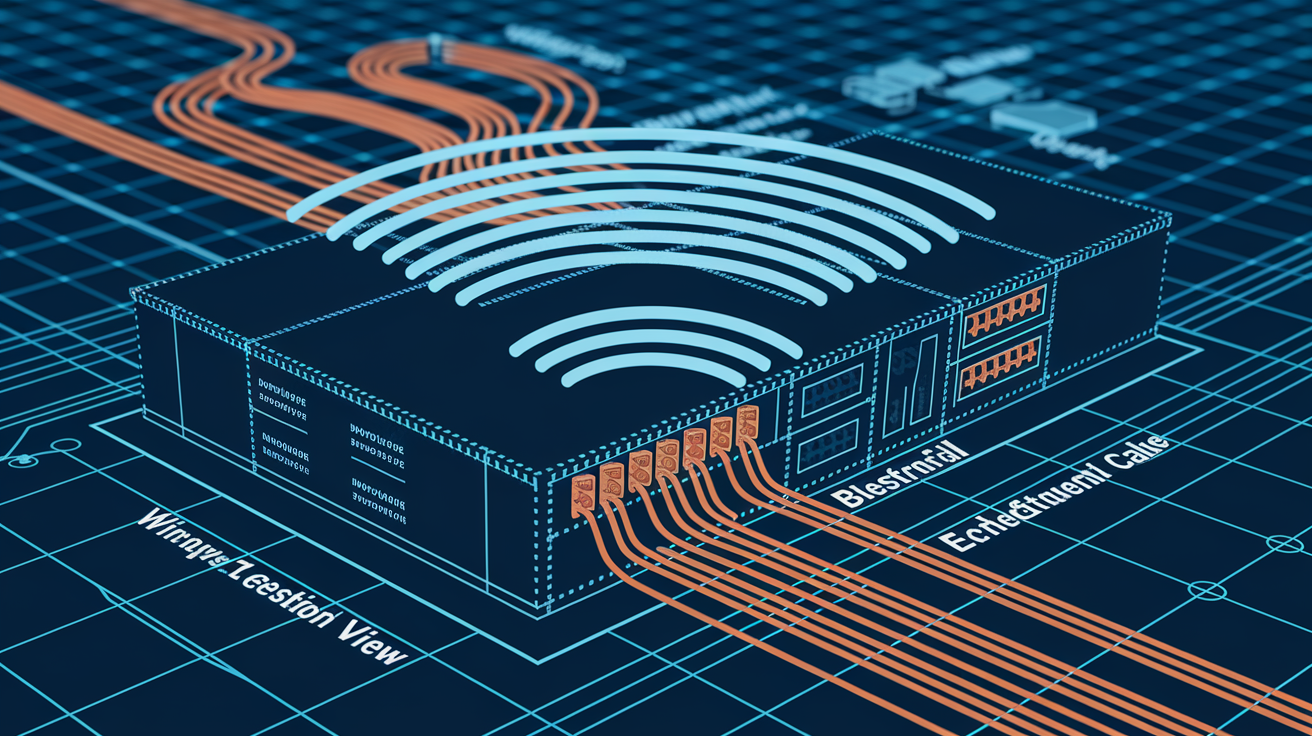
Backhaul is how Deco units connect to each other behind the scenes to extend your network. Understanding backhaul options helps you get the best performance from your mesh system, especially in larger homes.
Wireless Backhaul Setup
Wireless backhaul connects satellite Deco units to the primary unit (and to each other) using Wi-Fi, with no cables required. This happens automatically when you set up additional units. They find the primary unit and create wireless connections without you configuring anything.
The advantage is simple installation with no cable running through walls or along baseboards. The downside is that wireless backhaul uses some of your available Wi-Fi bandwidth to communicate between units, leaving less bandwidth for your actual devices. In a multi-hop setup where a satellite unit connects through another satellite unit rather than directly to the primary unit, performance can decrease because the signal has to make multiple jumps.
Wireless backhaul works well for most homes, especially if units are positioned within 30 to 40 feet of each other with minimal obstacles.
Wired Ethernet Backhaul Connection
Wired Ethernet backhaul connects satellite Deco units to the primary unit or to a network switch using Ethernet cables. This creates dedicated connections that don’t compete with Wi-Fi bandwidth used by your devices.
To enable Ethernet backhaul, plug an Ethernet cable from a LAN port on the primary Deco into a LAN port on a satellite unit, or connect both to a network switch using Ethernet cables. The Deco system automatically detects wired connections and prioritizes them over wireless backhaul.
Performance improves significantly, especially for bandwidth-heavy activities like 4K streaming, large file transfers, or gaming. Wired backhaul is ideal if you have Ethernet wiring already run through your walls or if you can route cables along baseboards without too much visual impact.
| Backhaul Type | Installation Complexity | Performance Level | Best For |
|---|---|---|---|
| Wireless | Simple, plug in and go with no cables needed | Good for typical home use; slight performance reduction in multi-hop setups | Renters, homes without existing Ethernet wiring, quick installations, smaller coverage areas |
| Wired Ethernet | Moderate, requires running Ethernet cables or using existing wiring | Excellent, full bandwidth available with no wireless overhead or degradation | Larger homes, high-bandwidth users, homes with existing Ethernet infrastructure, gaming and streaming households |
You can mix wired and wireless backhaul in the same mesh system. Connect units with convenient cable access using Ethernet backhaul, and let units in harder-to-reach locations use wireless backhaul. The Deco app automatically optimizes connections regardless of which backhaul method each unit uses, choosing the fastest available path for data to travel between units and your devices.
Advanced WiFi Settings and Performance Tuning

Deco mesh systems use automatic optimization technologies that work behind the scenes to maintain performance without manual adjustment. Beamforming focuses Wi-Fi signal directly toward connected devices rather than broadcasting equally in all directions. MU-MIMO (Multi-User Multiple Input Multiple Output) allows the system to communicate with multiple devices simultaneously instead of taking turns. Band steering automatically connects devices to either 2.4GHz or 5GHz band based on signal strength, device capabilities, and current network load. These features run continuously and typically work best when left on automatic settings in the Deco app.
If you need to access advanced Wi-Fi settings, open the Deco app and navigate to “Wi-Fi Settings” or “Advanced” in the menu. You’ll find options for manual channel selection, which can help in environments with heavy interference from neighboring networks. By default, Deco units automatically select the least crowded channel, but if you live in a dense apartment building where many networks overlap, manually selecting a specific channel after checking with a Wi-Fi analyzer app might improve performance. The 2.4GHz band has channels 1, 6, and 11 as the standard non-overlapping options. The 5GHz band has many more channels available and generally experiences less interference since fewer devices use it.
The built-in Internet Speedtest feature measures the actual speed your Deco system receives from your ISP. This is different from speed tests run on individual devices, which also account for Wi-Fi performance between the device and Deco. To use it, open the Deco app and tap “Internet Speedtest” or the speedometer icon. The test takes 15 to 30 seconds and shows download and upload speeds in Mbps (megabits per second). Compare these results to your internet plan speeds from your ISP. If the Deco speedtest shows speeds close to your plan speeds, your internet connection is working correctly. If device speed tests show lower speeds than the Deco speedtest, the issue is Wi-Fi coverage or device limitations rather than your internet connection.
Most home environments work best with automatic settings left as the default configuration. Consider manual adjustment only in specific scenarios: dense apartment or condo buildings with dozens of competing networks, homes near industrial equipment that causes interference, or unusual network layouts where automatic optimization doesn’t perform well. If you’re getting good speeds and reliable connections throughout your home, there’s no benefit to changing advanced settings. Automatic works better than manual configuration for the majority of installations.
Port Forwarding and VPN Configuration for Mesh Networks
Advanced users sometimes need port forwarding for gaming, remote access to home servers, or running services that require specific network ports open. VPN capabilities let you access your home network securely when you’re away or route all internet traffic through an encrypted connection for privacy.
To set up port forwarding, open the Deco app and go to “Advanced” then “NAT Forwarding” or “Port Forwarding” depending on app version. Tap to add a new rule and enter the service name (like “Gaming Console” or “Security Camera”), the internal IP address of the device that needs the forwarded port, the external and internal port numbers (often the same number), and the protocol (TCP, UDP, or both). Gaming consoles and their games usually list required ports in support documentation. Security cameras and home servers document needed ports in their manuals or setup guides.
After creating the rule, save it. For port forwarding to work reliably, assign a static IP address to the device through the app’s “Address Reservation” or “DHCP Reservation” feature so the device always gets the same IP address when it connects.
Deco systems support both VPN server and VPN client functionality. The VPN server feature lets you connect to your home network securely when traveling, giving you access to home network resources and a secure internet connection using your home IP address. Set this up through the app’s “VPN” or “VPN Server” section, where you’ll create credentials and download a configuration file to install on devices you’ll use remotely.
The VPN client feature routes all your home network’s internet traffic through a third-party VPN service for privacy. If you subscribe to a VPN service like NordVPN or ExpressVPN, you can configure the Deco system to connect all devices through that VPN without installing VPN apps on each device individually.
Only open ports you specifically need, and close them when you no longer need the service running. Every open port is a potential entry point for security threats. Use strong passwords or authentication for any service accessible through forwarded ports, and consider whether you can use alternative methods like VPN access instead of exposing services directly to the internet. Port forwarding is useful, but it does reduce security compared to keeping all ports closed and using VPN access for remote connectivity.
Final Words
Your TP-Link mesh Wi-Fi setup is complete once you’ve connected the main unit, added satellite nodes, and configured your network settings through the app.
The whole process from unboxing to full coverage typically takes 15 to 20 minutes.
If you run into connection issues or dead zones, check unit placement first. Most problems come down to distance between nodes or obstacles blocking the signal.
You can always add more units later if you need to expand coverage to new areas. The app walks you through it the same way.
Your mesh system now handles device roaming, security updates, and network optimization automatically. You’re set.
FAQ
How do I set up TP-Link mesh WiFi?
To set up TP-Link mesh WiFi, download the Deco app, connect your main Deco unit to your modem via Ethernet, power both on, and follow the app’s step-by-step setup to create your network name and password. The process takes about 10-15 minutes and automatically guides you through adding additional units.
What is a major disadvantage of a mesh network?
A major disadvantage of a mesh network is reduced performance on multi-hop wireless connections, where satellite units far from the main unit may experience slower speeds. Wired Ethernet backhaul between units solves this issue but requires cable installation throughout your home.
How do I connect mesh WiFi to an existing router?
To connect mesh WiFi to an existing router, plug an Ethernet cable from your router’s LAN port to the main Deco unit’s WAN port, then configure the Deco in Access Point mode through the app. This setup lets the mesh system handle WiFi while your existing router manages internet distribution.
Can I use TP-Link mesh with an existing router?
You can use TP-Link mesh with an existing router by connecting the main Deco unit to the router’s LAN port and selecting Access Point mode during setup. This configuration turns off the Deco’s routing functions while maintaining full mesh WiFi coverage throughout your home.
How many Deco units do I need for whole home coverage?
The number of Deco units you need depends on your home’s square footage and layout, with each unit typically covering 1,500 to 2,000 square feet. Multi-story homes or spaces with thick walls may require additional units positioned strategically to eliminate dead zones.
Do I need to turn off my modem before connecting Deco?
You need to turn off your modem completely and wait 10 seconds before connecting it to your main Deco unit to ensure proper connection recognition. After connecting the Ethernet cable, power on the modem first, wait until fully booted, then power on the Deco unit.
What’s the difference between router mode and Access Point mode for Deco?
Router mode makes your Deco the main network router handling all internet traffic, while Access Point mode turns off routing functions and connects to an existing router. Choose router mode when connecting directly to a modem and Access Point mode when adding mesh WiFi to an existing network setup.
How do I add more Deco units after initial setup?
To add more Deco units after initial setup, power on the new unit in your desired location and wait for the blue pulsing LED, then open the Deco app and follow prompts to detect and connect it. Add units one at a time for best results.
Can I use different Deco models together in one mesh network?
You can use different Deco models together in one mesh network, and they’ll work as a unified system with shared network name and settings. Keep in mind that the entire network’s maximum speed is limited by the capabilities of your slowest Deco model.
How do I update Deco firmware?
To update Deco firmware, open the Deco app, tap the menu icon, select the specific Deco unit, and tap “Update” if new firmware is available. All units in your mesh network update automatically when you trigger the update, taking about 3-5 minutes to complete.
What should the LED color be when Deco is working properly?
The LED should be solid green or white when your Deco is working properly and connected to the internet with active client devices. A pulsing blue LED means the unit is ready to set up, while red indicates no internet connection or setup issues.
How do I reset my Deco to factory settings?
To reset your Deco to factory settings, locate the reset button on the bottom of the unit and hold it for 10 seconds until the LED turns red. This erases all settings and requires you to complete the full setup process again.
Should I use the same network name for 2.4GHz and 5GHz bands?
You should use the same network name for both 2.4GHz and 5GHz bands, as Deco systems automatically manage band steering to connect devices to the best frequency. This unified approach provides seamless roaming and better overall performance without manual band selection.
How close should Deco units be to each other?
Deco units should be close enough to maintain strong signal overlap but not so close that coverage areas waste bandwidth, typically 20 to 40 feet apart on the same floor. Place satellite units where they still show good signal from the main unit, avoiding excessive distance that causes weak connections.
What devices can connect to my Deco mesh network?
Any WiFi-enabled device including smartphones, tablets, laptops, smart TVs, and IoT devices can connect to your Deco mesh network using the network name and password. Older devices that only support 2.4GHz will automatically connect to that band while newer devices use 5GHz when available.