


Your router is probably in the wrong spot right now. And that’s why your bedroom has zero bars while the hallway three feet from the router works fine. Router placement isn’t about finding an empty shelf. It’s about physics. WiFi signals spread in all directions from wherever you put the box, so a corner spot means half your signal goes straight into the yard or your neighbor’s garage. This guide shows you exactly where to position your router, how high to mount it, and which interference sources to avoid so you actually get coverage in the rooms where you need it.
Where to Position Your Wireless Router for Maximum Coverage
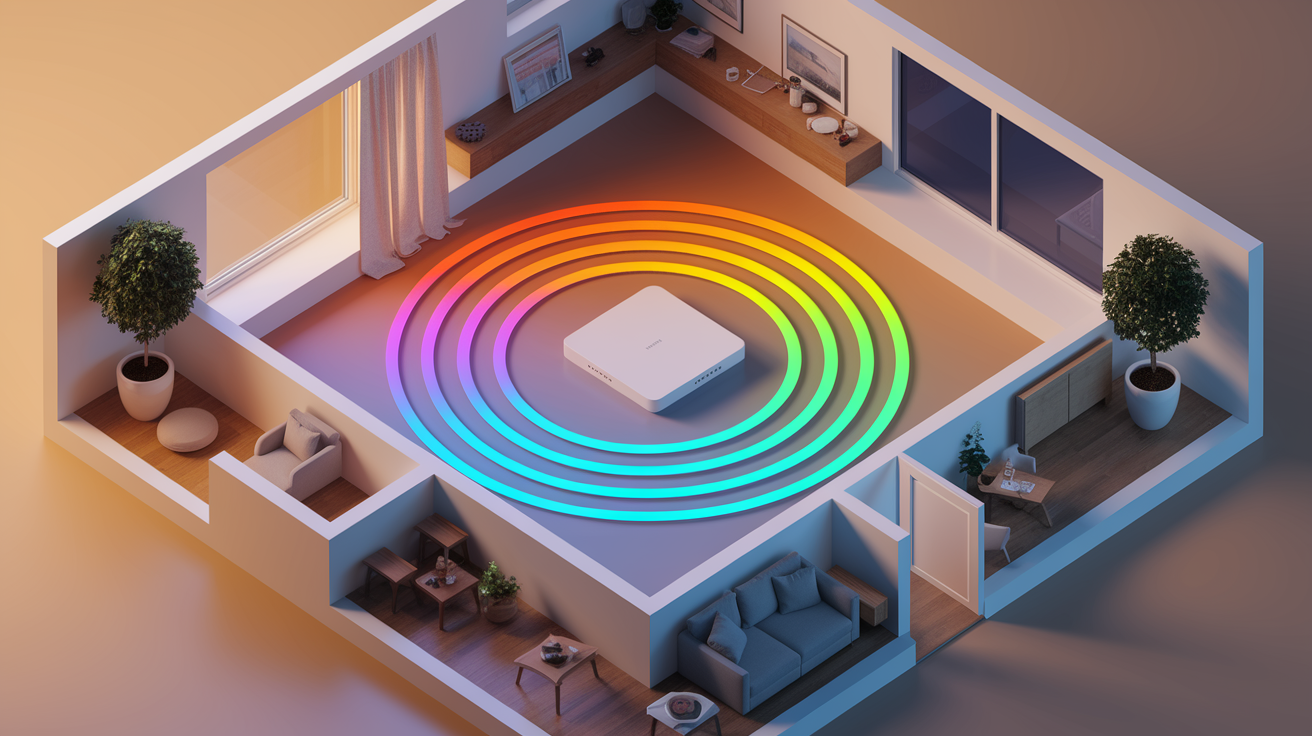
Your router’s location is the single most important factor in whether you’ll have strong WiFi everywhere or dead zones where nothing loads. The router broadcasts signals in all directions, so where you put it determines which areas get covered and which don’t.
WiFi signals radiate outward in predictable patterns. Routers with vertical external antennas broadcast in an elongated donut shape, while routers with internal antennas send signals in a sphere. Either way, the signal spreads equally in all directions from the router’s position. That’s why central placement matters. If your router sits in a corner, half its broadcast power goes into walls, closets, or outside your house where you don’t need it.
Choose a spot near the actual midpoint of your home. Not a corner or exterior wall. Walk through your house and find the room that’s roughly equal distance from all the spaces you use most. In a rectangular home, this might be a central hallway or the edge of your living room. In an L-shaped layout, it’s usually near the junction where the two sections meet. Placing the router here means signals reach all areas more evenly instead of leaving far corners struggling.
Elevation matters too. Keep your router at least 1 to 1.5 feet off the floor. Preferably on a small table, shelf, or wall mount. Signals naturally travel downward and outward, so floor placement limits how far they can reach before hitting furniture, walls, and other obstacles.
Keep the router away from interference sources. Microwaves operate on a wavelength that closely matches WiFi frequencies, causing disruptions whenever they run. Metal objects like filing cabinets, water heaters, and appliances also block signals. A few feet of separation from these items makes a noticeable difference.
If perfect center placement isn’t possible in your layout, prioritize the area where you use WiFi most. A home office, living room with streaming devices, or bedroom with work setup should take priority over rarely used guest rooms. You’re aiming for the best overall coverage, not perfect equality in spaces you hardly enter.
Optimal Height and Elevation for Router Installation
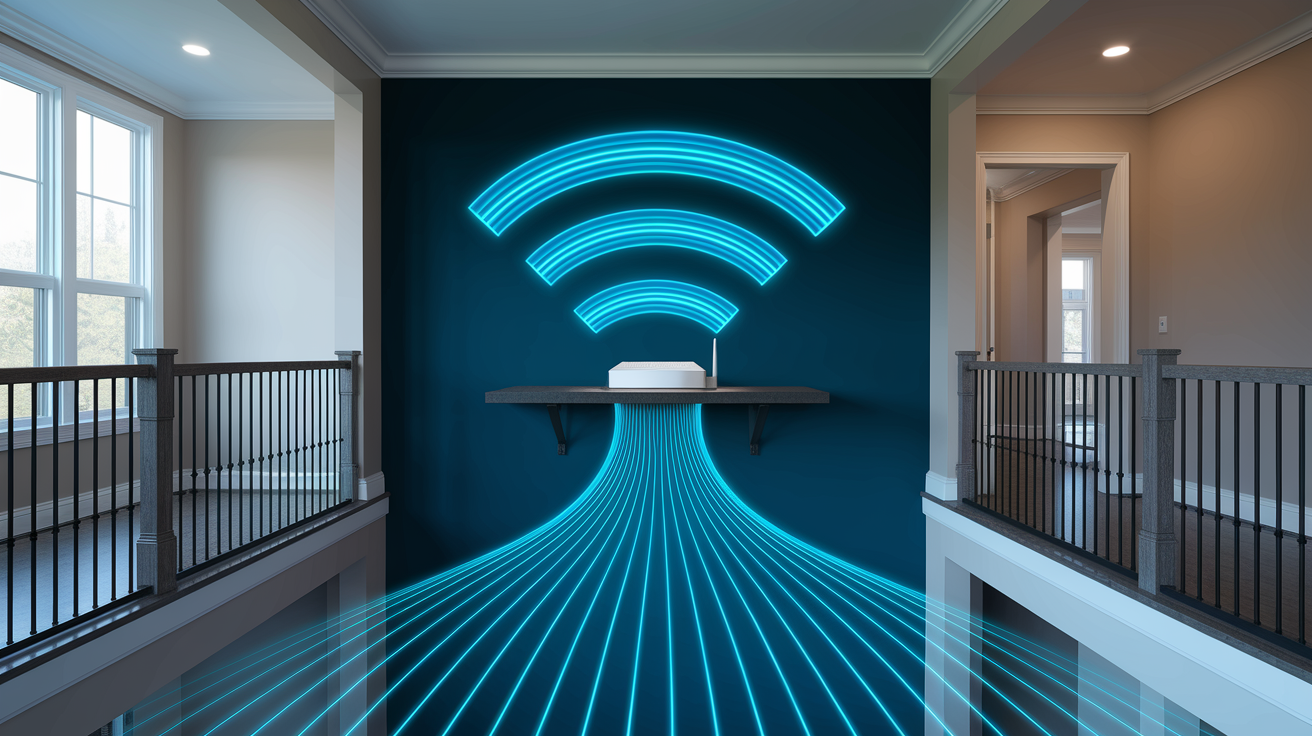
WiFi signals propagate downward and outward naturally, which is why elevation directly affects how well your network covers the space. A router sitting on the floor sends most of its signal into the ground, furniture legs, and lower walls. Exactly where you don’t have devices trying to connect.
The minimum effective height is 1 to 1.5 feet off the floor. This keeps signals from being absorbed by flooring materials and gives them a clear path to radiate outward. For better coverage, especially in multi-story homes, aim for 5 to 7 feet. About shoulder height or higher. This positioning lets signals travel farther before encountering major obstacles and improves distribution to upper floors.
Shelves, wall mounts, and the top of entertainment centers work well. These positions also prevent overheating by allowing air to circulate around the router’s ventilation openings. Routers generate heat during operation, and proper airflow keeps internal components from getting damaged or throttling performance. Don’t stack items on top of the router or cram it into tight spaces where heat gets trapped.
Floor placement, low TV stands, and bottom shelves all limit signal distribution. Even if the router is centrally located horizontally, putting it near floor level means signals hit chairs, couches, tables, and walls before reaching most of your devices. Move it higher and you’ll immediately notice better performance in rooms that were previously struggling.
Signal-Blocking Factors: Interference and Physical Obstacles

WiFi signals face two types of problems in homes. Electronic interference from devices operating on similar frequencies, and physical materials that absorb or reflect the signal. Both can turn strong coverage into frustrating dead zones.
Electronic interference happens when other devices broadcast signals that overlap with WiFi frequencies. Keep your router at least 3 to 6 feet away from these signal-emitting devices:
- Microwaves operate on wavelengths that closely match WiFi, causing severe disruption whenever running
- Cordless phones, especially older models, use 2.4 GHz, the same frequency as basic WiFi
- Baby monitors constantly transmit audio or video, creating ongoing interference
- Bluetooth devices like speakers, keyboards, and mice all share the 2.4 GHz band
- Fluorescent lights have ballasts that generate electromagnetic interference
- Kitchen appliances like blenders, electric mixers, and food processors create electrical noise
- Refrigerators with compressor cycling that generates electromagnetic interference
- Other wireless devices including printers, security cameras, and smart home hubs all compete for bandwidth
Microwaves deserve special attention. Their radiation wavelength overlaps almost exactly with 2.4 GHz WiFi. When a microwave runs, it doesn’t just interfere. It can completely block WiFi in nearby rooms. If your router sits next to the kitchen and you lose connection every time someone reheats coffee, the microwave is the reason. Move the router at least 6 feet from the microwave, or better yet, put a wall between them.
Physical materials create dead zones by blocking or weakening signals as they pass through. Concrete, brick, metal, stone, water, and tile are the worst offenders. Load-bearing walls in older homes often contain metal rebar or thick concrete that signals struggle to penetrate. Bathroom walls covered in ceramic tile create barriers that significantly reduce signal strength. Large metal furniture like filing cabinets, safes, or metal bed frames can completely block signals in one direction.
Reflective surfaces create unpredictable interference patterns. Large mirrors, aquariums, and metal cabinets don’t just block signals. They bounce them in random directions, creating areas where the signal cancels itself out. These dead zones can appear in unexpected locations, sometimes several feet away from the actual reflective object. Keep the router’s line of sight clear of these materials, and don’t position large furniture items, especially metal pieces, directly between the router and rooms where you need coverage.
Router Placement Strategies for Multi-Story Homes

WiFi signals move downward through floors more effectively than they travel upward. This completely changes placement strategy in multi-story homes. If you put the router on the main floor of a two-story house, the second floor usually gets decent coverage. Put it in the basement, and everything above struggles.
For two-story homes, position the router near the ceiling on the first floor or near the floor on the second floor. Both approaches keep the router vertically centered between the two levels. Ceiling placement on the first floor works well if you can mount the router on a high shelf or use an actual ceiling mount. The signals broadcast downward to cover the main floor while also reaching up through the floor above. Second-floor placement near the floor achieves similar vertical positioning and often provides better coverage to upper-floor rooms where family members sleep or work.
| Floor Level | Best Placement | Reason |
|---|---|---|
| Main floor | Central location near ceiling (high shelf or wall mount) | Covers main floor while sending signals upward to second floor |
| Second floor | Central location near floor (low shelf or entertainment center) | Maintains vertical center position between levels, covers both floors evenly |
| Basement | Avoid—signals struggle to penetrate upward through concrete and dense flooring | Creates weak coverage on main and upper floors, pipes and concrete block signals |
| Attic | Avoid—excessive heat damages router electronics | Extreme temperatures reduce lifespan, signals still need to travel down through entire house |
Stairwells and central hallways on upper floors work particularly well because they create natural pathways for signals to move between levels. Open staircases especially help signals flow from one floor to another without being blocked by solid floors and ceilings. If your home has a staircase near the center, positioning the router on the second floor landing or at the top of the stairs can provide excellent coverage to both levels. Hallways serve a similar function. They’re usually centrally located and connect to multiple rooms, letting signals radiate outward from a central core that serves the entire floor.
Proper Router Antenna Positioning and Orientation

WiFi signals broadcast perpendicular to antenna position, which means antenna angle directly controls where your signal goes. A vertical antenna broadcasts horizontally across the same floor. A horizontal antenna broadcasts vertically up and down through floors.
For single-story homes with adjustable antennas, set one antenna vertically and one horizontally. The vertical antenna sends signals horizontally across your floor, covering all the rooms on that level. The horizontal antenna broadcasts vertically, which helps if you have furniture, appliances, or obstacles that block horizontal signal paths.
In multi-story homes, angle some antennas downward at roughly 45 degrees. This position broadcasts signals both horizontally across the floor where the router sits and vertically up and down to reach other levels. If you have three adjustable antennas, try this configuration: one vertical for horizontal coverage on the router’s floor, one angled down to send signals to lower floors, and one angled up to reach upper floors.
Routers with internal antennas should be positioned vertically. You can’t adjust the antennas themselves, but the router’s orientation determines the broadcast pattern. Most routers with internal antennas are designed to sit upright, creating an even broadcast sphere around the unit. Laying these routers flat or sideways changes the signal pattern in ways that reduce coverage. If your router has no visible external antennas, check that it’s sitting in its intended upright position and not tipped over or stored on its side.
Locations to Avoid When Installing Your Router
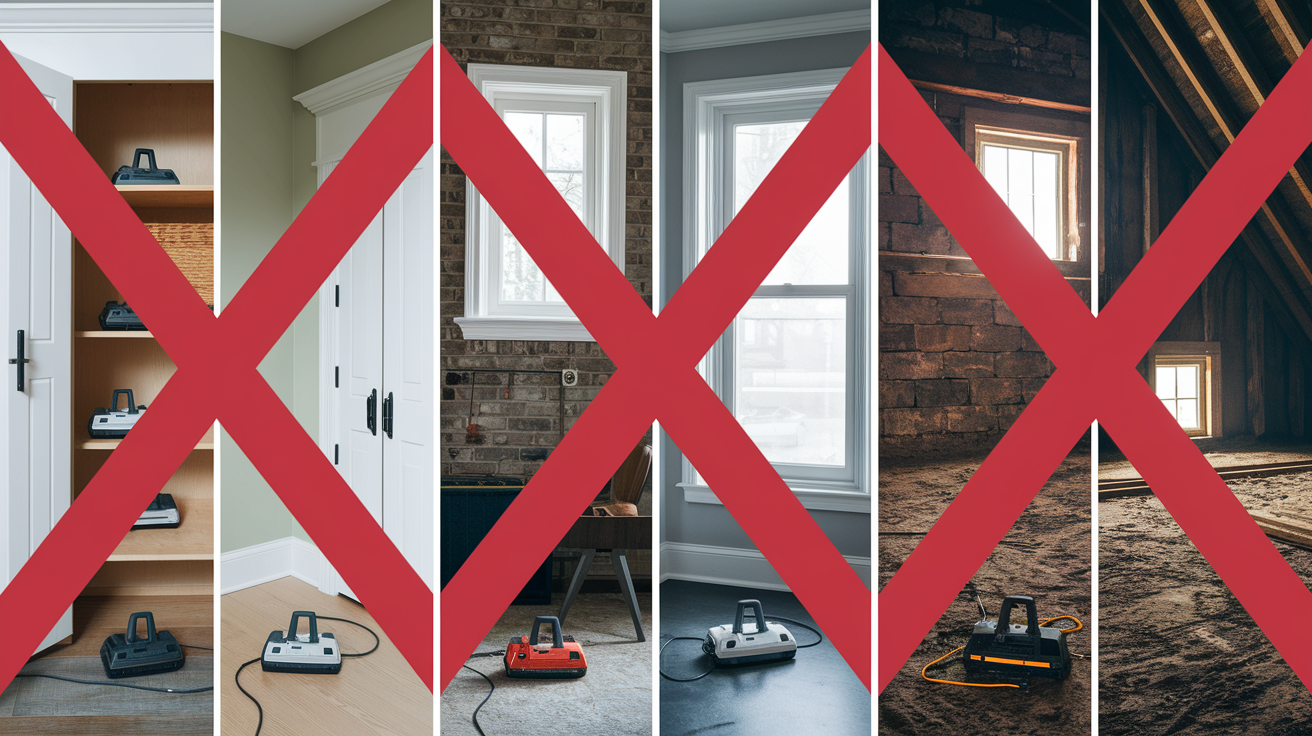
Some router placement spots seem convenient but will guarantee poor performance throughout your home. These locations all share a common problem. They either block signals, waste broadcast power outside the house, or create coverage gaps on the opposite side.
Here are six locations that will cause connection problems:
-
Enclosed cabinets or closets. Walls on all sides absorb and reflect signals before they can reach your rooms. Even with the door open, the enclosed space reduces signal strength by 40 to 60%.
-
Corners. Half the broadcast pattern goes directly into exterior walls, and the opposite corner of your house becomes a dead zone because signals have to travel the longest possible distance through the most obstacles.
-
Near windows. Signals broadcast just as strongly outside your house as inside, wasting coverage on your yard, driveway, or neighbor’s property instead of reaching your back bedrooms.
-
Against external walls. Similar to windows, this positioning sends a large portion of the broadcast outside the building where you don’t need it, leaving interior rooms with weak coverage.
-
Basement. Signals struggle to penetrate upward through dense concrete floors, support beams, and plumbing, creating weak coverage on main and upper floors even with a powerful router.
-
Attic. Extreme heat in summer damages router electronics and reduces lifespan, while the router still needs to broadcast down through the entire house to reach living spaces.
Modern routers have sufficient range to reach neighboring homes even when centrally placed inside your house. You don’t gain any advantage by putting the router near a window or exterior wall. The signals will still reach your yard and driveway when needed, but central placement ensures indoor spaces get strong coverage first. A centrally placed router sends equal signal strength in all directions, which means interior rooms, exterior rooms, front, and back all receive similar coverage.
Layout-Based Placement for Different Home Configurations

Placement strategy changes based on home type, total square footage, architectural features like long hallways or open concepts, and which rooms see the most WiFi usage. A small apartment needs a completely different approach than a sprawling single-story ranch or a narrow two-story townhouse.
When perfect central placement creates unavoidable dead zones in the spaces you actually use, prioritize high-use areas. A home office where you work 40 hours per week matters more than a guest bedroom used twice a year. A living room with streaming TV, gaming consoles, and tablets in use every evening should take priority over a formal dining room you rarely enter.
| Home Type | Placement Strategy | Additional Tools Needed |
|---|---|---|
| Small apartment under 1000 sq ft | Central room (often living room), any shelf 3 to 5 feet high | None—router alone provides full coverage |
| Single-story home 1000 to 2500 sq ft | Central hallway or main living area, elevated shelf 5 to 7 feet high | Possibly one extender for opposite end of house |
| Two-story home 2000 to 3500 sq ft | First floor ceiling or second floor near stairs, 5 to 7 feet vertical from main living level | Consider mesh system if dead zones persist |
| Large home over 3500 sq ft | Mesh system with main router centrally located and nodes in far corners | Mesh network required—single router insufficient |
Living room placement works well as a central location in many homes because living rooms often sit near the middle of the floor plan and connect to multiple adjacent rooms. This position serves the kitchen, dining area, hallway, and nearby bedrooms from a single spot. For remote workers, home office placement might be the better choice even if it’s not perfectly central. You’ll get maximum performance for video calls and large file uploads where you need it most, with acceptable coverage in other areas. Hallway placement is an effective compromise that distributes signal to multiple rooms from a central corridor. Signals radiate outward through doorways into surrounding spaces, and hallways typically have fewer obstacles than furnished rooms.
Don’t rely solely on square footage guidelines. Test actual signal strength in the rooms you use and adjust based on your specific layout. An open-concept home with few walls might get full coverage from a less than central position, while a home with many small rooms and thick walls might need the router perfectly centered to avoid dead zones. Where your walls are, what they’re made of, and how your family uses the space all matter more than matching a size category in a chart.
Addressing Dead Zones and Weak Coverage Areas

Even with optimal router placement, larger homes or difficult layouts may still have rooms with weak or no signal. Thick walls between the router and far bedrooms, multi-story homes with dense flooring, or long ranch-style houses can create persistent dead zones despite your best placement efforts.
Ethernet cables provide the most reliable solution for connecting devices in dead zones. Flat Ethernet cables with adhesive clips run along baseboards without requiring in-wall installation. You can route a cable from the router to a distant room in about 15 minutes. This works especially well for stationary devices like desktop computers, smart TVs, or gaming consoles that don’t need to move around. The wired connection delivers full speed without any signal loss, and it removes these bandwidth-heavy devices from your WiFi network, freeing up wireless capacity for phones, tablets, and laptops.
| Solution | Best For | Limitation |
|---|---|---|
| WiFi Extenders—Repeater Mode | Budget-conscious coverage extension, rooms 20 to 40 feet from router | Doubles connection latency, causes delays in gaming and video calls |
| WiFi Extenders—Access Point Mode | Extending coverage when you can run an Ethernet cable to the extender location | Requires Ethernet connection from router to extender, but delivers better speeds than repeater mode |
| Mesh Network Systems | Large homes over 3000 sq ft, multiple dead zones, continuous roaming between areas | Higher cost, reduced long-range performance compared to standalone routers |
Choose extenders in repeater mode for budget coverage extension when running cables isn’t practical, but understand you’re trading speed for coverage. Choose access point mode extenders when you can run an Ethernet cable to the extender’s location. You’ll get much better performance. Choose mesh systems when you need whole-home coverage with multiple problem areas, you want devices to automatically switch between nodes as you move through the house, or budget allows for the higher initial investment. Mesh works best in homes where you can position nodes with line of sight to each other, creating a strong connectivity web throughout the house.
Connection Considerations: Modem, Power, and Cable Access

Router placement is often limited by practical constraints. Where your modem connects to the internet line, where power outlets are located, and how far you can run cables without major installation work.
If your internet service enters through a specific wall location (cable from the street, fiber termination box, or phone line), your modem must connect there. The router needs an Ethernet cable connection to the modem, which typically limits your router placement to the same room or an adjacent space. Moving the router to a more central location might mean relocating the modem too, which may or may not be possible depending on your internet service type and building layout.
Flat Ethernet cables with baseboard clips extend your options significantly without requiring wall fishing or contractor work. These cables are 2 to 3mm thin and come with adhesive clips that hold them flush against baseboards, door frames, and corners. You can run a cable from a corner modem location to a central shelf in another room in 15 to 20 minutes. This approach works especially well in apartments or rentals where you can’t modify walls, and in any situation where optimal router placement and modem location don’t naturally align. The cables are available in lengths up to 100 feet, which covers most single-story homes and many two-story layouts if you’re willing to route the cable through a hallway or up a staircase.
Balance optimal WiFi placement with practical connection requirements by mapping both factors. Identify where your modem must be located, then find the most central spot you can reach with either a 6-foot patch cable (keeping the router very close to the modem) or a longer flat cable routed along baseboards (extending the router 25 to 50 feet away). If no central location is reachable, consider whether relocating the modem is possible. Some internet service providers will move the service entry point for a fee, which might be worth it in a home where the current entry location makes good WiFi coverage impossible. In other cases, adding an extender or mesh system to supplement a poorly located router becomes the practical solution.
Testing and Optimizing Your Router Location

Theoretical placement guidelines work for most homes, but your specific layout, building materials, and interference sources create unique conditions that require actual testing to optimize. What works in a home with drywall interior walls might not work in a home with plaster and lathe, and what works on the first floor might be completely different on the second.
Follow this testing process to find your optimal location:
- Download a WiFi analyzer app on your phone. NetSpot, WiFi Analyzer, or Airport Utility all show signal strength in each room.
- Test your current router location by walking through every room you use regularly and recording the signal strength in decibels (dBm, where -30 is excellent and -70 is barely usable).
- Relocate the router to an alternative position. More central, higher elevation, or different room, and let it run for 5 minutes to stabilize.
- Retest coverage by walking through the same rooms and recording signal strength in the new location.
- Compare results for each room and choose the location that provides the best overall coverage, prioritizing rooms where you need performance most.
Firmware updates and channel optimization work alongside physical placement to maximize performance. Routers broadcast on specific channels within the 2.4 GHz and 5 GHz bands, and if your neighbors’ routers use the same channels, you all interfere with each other. Most routers can automatically select the least crowded channel, but checking manually every few months ensures you’re not stuck on a congested channel. Log into your router’s admin interface, find the wireless settings, and either enable automatic channel selection or use your WiFi analyzer app to see which channels have the least traffic in your area. Switch to a clearer channel and test whether your speeds improve.
Performance Factors Beyond Physical Placement
Router location provides the foundation for good WiFi, but technology features and settings determine what happens after signals reach your rooms. Placement gets the signal there. Router capabilities determine how fast and stable that connection is.
Dual-band routers broadcast on both 2.4 GHz and 5 GHz frequencies simultaneously, and these bands behave very differently in home environments. The 5 GHz band delivers faster maximum speeds, often 2 to 3 times faster than 2.4 GHz, but has shorter range and struggles to penetrate walls. It works best for devices in the same room as the router or one room away. The 2.4 GHz band is slower but travels further and penetrates walls better, making it more reliable for devices in distant rooms or on different floors. Most modern devices automatically switch between bands based on signal strength, but understanding the difference helps you position devices strategically.
Beamforming technology actively improves placement effectiveness by directing signal strength toward connected devices instead of broadcasting equally in all directions. When your laptop connects to a Beamforming-enabled router, the router detects the laptop’s location and focuses extra signal power in that direction. This creates stronger connections for devices at the edge of coverage range and reduces interference with neighboring networks. You don’t need to configure anything. Beamforming works automatically in the background. But it’s a feature worth checking for when choosing a router, especially in larger homes or homes with many walls.
WiFi 6 technology (802.11ax) delivers noticeable performance improvements over older standards through better efficiency with multiple devices, lower latency for gaming and video calls, and improved performance in congested areas with many nearby networks. If your router is more than 3 to 4 years old, upgrading to WiFi 6 often provides bigger speed improvements than any amount of repositioning. Keep firmware updated regardless of router age. Manufacturers regularly release updates that improve performance, fix security vulnerabilities, and add compatibility with newer devices. Most routers check for updates automatically, but manually checking every 3 to 6 months ensures you’re not missing important improvements. Channel selection also matters. If your WiFi feels slow during evening hours when neighbors are home, switching to a less congested channel can improve speeds even without moving the router an inch.
Device Count and Usage Density Planning
Homes with many connected devices need placement strategies that serve device clusters, not just geometric center points. A router positioned in the exact middle of an empty house provides perfect theoretical coverage. But if all your devices are actually in three rooms on one side, you’ve optimized for the wrong thing.
Smart home systems with security cameras, smart speakers, thermostats, door locks, and light bulbs can easily reach 20 to 30 connected devices. Families with multiple users streaming video, attending video calls, and gaming simultaneously add another 10 to 15 active connections during peak hours. These device-dense environments benefit from router placement near the areas with the highest concentration of connections. If your home office has a desktop computer, laptop, printer, smart speaker, and security camera all connecting simultaneously, positioning the router in or adjacent to that room ensures these bandwidth-heavy devices get strong signals even under load.
Bandwidth-intensive activities like gaming, 4K streaming, and video conferencing need prioritized placement consideration. A gaming setup benefits enormously from a router positioned in the same room or one room away, reducing latency and improving response time in multiplayer games. A living room with a 4K TV streaming for hours every evening should be within strong signal range. A home office where you take video calls all day needs reliable upload speeds, which drop off quickly as signal strength decreases.
Wired connections for stationary high-demand devices reduce WiFi load and improve performance for everything else on the network. If your gaming PC, smart TV, and desktop computer all have Ethernet ports, connecting them with cables removes three bandwidth-heavy devices from the wireless network. This frees up WiFi capacity for phones, tablets, laptops, and IoT devices that must connect wirelessly. The wired devices get maximum speed with zero latency variation, and wireless devices get better performance because they’re sharing bandwidth with fewer competing connections. This approach works especially well when optimal router placement for whole-home coverage doesn’t align with placement for maximum performance in one specific room.
Final Words
Getting your router placement in home right makes the difference between solid coverage everywhere and constant connection headaches.
Start with central positioning at least 1 to 1.5 feet off the floor, keep it away from microwaves and metal objects, and avoid hiding it in closets or corners.
Test your signal strength in the rooms that matter most, then adjust based on what you actually see.
If dead zones persist after repositioning, you know exactly where extenders or mesh nodes will help most. Small changes in height and location can fix problems that feel like they need expensive solutions.
FAQ
Where is the best place to put a router in your house?
The best place to put a router in your house is in a central location, preferably elevated 1 to 1.5 feet off the floor. Choose a spot near the midpoint of your home, away from walls, corners, and interference sources like microwaves, to ensure even signal distribution throughout all rooms.
Is it better to place a WiFi router high or low?
It is better to place a WiFi router high rather than low, ideally at least 1 to 1.5 feet off the floor. Higher placement (5 to 7 feet) works even better for multi-story homes because WiFi signals naturally propagate downward and outward, maximizing coverage when the router is elevated.
Is it better to have your WiFi router upstairs or downstairs?
It is better to have your WiFi router upstairs rather than downstairs because signals travel downward more effectively than upward. For two-story homes, place the router near the ceiling of the first floor or on the floor of the second floor to distribute signals evenly across both levels.
Is it okay to put the router behind the TV?
It is not okay to put the router behind the TV because the TV and surrounding metal or electronic components block and interfere with WiFi signals. Keep your router in open spaces away from large electronics, maintaining at least 3 to 6 feet of separation from signal-emitting devices for better performance.