


Think Microsoft can stop you from running Windows 11 on an older PC?
Think again.
If your machine shows “unsupported,” you can still upgrade safely and keep your files.
This guide walks you, step-by-step, through the two reliable ways: a simple registry edit to bypass CPU/TPM checks and using Rufus to make modified install media that skips TPM, Secure Boot, and RAM checks.
You’ll also learn how to check TPM, UEFI/GPT, and CPU support, plus backup tips and what to do if something goes wrong.
Immediate Steps to Install Windows 11 on an Unsupported PC (Primary Bypass Methods)
Most PCs from the last 15 years can run Windows 11 using one of two methods. The first bypasses CPU and TPM 2.0 checks with a registry edit. The second uses Rufus to create modified installation media that skips TPM, Secure Boot, and RAM checks. Both need the official Windows 11 ISO from Microsoft’s download page.
The registry method works when you’ve got at least TPM 1.2, UEFI firmware, and a CPU supporting SSE4.2 and PopCnt instructions (Intel from around 2009 or AMD from 2013 onward). You’ll run Windows 11 Setup.exe from inside your current Windows after making the registry change. Rufus is what you need when there’s no TPM at all, a locked BIOS that won’t turn on Secure Boot, or legacy BIOS instead of UEFI. With Rufus, you create modified USB installation media, then run Setup.exe from the USB while still inside Windows. Don’t boot to it for an in-place upgrade.
Registry bypass steps (in-place upgrade):
- Press Windows + R, type regedit, press Enter.
- Go to HKEYLOCALMACHINE\SYSTEM\Setup\MoSetup.
- Right-click in the right pane, pick New → DWORD (32-bit) Value, name it AllowUpgradesWithUnsupportedTPMOrCPU, and set the value to 1.
- Close the registry editor and reboot.
- Download the Windows 11 ISO from Microsoft, double-click to mount it, open the mounted drive in File Explorer, and run Setup.exe.
- Follow the wizard. When you see a compatibility warning, click Accept to continue.
Rufus steps (for systems with no TPM or legacy BIOS):
- Download Rufus version 4.6 or later and the official Windows 11 ISO.
- Plug in a 16 GB or larger USB flash drive (everything on it gets erased).
- Open Rufus, select your USB drive and the Windows 11 ISO file.
- In the “Windows User Experience” dialog, check the option to remove hardware requirements (TPM/Secure Boot/RAM).
- Click START and wait for Rufus to finish.
- Open the USB drive in File Explorer and run Setup.exe from inside your current Windows. Don’t boot to the USB.
Checking Windows 11 Compatibility Issues Before Installing
Before you try either bypass, figure out exactly which requirement your PC fails. Microsoft’s official list is TPM 2.0, Secure Boot, UEFI firmware with a GPT-formatted system disk, and a supported CPU (8th-gen Intel or AMD Zen 2 or later). Run Microsoft’s PC Health Check app to see which specific checks fail. If it just says “This PC can’t run Windows 11,” you need to dig deeper with two built-in tools.
Open Msinfo32.exe by pressing Windows + R, typing msinfo32, and hitting Enter. Look at the BIOS Mode line. If it says “Legacy,” your system uses old-style BIOS and you’ll need either a disk conversion or a clean install. If it says “UEFI,” you’re halfway there. Next, open Tpm.msc by pressing Windows + R, typing tpm.msc, and hitting Enter. If a TPM management window opens, check the Specification Version. TPM 2.0 is the official requirement, but TPM 1.2 works with the registry bypass. If you see “Compatible TPM cannot be found,” your motherboard either has no TPM or it’s disabled in firmware.
- CPU instruction check: Windows 11 version 24H2 requires SSE4.2 and PopCnt CPU instructions. Intel CPUs from around 2009 (Core i-series) and AMD from around 2013 (Bulldozer/Piledriver or later) typically support these. Pre-2009 Intel or pre-2013 AMD chips can’t be bypassed at all.
- Partition format: If BIOS Mode is Legacy, you’re using MBR partitions and will need to convert to GPT or do a clean install.
- Secure Boot status: Some motherboards ship with Secure Boot disabled. Check your firmware menu if Msinfo32 shows UEFI but PC Health Check still flags Secure Boot.
- TPM location in firmware: TPM settings may appear under names like Intel PTT, AMD PSP fTPM, Security Device, or Trusted Computing, depending on your motherboard brand.
Fixing TPM and Secure Boot Limitations for Windows 11 Installation
If Tpm.msc returns “Compatible TPM cannot be found,” your motherboard might have TPM hardware that’s just turned off. Restart your PC and enter the UEFI/BIOS setup menu (common keys are Del, F2, F10, or F12 during boot). Look for menus labeled Advanced, Security, Trusted Computing, or Boot. TPM may be listed as TPM Device, Intel Platform Trust Technology (PTT), or AMD PSP fTPM. If you find it, change the setting from Disabled to Enabled, save, and reboot. Run Tpm.msc again to confirm.
Some motherboards, especially older consumer boards, shipped without TPM hardware or with TPM 1.2 firmware that can’t be upgraded. If enabling TPM in firmware doesn’t help, search your exact motherboard or PC model number plus “TPM 2.0 firmware update” to see if the manufacturer released a BIOS/UEFI update that adds or upgrades TPM support. If no update exists and you have no TPM, the Rufus method is your only option.
Secure Boot is separate from TPM but usually lives in the same firmware menus. Secure Boot requires UEFI mode (it won’t work if BIOS Mode is Legacy). If you dual-boot with Linux or installed Windows using legacy methods, Secure Boot may have been turned off. Look for a setting called Secure Boot, Secure Boot Control, or OS Type. Change it to Enabled or Windows UEFI mode, save, and reboot. If the Secure Boot option is grayed out or missing, you may need to switch from Legacy/CSM mode to pure UEFI mode first, or clear any custom boot keys. After enabling both TPM and Secure Boot, re-run PC Health Check to see if anything else remains.
Converting MBR to GPT for Windows 11’s UEFI Requirement

If Msinfo32 shows BIOS Mode as Legacy, your system disk is formatted as MBR and Windows is booting in legacy BIOS mode. Windows 11 requires UEFI and a GPT-formatted disk. You’ve got two options: convert the disk in place using Microsoft’s MBR2GPT tool, or do a clean install that reformats the disk to GPT (this erases everything).
MBR2GPT works only if your motherboard supports UEFI. Most systems from the last 12 years do. The tool converts the partition structure without deleting files, but you must still change the firmware boot mode to UEFI after conversion. If MBR2GPT fails with an error about partition layout or unsupported firmware, your only choice is a clean install using Microsoft’s Media Creation Tool, which will set up GPT automatically when you select UEFI boot.
Convert MBR to GPT without losing data:
- Open Command Prompt as Administrator (search “cmd,” right-click, “Run as administrator”).
- Type mbr2gpt /validate /allowFullOS and press Enter. If validation passes, continue.
- Type mbr2gpt /convert /allowFullOS and press Enter. Wait for the conversion to finish.
- Restart, enter UEFI/BIOS setup, and change the boot mode from Legacy/CSM to UEFI. Save and reboot. Your system should now boot Windows in UEFI mode. Verify by running Msinfo32 again.
After conversion, if Windows won’t boot, you may need to recreate the EFI boot entry or switch the SATA mode in firmware. If the conversion command fails entirely, back up your data and go with a clean install instead.
Advanced Insights Into the Registry Edit Bypass Method
The registry bypass works by setting a single DWORD value that tells Windows Setup to skip certain compatibility checks during an in-place upgrade. It allows CPUs that aren’t on Microsoft’s official support list and accepts TPM 1.2 instead of requiring TPM 2.0. It doesn’t bypass the need for UEFI, Secure Boot, or a GPT-formatted disk. It also can’t override the SSE4.2 and PopCnt instruction requirements introduced in Windows 11 version 24H2.
The registry key, HKEYLOCALMACHINE\SYSTEM\Setup\MoSetup, doesn’t exist by default on most Windows 10 installations. You create it along with the DWORD AllowUpgradesWithUnsupportedTPMOrCPU and set the value to 1. When Setup.exe reads this value, it displays a warning dialog about unsupported hardware and potential loss of entitlement to updates, but it lets the upgrade proceed. Microsoft officially documented this method until December 2024, when the support article was removed without explanation. The registry entry itself still functions as of early 2025, but there’s no guarantee future Windows updates won’t disable or ignore it.
This bypass fails in several scenarios. If your PC has no TPM at all, Setup will still block the upgrade because the registry flag only lowers the requirement from TPM 2.0 to TPM 1.2. If your CPU lacks SSE4.2 or PopCnt (typically Intel pre-2009 or AMD pre-2013), the installer or the OS itself will crash or refuse to boot after installation, even with the registry edit in place. If your firmware is set to Legacy mode or your disk is MBR, Setup will reject the upgrade regardless of the registry value. And if you boot from USB installation media instead of running Setup.exe from inside Windows, the registry edit won’t be read and the compatibility check will fail.
Registry bypass method: advanced scenarios, risks, and failure points
- Pre-2009/2013 CPUs: Even with the registry edit applied, systems with CPUs that lack SSE4.2 or PopCnt will fail to boot Windows 11 version 24H2 or show blue-screen crashes during installation. Check your CPU’s supported instruction sets before attempting.
- No TPM hardware: The bypass only accepts TPM 1.2 or higher. Systems with zero TPM (no firmware TPM, no discrete chip) must use the Rufus method or stay on Windows 10.
- ISO language mismatch: If you download a Windows 11 ISO in a different language than your current installation, Setup may skip the “keep apps and settings” option and force a data-only or clean install, even when using the registry bypass.
- Update entitlement warnings: During Setup, you’ll see a dialog stating that your PC doesn’t meet minimum requirements and may not be entitled to receive updates. This is expected. Click Accept to continue. Microsoft hasn’t clarified whether unsupported installs will actually be blocked from security updates long-term.
- Cumulative update instability: Some users report that monthly cumulative updates or annual feature updates fail to install or cause boot loops on unsupported hardware. If this happens, you may need to reinstall Windows 10 or do a clean Windows 11 install using Rufus-modified media.
Advanced Usage and Limitations of the Rufus USB Bypass Method

Rufus is mandatory when your PC has no TPM, when firmware settings are locked (common on OEM laptops), or when your motherboard uses legacy BIOS with no UEFI support. The Rufus method modifies the Windows 11 installation files before you write them to USB, removing or altering the compatibility checks that normally block unsupported hardware. As of October 2024, Microsoft changed how the installer validates hardware, so you must use Rufus version 4.6 or later. Earlier versions won’t bypass the checks.
When Rufus creates the modified USB, it removes or replaces the Appraiserres.dll file in the Sources folder, which is responsible for hardware validation. Some advanced users manually delete or replace this file on an existing USB or mounted ISO, but Rufus automates the process and also applies registry-like tweaks to the installer environment. After creating the USB, you should run Setup.exe from the USB drive while still inside your current Windows installation, not boot to the USB. Booting to USB and running a clean install will still enforce TPM and Secure Boot checks unless you also apply registry edits during the installation’s initial setup phase.
Edge cases include broken UEFI bootloaders, ISO file mismatches, and USB drives that won’t appear in boot menus. If your PC’s boot menu doesn’t show the USB, check your firmware’s boot order and disable Fast Boot or Fast Startup in both Windows and firmware. If Rufus fails to create the installer or the USB shows only a Rufus icon, re-download the Windows 11 ISO and restart Rufus. If the installer crashes with “An unsupported operation was attempted” when using a 24H2 ISO, choose “Change how setup downloads updates” at the start of Setup and select “Not right now.” This prevents the installer from fetching updated compatibility-check modules that re-enable blocks.
Rufus USB bypass: advanced troubleshooting scenarios
- USB not appearing in boot menu: Enter firmware setup, set USB as first boot priority, disable Secure Boot temporarily, and try different USB ports (prefer USB 2.0 ports for maximum compatibility).
- Rufus fails to write ISO: Make sure the USB drive is at least 16 GB and formatted (Rufus will reformat it). If Rufus returns an error, try a different USB drive or download Rufus from the official site instead of using a cached copy.
- Installer rejects hardware during clean install: If you boot to the USB and attempt a clean install, you must apply the registry edit manually during installation. Press Shift + F10 at the first setup screen to open Command Prompt, run regedit, go to HKEYLOCALMACHINE\SYSTEM\Setup, create the MoSetup key and AllowUpgradesWithUnsupportedTPMOrCPU DWORD, set to 1, close everything, and continue Setup.
- Revoked bootloader error: Microsoft occasionally revokes older UEFI bootloader signatures. Re-download the Windows 11 ISO and recreate the USB with the latest Rufus version.
- Installation succeeds but updates fail: Some users report that monthly cumulative updates refuse to install on PCs with bypassed checks. Monitor Windows Update for failures and be prepared to reinstall or switch back to Windows 10.
- Fast Boot interference: Windows Fast Startup or firmware Fast Boot can prevent the USB from appearing or cause boot loops. Disable both before creating or booting from the USB.
- Old CPUs still fail: CPUs lacking SSE4.2 or PopCnt will crash during or after installation regardless of Rufus modifications. This is a hard CPU instruction requirement, not a software check.
| Method | Difficulty | What It Bypasses |
|---|---|---|
| Registry Bypass | Easy (single registry edit, run Setup.exe) | Unsupported CPU, TPM 2.0 requirement (accepts TPM 1.2) |
| Rufus USB | Medium (requires USB creation, firmware boot configuration) | TPM 2.0, Secure Boot, RAM requirement, unsupported CPU (if hardware supports SSE4.2/PopCnt) |
| Manual File Replacement | Hard (requires ISO editing, manual registry edits during install) | Same as Rufus, but fully manual; used when Rufus fails or for advanced control |
Choosing Between In-Place Upgrade and Clean Install on Unsupported PCs
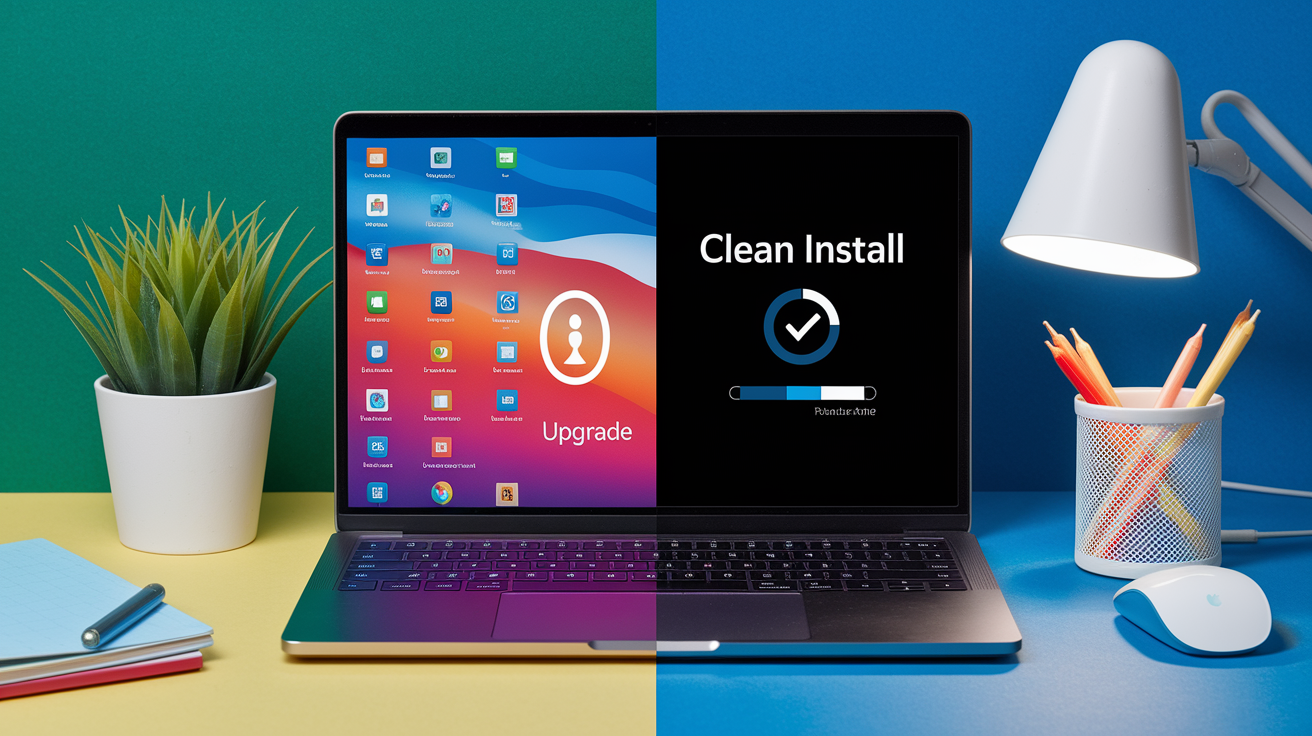
When you run Setup.exe from the Windows 11 ISO or USB, the installation wizard offers three choices: Full Upgrade (keep apps, settings, and files), Keep Data Only (keep files, remove apps and settings), or Clean Install (remove everything). Full Upgrade is easiest because you keep your programs and configuration, but it’s only available if the ISO language matches your current Windows language. If you downloaded a different-language ISO by mistake, Setup will skip the Full Upgrade option and only offer the other two.
Clean Install is faster and leaves no leftover files from Windows 10, but you’ll need to reinstall all your apps and restore your personal files from a backup. Clean installs still require TPM and Secure Boot support unless you use the Rufus method or apply the registry edit manually during installation. If your hardware has TPM 1.2 and UEFI, the registry bypass lets you do a Full Upgrade without booting from USB. If you have no TPM or legacy BIOS, you must use Rufus-modified media and can pick any install type, but Clean Install is often more reliable in those cases.
- Full Upgrade: Fastest, preserves apps and settings, requires ISO language match and functional TPM 1.2 or higher (with registry bypass) or Rufus-modified installer.
- Keep Data Only: Faster than clean install, keeps personal files in Windows.old folder, removes apps and settings, still requires TPM/UEFI unless using Rufus.
- Clean Install: Slowest, wipes drive and requires reinstalling apps and restoring data, most reliable on problematic hardware, bypasses some compatibility checks if using Rufus or manual registry edits during setup.
Troubleshooting Windows 11 Installation Errors on Unsupported PCs

Several errors appear frequently during unsupported installs. “This PC can’t run Windows 11” or “Compatible TPM cannot be found” means you haven’t applied the registry bypass or your PC lacks TPM entirely. “An unsupported operation was attempted” typically shows up when using the Windows 11 version 24H2 ISO and Setup tries to download updated compatibility modules. “This PC doesn’t meet the minimum system requirements” appears as a final warning before upgrade and is expected. Click Accept to continue.
Revoked bootloader errors or “Windows cannot be installed” messages during a clean install from USB usually mean the ISO is outdated or the bootloader signature was revoked by Microsoft. Re-download the ISO from the official Windows 11 download page and recreate your USB with Rufus 4.6 or later. If the USB won’t boot at all, check your firmware boot order, disable Secure Boot temporarily, and make sure the USB was created for the correct boot mode (UEFI or Legacy). Some firmware requires manually selecting the USB device from a one-time boot menu (F12, F10, F8, Esc, or another key depending on manufacturer).
If Setup succeeds but Windows won’t boot afterward, you may have a GPT/MBR mismatch. Run Msinfo32 in your old Windows installation to confirm BIOS Mode is UEFI. If it’s still Legacy after you thought you converted, you either didn’t complete the MBR2GPT process or didn’t switch firmware to UEFI mode. For deeper diagnostics, Microsoft’s SetupDiag tool can parse Setup logs and identify why an installation failed. Download SetupDiag, run it, and check the output file for specific error codes and remediation steps.
- “Compatible TPM cannot be found”: Apply the registry bypass before running Setup.exe, or use the Rufus method if you have no TPM.
- “An unsupported operation was attempted” (24H2 ISOs): At the start of Setup, click “Change how setup downloads updates” and select “Not right now.” This prevents fetching updated compatibility-check modules.
- USB not appearing in boot menu: Enter firmware, set USB as first priority, disable Fast Boot, switch USB ports, or hold a device-specific boot-selection key (F12, Esc, F10) during startup.
- Wrong-language ISO removes Full Upgrade option: Download the correct-language ISO from Microsoft’s site (match your current Windows display language).
- Bootloader errors or crashes during clean install: Re-download the Windows 11 ISO, use Rufus 4.6+, disable Secure Boot, and make sure firmware is set to UEFI if your hardware supports it.
Understanding the Risks of Installing Windows 11 on Unsupported Hardware

Microsoft’s official stance is that unsupported PCs may not receive updates and could experience instability or security vulnerabilities. When you bypass hardware checks, a warning dialog appears during Setup stating your device doesn’t meet minimum requirements and may not be entitled to receive updates. This isn’t an error, but it is a legal and technical disclaimer. Microsoft hasn’t officially blocked updates to unsupported installs as of early 2025, but the company reserves the right to do so in future cumulative or feature updates.
Security is reduced on systems that bypass TPM 2.0 and Secure Boot. TPM provides hardware-based encryption key storage and protects against certain firmware attacks. Secure Boot prevents unauthorized or malicious code from running during startup. Without these, your PC is more vulnerable to rootkits, firmware-level malware, and physical-access attacks. Performance may also suffer on older CPUs, especially during Windows updates or when running modern apps designed for newer instruction sets. Systems with CPUs that lack SSE4.2 or PopCnt can’t run Windows 11 version 24H2 at all, even with bypass methods, and will crash or fail to boot.
- Update and support uncertainty: Microsoft may revoke update eligibility for unsupported installs at any time, leaving your system without security patches.
- Reduced security posture: Missing TPM and Secure Boot weakens encryption, credential protection, and boot-time defenses against malware.
- Potential instability: Older hardware may experience blue screens, driver conflicts, or application crashes, especially after cumulative or feature updates. Be prepared to reinstall Windows 10 if Windows 11 becomes unusable.
Final Words
in the action, we showed the quickest bypasses: the registry edit and the Rufus USB path. You also learned how to check compatibility, enable TPM and Secure Boot, convert MBR to GPT, choose upgrade versus clean install, and troubleshoot common errors. We covered risks and what can fail so you know what to watch for.
If you want a single takeaway, pick the method that matches your hardware and back up first. For step-by-step help on how to install windows 11 on unsupported pc, you’ve got clear options and a safe path forward.
FAQ
Q: Can you install Windows 11 on an unsupported PC? / Can I install Windows 11 on an old PC?
A: You can install Windows 11 on some unsupported or older PCs using bypass methods (registry or Rufus), but expect setup warnings, possible instability, blocked updates, and confirm your CPU supports required instruction sets first.
Q: What app can I use to install Windows 11 on an unsupported PC?
A: The app you can use is Rufus (version 4.6+), which creates a USB installer that can remove TPM/Secure Boot checks; alternatively run Setup.exe in Windows or use the registry bypass for upgrades.
Q: How do I update to 25H2 on unsupported hardware?
A: Updating to 25H2 on unsupported hardware uses the registry bypass (create DWORD AllowUpgradesWithUnsupportedTPMOrCPU at HKEYLOCALMACHINE\SYSTEM\Setup\MoSetup) or a Rufus USB installer; back up data and expect warnings.