


Sick of Windows 11 updates freezing, failing, or leaving your apps broken?
You’re not alone.
This guide shows fast, safe fixes that solve most common update failures—stuck at 0%, “Preparing to install,” error 0x80070005, or post-update driver trouble.
We’ll walk you step-by-step: fully restart, use an admin account, pause antivirus and OneDrive, reset the update cache, and run quick repairs (SFC and DISM).
Do them in order and you’ll often fix updates in 15–60 minutes without reinstalling Windows.
If that fails, I’ll show deeper troubleshooting next.
Quick Fixes for Common Windows 11 Update Issues (Immediate Troubleshooting)

Windows 11 update problems come in all shapes. You’ve got updates stuck at 0%, frozen on “Preparing to install,” or spinning in endless configuration loops. Some just fail with error codes like 0x80070005. Others let you through, then hit you with “Access Denied” when you try opening files or apps. Installation failures, downloads that restart over and over, apps crashing right after an update… they’re all pointing at the same mess underneath.
Updates break for a few common reasons. File permissions get scrambled during install, locking Windows out of folders it needs to reach. Antivirus and OneDrive can hold files open, blocking the updater from swapping them out. System file corruption, leftover fragments from previous botched updates or disk errors, stops new installs cold. User account control settings sometimes prevent the installer from writing to protected folders, even when you’re already logged in as admin.
Try these quick steps in order before you dig deeper:
- Fully shut down and restart. Not sleep or hibernate. Hit Restart and wait for a complete cold boot.
- Log in as an Administrator. Check by opening Settings → Accounts → Your info. If it says “Standard user,” switch to an admin account or get someone with admin rights to log in.
- Temporarily disable third-party antivirus. Open the app and find “Turn off protection” or “Pause protection.” Pick 1 hour.
- Pause OneDrive sync. Right-click the OneDrive cloud icon in the system tray, choose Settings → Account → Unlink this PC, then retry the update.
- Boot into Safe Mode. Hold Shift while clicking Restart. Choose Troubleshoot → Advanced options → Startup Settings → Restart. Press 4 or F4 for Safe Mode. Try installing the update from there.
- Run System File Checker. Open Command Prompt as administrator and type
sfc /scannow. Wait 10 to 20 minutes. If it finds and fixes errors, restart and test again. - Run DISM repair. In the same Command Prompt, type
DISM /Online /Cleanup-Image /RestoreHealth. This takes 15 to 30 minutes and repairs the update component database.
If these don’t clear the problem, you’re probably looking at deeper file corruption, permission damage, or conflicts with drivers and third-party software. At that point, move on to command-line permission repairs, update rollback steps, or boot recovery tools.
Diagnosing Windows 11 Update Problems and Failure Points

Start by checking Windows Update History to see exactly which update failed and when. Open Settings → Windows Update → Update history. Failed updates show up with a red X or “Failed to install” label next to the KB number. Click the KB to see the error code. You can also open Event Viewer (type “Event Viewer” in the Start menu), expand Windows Logs → System, and filter for “Windows Update” events around the failure time. For detailed logs, run Get-WindowsUpdateLog in PowerShell (run as admin). This creates a readable log file on your desktop showing each step the updater attempted.
If updates hang during “Checking for updates” or “Configuring,” check for pending.xml corruption and compatibility blocks. Open File Explorer and go to C:\Windows\WinSxS\, then look for a file named pending.xml. If it’s very large (over 20 MB) or won’t delete, it can lock the updater in a loop. Compatibility issues show up differently. If your PC lacks TPM 2.0 or Secure Boot is off, feature updates to newer Windows 11 versions will fail silently or display a compatibility error. Check by typing “msinfo32” in Start, then look for “Secure Boot State” (should say “On”) and “TPM Version” (should be 2.0).
| Issue | How to Identify It | Tools Needed |
|---|---|---|
| Stuck update loop | Update shows “Preparing” or 0% for 30+ minutes; reboot brings same screen | Event Viewer, Update History, WinRE uninstall |
| Compatibility block | Update fails with compatibility message; TPM/Secure Boot missing or off | msinfo32, BIOS/UEFI settings check |
| File corruption | SFC or DISM reports “Windows Resource Protection found corrupt files”; error 0x80073712 | SFC, DISM, CHKDSK |
Fixing Windows 11 Update Installation Failures Step-by-Step

Update installation failures usually happen when the Windows Update service cache gets corrupted, downloads are interrupted, or leftover files from prior attempts block the new install. The SoftwareDistribution folder (where updates are downloaded and staged) and the Catroot2 folder (which stores update signatures) are common failure points. Renaming these folders forces Windows to rebuild them from scratch, clearing stuck downloads and broken metadata.
Follow these steps to reset the update components and retry installation:
- Open Command Prompt as administrator. Type “cmd” in Start, right-click Command Prompt, choose “Run as administrator.”
- Stop the update services by typing these commands one at a time, pressing Enter after each:
net stop wuauserv
net stop bits - Rename the broken folders:
rename %windir%\SoftwareDistribution SoftwareDistribution.old
rename %windir%\system32\catroot2 catroot2.old - Restart the services:
net start bits
net start wuauserv - Close Command Prompt, then go to Settings → Windows Update and click “Check for updates.” Windows will re-download the update into the new, clean folders.
Run system file repairs alongside the cache reset. In the same admin Command Prompt, type sfc /scannow and wait 10 to 30 minutes. If SFC finds corruption, it’ll try to fix it. Follow up with DISM /Online /Cleanup-Image /RestoreHealth, which takes another 15 to 30 minutes and repairs the component store that SFC relies on. After both finish, reboot and retry the update.
If disk errors are blocking the install, run Check Disk. Type chkdsk C: /f /r in the admin Command Prompt. You’ll see a message that the scan is scheduled for the next restart. Type “Y” and press Enter, then restart your PC. CHKDSK can take 30 minutes to 2+ hours depending on your drive size and condition, but it repairs file system damage that prevents updates from writing correctly.
If the update still fails after these steps, you’re probably dealing with deeper corruption or a hardware compatibility conflict. At that point, consider uninstalling the failing update (if it partially installed), rolling back to a restore point, or preparing for a repair install using Windows 11 installation media to keep your files and apps while rebuilding system components.
Understanding Windows 11 Update Error Codes and What They Mean

Windows 11 shows error codes when an update fails, and each code points to a specific failure reason. Knowing what the code means helps you skip unnecessary fixes and go straight to the right repair. Most codes indicate missing files, download interruptions, permission problems, or conflicts with running software.
Here are the most common Windows 11 update error codes and what they tell you:
0x80070005 is Access denied. The update installer can’t write to a folder or registry key, usually because of permission issues, antivirus blocking, or a user account control conflict. Fix by running updates in Safe Mode, disabling antivirus, or using takeown and icacls commands to reset folder permissions.
0x80070020 means File in use. Another program or service is holding a file the updater needs to replace. Fix by closing all apps, disabling antivirus, stopping OneDrive sync, or rebooting into Safe Mode before retrying the update.
0x80070490 is Component store corruption. The CBS (Component-Based Servicing) database is damaged or has missing entries. Fix by running DISM /Online /Cleanup-Image /RestoreHealth followed by sfc /scannow.
0x80240034 points to Download incomplete or corrupted. The update file didn’t download fully or was modified during transfer. Fix by clearing the SoftwareDistribution cache (rename the folder as described earlier) and re-downloading.
0x80073712 means File required by Windows is missing or damaged. Similar to 0x80070490 but often affects individual update files rather than the whole component store. Fix with DISM and SFC, then retry the update.
0x800F0922 can mean Not enough disk space, network error, or device not connected to Microsoft servers. Fix by freeing up at least 10 GB on your C: drive, checking your internet connection, and confirming Windows Update services are running.
Addressing Windows 11 Driver Conflicts After Updates

Driver conflicts are one of the most common reasons devices stop working right after a Windows 11 update. Updates sometimes install generic Microsoft drivers that replace OEM drivers, or new drivers arrive that aren’t fully compatible with your hardware. You’ll notice problems with graphics (screen flickering, low resolution, crashes), network adapters (no Wi-Fi or Ethernet), audio devices (no sound, distorted playback), or USB peripherals that worked fine before the update.
Open Device Manager to spot conflicts. Type “Device Manager” in Start. Look for any device with a yellow triangle warning icon. Right-click the device and choose Properties, then check the “Device status” box for error messages. Common driver symptoms after updates include:
Display goes black or stuck at low resolution after reboot. Wi-Fi or Ethernet adapter missing from network settings. Audio devices show “No output device is installed” or crackling sound. USB keyboard or mouse stops responding in Windows (but works in BIOS). Printer or scanner not recognized after the update.
If a driver updated around the same time as the symptom appeared, roll it back. In Device Manager, right-click the device → Properties → Driver tab → Roll Back Driver. If the button is grayed out, the previous driver isn’t saved. In that case, uninstall the device (right-click → Uninstall device, check “Delete the driver software for this device”), restart, and Windows will reinstall a fresh driver. For critical devices like graphics or network adapters, download the latest driver from the manufacturer’s website before uninstalling, so you’ve got a backup ready to install manually.
If rolling back or reinstalling doesn’t fix it, visit your PC or motherboard manufacturer’s support page and download the specific driver for your model and Windows 11 build. Avoid third-party driver updater tools. They often install generic or outdated drivers that cause more conflicts.
Fixing Windows 11 Boot Failures After Updates

The most severe Windows 11 update issue is a boot failure that leaves your PC stuck on a black screen with the message “Your device ran into a problem and needs to restart. You can restart.” This error, often paired with the code UNMOUNTABLEBOOTVOLUME, makes Windows completely unusable. It showed up most recently after the January 2026 security update, primarily affecting PCs running Windows 11 versions 24H2 and 25H2. Some users also report repeated blue screens or automatic repair loops that never finish.
Boot failures happen when an update damages boot configuration files, corrupts the file system, or replaces a critical driver with an incompatible version. The January 2026 bug reportedly broke boot volume access, preventing Windows from mounting the system drive during startup. Because the PC can’t boot into Windows, you have to fix it from the Windows Recovery Environment (WinRE).
Here’s how to recover from an update-caused boot failure:
- Force your PC into WinRE by holding the power button to shut down, then turning it on. Repeat this 2 to 3 times. On the third failed boot, Windows should automatically load the recovery screen.
- If WinRE doesn’t load automatically, create a Windows 11 USB recovery drive on another PC (download the Media Creation Tool from Microsoft’s site), boot from the USB, and choose “Repair your computer.”
- In WinRE, choose Troubleshoot → Advanced options → Uninstall Updates.
- Select “Uninstall latest quality update” if a monthly security patch caused the issue, or “Uninstall latest feature update” if you recently upgraded to a new Windows 11 version. Follow the prompts and restart.
- If uninstalling the update doesn’t work, try System Restore from the same Advanced options menu. Pick a restore point from before the update installed.
After the PC boots successfully, delay or block the problematic update until Microsoft releases a fix. Go to Settings → Windows Update → Pause updates, and choose the longest delay available (up to 5 weeks for most users). Check Windows Update history periodically to see if a newer patch resolves the issue, then resume updates.
Rolling Back or Uninstalling a Problematic Windows 11 Update Safely

If an update causes crashes, performance problems, or device failures, you can uninstall it to return your system to the previous working state. Windows keeps recent updates for a short time so you can remove them without losing your files or apps. The safest rollback methods depend on whether the update is a small monthly patch or a large feature update.
To uninstall a monthly security or quality update, open Settings → Windows Update → Update history → Uninstall updates. You’ll see a list of installed updates with their KB numbers and install dates. Find the update that matches the date your problem started, click it, and choose “Uninstall.” Restart when prompted. The PC will revert to the previous patch level.
You can also uninstall updates from the command line if the Settings app won’t open. Open Command Prompt as administrator and type:
wusa /uninstall /kb:<KB number>
Replace <KB number> with the actual update ID (for example, wusa /uninstall /kb:5034848). This method works even in Safe Mode.
For feature updates (major version changes like 23H2 to 24H2), you’ve got about 10 days to roll back. After that, Windows deletes the old installation files to free up disk space. To roll back within the 10-day window, go to Settings → System → Recovery → Go back. Follow the on-screen steps. The rollback takes 30 to 60 minutes and keeps your personal files but removes apps installed after the update.
If the 10-day window has passed or the “Go back” button is missing, use a System Restore point instead. Boot into WinRE (hold Shift while clicking Restart, or use a recovery USB), choose Troubleshoot → Advanced options → System Restore, pick a restore point dated before the update, and let it run. System Restore can take 20 to 40 minutes and undoes system changes without touching your documents, but recently installed programs may need reinstalling.
Preventing Future Windows 11 Update Issues

Preventing update issues is faster and less stressful than fixing them. A few simple maintenance steps reduce the chance of corrupted installs, permission errors, and driver conflicts. The goal is to give Windows a clean environment before each update and keep a safety net in case something goes wrong.
Create a System Restore point every week and always before a major update. Type “Create a restore point” in Start, click the result, choose your C: drive, click “Create,” and give it a name like “Pre-update backup Oct 2025.” If an update breaks something, you can roll back to this point in minutes. Windows is supposed to create restore points automatically before big updates, but manual points guarantee you’ve got one when you need it.
Clear out disk space so updates have room to install. Windows needs at least 10 to 20 GB free on the C: drive for feature updates. Run Disk Cleanup (type “Disk Cleanup” in Start), check “Temporary files,” “Windows Update Cleanup,” and “Previous Windows installations,” then click OK. You can also enable Storage Sense in Settings → System → Storage → Storage Sense, which automatically deletes temp files and old update backups.
Defer feature updates to avoid early bugs. Go to Settings → Windows Update → Advanced options → Choose when updates are installed (or “Pause updates” on some builds). You can delay feature updates for up to 365 days on Pro/Enterprise editions, or pause all updates for up to 5 weeks on Home edition. Delaying 7 to 30 days gives Microsoft time to catch and fix problems that slip through initial testing.
Keep drivers updated from official OEM sources, not generic Windows Update drivers. Visit your PC manufacturer’s support page once a month, download the latest chipset, graphics, and network drivers for your exact model, and install them manually. This prevents Windows from auto-installing incompatible or generic drivers during updates. If a driver update from Windows Update causes issues, roll it back in Device Manager and mark it to prevent reinstall.
Windows 11 Update Problems From Recent Microsoft Patches (2025 to 2026 Context)

The last year brought several serious Windows 11 update bugs that affected millions of users. These incidents show how even routine security patches can break core functionality, and they help you recognize patterns when your own system hits a problem. Knowing what went wrong before makes troubleshooting faster.
In January 2026, a security update for Windows 11 versions 24H2 and 25H2 caused some PCs to become completely unbootable. Affected devices showed a black screen with the message “Your device ran into a problem and needs to restart,” often paired with the error code UNMOUNTABLEBOOTVOLUME. The only reported workaround was to boot into the Windows Recovery Environment and uninstall the January 2026 patch. Microsoft hadn’t released an emergency fix for this catastrophic issue at the time it was widely reported, leaving users to manually recover each affected machine. The bug ranked among the most severe recent update failures because it made systems unusable until the patch was removed.
Earlier in 2025, other patches caused different but equally frustrating issues. The August 2025 security update broke Windows Recovery Environment tools on both Windows 10 and Windows 11, preventing users from accessing Safe Mode, System Restore, and startup repair when they needed them most. In October 2025, another security update caused USB keyboards and mice to stop working inside WinRE, making command-line recovery nearly impossible without a PS/2 device. Both problems left users stuck when trying to fix unrelated update failures.
Even within January 2026, multiple bugs hit at once. Besides the boot failure, some PCs refused to shut down or enter hibernate mode after installing the update. Cloud-connected apps like Outlook, OneDrive, and Dropbox stopped syncing or crashed repeatedly, prompting Microsoft to release emergency fixes for those specific problems. The pattern across these incidents is clear. Updates tested on Microsoft’s diverse hardware lab don’t always behave the same way on hundreds of millions of real-world PC configurations, and high-severity bugs can slip through to general release. If your system shows new, unexplained behavior right after an update, check online communities and Microsoft’s Known Issues page to see if others report the same problem before spending hours troubleshooting.
How to Fix the Windows 11 “Access Denied” Update Bug
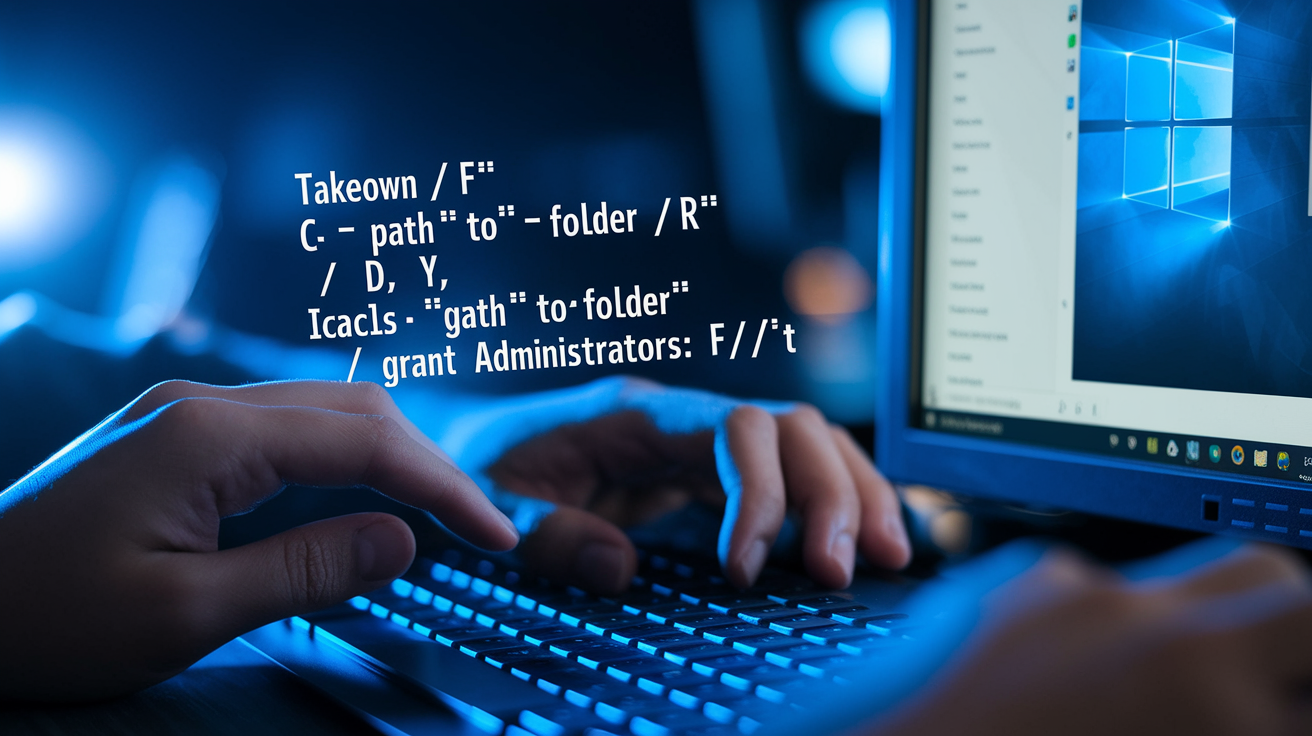
The “Access Denied” bug appears after some Windows 11 updates and prevents you from opening files, saving documents, launching apps, or accessing certain folders. You might see dialogs that say “You don’t have permission to access this folder” or “Access is denied” even though you’re logged in as an administrator. Some apps crash on startup, and system tools refuse to run. The underlying cause is damaged NTFS file permissions or ownership records that the update corrupted or reset.
Start with Safe Mode to rule out third-party interference. Hold Shift while clicking Restart, choose Troubleshoot → Advanced options → Startup Settings → Restart, then press 4 for Safe Mode. Try accessing the affected files or apps. If they work in Safe Mode, the problem is probably antivirus software or a background service locking files, not true permission damage. Disable your antivirus temporarily and test again in normal mode.
If Safe Mode doesn’t help, you need to repair NTFS permissions manually. Open Command Prompt as administrator (type “cmd” in Start, right-click, choose “Run as administrator”). You’ll use two commands: takeown to reclaim ownership of the folder, and icacls to grant your user account full control. Replace "C:\Path\To\Folder" in the examples below with the exact path to the folder or file causing the error (for example, "C:\Users\YourName\Documents").
Use these exact commands in order:
- Take ownership of the folder and all subfolders:
takeown /f "C:\Path\To\Folder" /r /d y - Grant Administrators group full control:
icacls "C:\Path\To\Folder" /grant Administrators:F /T - Grant your user account explicit permissions (replace
YourUsernamewith your actual account name):
icacls "C:\Path\To\Folder" /grant YourUsername:F /T - Reset inherited permissions from the parent folder:
icacls "C:\Path\To\Folder" /reset /T - If errors persist, run SFC and DISM to repair system file corruption that might be blocking permission changes:
sfc /scannow
DISM /Online /Cleanup-Image /RestoreHealth
After running these commands, reboot and test access. If specific apps still fail, try creating a new Administrator user account (Settings → Accounts → Family & other users → Add account) and log in there. If the new account works fine, the original profile has corruption that can’t be easily repaired. Export your files, then migrate to the new account or perform a repair install to rebuild the profile while keeping your data.
Final Words
Stuck at 0% or seeing “Access Denied”? This guide jumped right into quick fixes like rebooting, Safe Mode, disabling antivirus/OneDrive, and running SFC/DISM.
We also covered diagnosing failures, reading error codes, checking drivers, recovering from boot loops, and safely rolling back bad updates.
If quick steps don’t work, move to the deeper repair steps or use WinRE uninstall before a full reinstall.
Use restore points, free up disk space, and pause feature updates. With these tips, windows 11 update issues should be temporary — you’ll be back up and running soon.
FAQ
Q: Is there a problem with the latest Windows 11 update?
A: The latest Windows 11 update has reported issues like boot failures, update loops, “Access Denied” and error 0x80070005; Microsoft has released fixes for some problems while rollouts remain phased and monitored.
Q: How to fix Windows 11 update problem?
A: To fix Windows 11 update problems, reboot, sign in as an admin, try Safe Mode, temporarily disable antivirus/OneDrive, run SFC and DISM scans, restart Windows Update services, then retry the update.
Q: Why is Windows 11 not getting 25H2?
A: Windows 11 may not get 25H2 due to phased rollouts, hardware or driver compatibility holds, TPM/Secure Boot requirements, or update blocks from file corruption or pending.xml issues—check Update History and compatibility settings.
Q: Is 24H2 a stable Windows 11 version?
A: The 24H2 Windows 11 release is generally stable for most users, though some reported driver and recovery-tool bugs; create a restore point, back up data, and delay feature updates if you want extra caution.