


Ever set up a mesh WiFi system only to find dead spots in rooms that should have perfect coverage? Most mesh extender problems come from rushed installation, not faulty equipment. This guide walks you through mesh WiFi extender setup from start to finish, including the placement mistakes that kill your signal and the simple configuration steps that actually matter. You’ll go from opening the box to full-home coverage in under 30 minutes, with no tech background needed.
Prerequisites and Equipment Needed Before Starting Your Mesh Setup

Checking your prerequisites before starting saves you from mid-installation frustration and the need to backtrack. Most mesh setup failures happen because people skip this step.
Here’s what you need before you begin:
Active internet service from your ISP. Your internet needs to be working through your current modem.
Compatible modem. Check your mesh system’s compatibility list to verify your modem model works. Most do, but verify anyway.
Smartphone or tablet. You’ll need iOS 12 or newer, or Android 8.0 or newer for the setup app.
Ethernet cable. Usually included in the box, but check to make sure it’s there.
Available power outlets. You need outlets near your modem and in the rooms where you’ll place satellite nodes.
Downloaded manufacturer app. Install this before you start, not during setup when you’re juggling equipment.
Unplugged modem. Pull the power cable from your modem before you begin. This lets your mesh system get the proper IP address.
Device compatibility matters more than you’d think. If your phone’s operating system is outdated, the mesh app might not install or might be missing features. Most manufacturers require iOS 12 or Android 8.0 as minimums, though newer systems may need iOS 14 or Android 10. Your home devices should support WiFi 5 (802.11ac) at minimum for decent performance, though older WiFi 4 devices will still connect.
Before moving forward, double check that you’ve got everything on this list. Missing just one item means stopping mid-setup to hunt for cables or wait for app downloads.
Complete Installation Steps for Mesh WiFi Extender Configuration

This section walks you through the complete installation from opening the box to your first successful connection. Plan for 15 to 30 minutes depending on how many satellite nodes you’re setting up.
Here’s the step by step process:
Unplug your modem. Pull the power cable and wait 30 seconds. This clears the modem’s memory so it recognizes the new mesh system.
Connect the base unit to your modem. Use the ethernet cable to connect your modem’s LAN port to the mesh router’s WAN port, usually marked in a different color.
Power on the base unit. Plug it into the wall outlet and wait 2 minutes for it to boot up completely.
Open the mobile app and create an account. Enter your email, create an admin password (write this down), and verify your account if required.
Follow the app’s setup wizard. Tap “Add New System” or similar option, then scan the QR code on the bottom of your base unit.
Name your network and set your password. Choose a network name (SSID) and create a strong WiFi password.
Add satellite nodes one at a time. Place the first satellite node within two rooms of the base unit (about 30 feet maximum), plug it in, and wait for the LED to start flashing red.
Press and hold the WPS button on your base unit for six seconds. You should see the LED start flashing green.
Press and hold the WPS button on the satellite node for six seconds. Both units will flash green while they pair.
Wait for solid green LEDs on both units. This confirms successful pairing and can take 2 to 5 minutes.
| LED Color/Pattern | Meaning | Action Required |
|---|---|---|
| Flashing red | Ready to pair | Press WPS button to begin pairing |
| Flashing green | Pairing in progress | Wait 2 to 5 minutes, do not unplug |
| Solid green | Successful connection | None, node is working properly |
| Solid red | Connection failure | Move node closer to router or previous node, try pairing again |
| Flashing amber | Firmware updating | Wait for update to complete, do not unplug |
| No light | Power issue | Check outlet and power cable connections |
LED indicators vary slightly between manufacturers, so check your quick start guide if your lights show different patterns than what’s listed here.
Once all your nodes show solid green lights and appear in the app, you’ve got one network name and one password covering your entire home. Your devices will automatically connect to the strongest signal as you move between rooms without you needing to manually switch networks like you would with traditional extenders.
Now that installation is complete, you’re ready to optimize placement for the best coverage.
Strategic Mesh Node Placement for Optimal Signal Coverage

Where you place your mesh nodes determines whether you get wall to wall coverage or frustrating dead spots that shouldn’t exist. Mesh systems distribute signal differently than traditional routers because each node talks to the others, creating overlapping coverage zones instead of a single broadcast point.
Follow these placement rules:
Keep nodes no more than 30 feet apart. Two rooms maximum between each node or you risk weak connections.
Elevate nodes off the floor. Place them on bookshelves, counters, or tables at least 3 feet up.
Avoid closets, cabinets, and enclosed spaces. Nodes need open air around them to broadcast effectively.
Position away from metal objects and appliances. Refrigerators, filing cabinets, and microwaves interfere with WiFi signals.
Keep nodes in open areas of rooms. Corner placement reduces coverage in the opposite direction.
Maintain line of sight when possible. If you can see from one node to another, the signal is stronger.
For multi-story homes, vertical distance matters as much as horizontal distance. If you place a satellite on the second floor directly above the main router on the first floor, keep them within 30 feet vertically. Signal passes through one floor reasonably well but struggles through two. If your basement node is 40 feet below your second floor node, they won’t connect properly.
| Room Type | Recommended Node Placement | Avoid |
|---|---|---|
| Living room | TV stand or bookshelf near center of room | Behind TV, inside entertainment center |
| Bedroom | Dresser or nightstand with open space around it | Inside closet, under bed |
| Basement | Top of storage shelf in central area | Utility room with water heater and furnace |
| Garage | Wall mounted shelf away from metal door | Workbench surrounded by tools |
After positioning your nodes, use the signal strength tool in your mesh app to verify each satellite is getting a strong connection to the router or the previous node. Most apps show “Good,” “Fair,” or “Weak” ratings. If you see “Weak,” move that node closer to the previous one by about 10 feet and test again.
Mobile App Configuration and Network Settings Management

After your hardware is installed and positioned, you need to configure your network settings through the mobile app for optimal performance and security.
Start by customizing your network name (SSID) to something you’ll recognize but that doesn’t identify you personally. “Smith Family WiFi” tells everyone whose network it is, while “NetworkName_5G” is generic but functional. Your network password needs to be strong. At least 12 characters with uppercase, lowercase, numbers, and symbols. The app will typically require WPA3 encryption by default, which is what you want for security.
Key settings to configure during initial setup:
Network name visibility. Keep your SSID visible unless you have a specific security reason to hide it. Hidden networks actually cause more connection problems.
Password strength requirements. Don’t skip this to use a simple password because you think it’s easier to remember.
Automatic band steering versus band splitting. Leave on automatic band steering for most situations.
Guest network creation. Set this up now even if you don’t need it immediately.
Firmware auto update preferences. Enable automatic updates during nighttime hours when you’re not using the internet heavily.
Most mesh systems use automatic band steering, which means your 2.4GHz, 5GHz, and 6GHz bands (if your system has all three) appear as a single network name. Your devices automatically connect to the best band for their current situation. Some systems let you split bands into separate network names like “YourNetwork2.4G” and “YourNetwork5G,” which gives you manual control but means you’re constantly switching networks. Unless you have a specific device that only works on 2.4GHz and won’t connect properly with band steering, stick with the automatic option.
For settings not available in the mobile app, most mesh systems offer a web interface you can access by typing the router’s IP address (usually 192.168.1.1 or similar) into a browser on a connected device. The web interface typically has advanced firewall rules, port forwarding options, and detailed device logs.
Ethernet Backhaul vs Wireless Backhaul Configuration Options

Backhaul is how your satellite nodes talk to your main router to move data through your mesh system.
Wireless backhaul uses your WiFi bands to connect nodes to each other. Your mesh system automatically uses the 2.4GHz and 5GHz bands to relay data from satellite nodes back to the main router. If you have a tri-band system, it dedicates an entire 5GHz or 6GHz band just for backhaul communication, which keeps your device connections from competing with the node to node traffic. Setup is simple because there are no cables to run. You just plug in the satellite nodes where you need coverage.
Ethernet backhaul connects your nodes with physical network cables running through your walls or along baseboards. Data flows through the cables instead of through the air, which means faster speeds, lower latency, and zero interference from walls or other wireless signals. Security is tighter because someone would need physical access to your ethernet cables to intercept traffic. The tradeoff is that you need ethernet cables running to every node location, which means drilling holes or hiring an electrician if your home doesn’t already have ethernet drops in the right rooms.
When to choose each option:
Wireless backhaul. Renting your home, no existing ethernet infrastructure, moving nodes between rooms, prioritizing easy setup over maximum speed.
Wired backhaul. Gaming or 4K streaming priority, new home construction with pre-wired ethernet, maximum performance requirements, professional office setup.
Hybrid backhaul. Wire the nodes you can reach easily (basement, garage) and use wireless for upstairs rooms without cable runs.
| Backhaul Type | Pros | Cons | Best For |
|---|---|---|---|
| Wireless | Easy setup, no cables, works in any room, free to relocate nodes | Slower speeds, subject to interference, uses WiFi bandwidth | Renters, homes without ethernet, average internet usage |
| Wired (Ethernet) | Maximum speed, minimal latency, dedicated bandwidth, better security | Requires cable installation, permanent placement, harder to relocate | Gamers, streamers, home offices, new construction |
Many mesh systems support hybrid configurations where some nodes connect via ethernet and others use wireless backhaul. This works well when you can easily wire your basement and garage nodes but need wireless for second floor bedrooms.
Firmware Updates and Keeping Your Mesh System Current

Firmware updates fix security vulnerabilities, patch bugs that cause disconnections, improve performance, add new features, and maintain compatibility with the latest devices connecting to your network. Manufacturers release updates every few months, and critical security patches come out immediately when vulnerabilities are discovered.
Here’s how to check for and install updates:
Open your mesh system’s mobile app and log in with your admin credentials.
Navigate to system settings. Usually under a gear icon or “Settings” menu.
Look for “System Update,” “Firmware Update,” or similar option and tap it.
Review the update notes to see what’s changing. New features, bug fixes, security patches.
Tap “Update Now” or “Install Update.” Your nodes will update one at a time, starting with satellites and ending with the main router.
During updates, your internet stays connected because only one node updates at a time. The process usually takes 10 to 15 minutes per node. Your devices might briefly disconnect and reconnect as each node restarts, but you won’t lose internet access completely.
Enabling automatic firmware updates in your app settings means you’ll wake up to an already updated system rather than manually checking. Most systems schedule automatic updates between 2 AM and 4 AM when internet usage is lowest. The downside is you lose control over when updates happen, and occasionally an update introduces a new bug that wasn’t in the previous version. Still, the security benefits of automatic updates outweigh the minimal risk of a buggy update.
Even with automatic updates enabled, manually check for updates once a month. Sometimes automatic updates fail silently, or manufacturers release critical patches that don’t wait for the scheduled update window.
Testing Signal Strength and Verifying Mesh Network Performance

After setup, you need to verify your mesh system is actually delivering the coverage and speeds you expected.
Download the Ookla Speedtest app or use speedtest.net in a browser, then follow this testing procedure:
Test your baseline speed directly next to your modem with your device connected via ethernet if possible, or standing right next to the main mesh router. This shows your maximum available speed from your ISP.
Test within 5 feet of each mesh satellite node. You should see speeds close to your baseline, typically within 80 to 90%.
Test in rooms that previously had dead zones. These should now show usable speeds of at least 25 to 50 Mbps.
Test in the farthest corners of your home. Even at maximum distance between nodes, speeds should stay above 15 to 20 Mbps for basic browsing.
Walk between rooms while streaming video on your phone to test seamless handoff between nodes. The video should continue without buffering as you move.
Compare all results to your ISP’s advertised speeds. If you pay for 200 Mbps and your baseline test shows 180 to 200 Mbps, your system is working correctly.
Your mesh app includes testing tools beyond just speed tests. Look for built in signal strength meters that show how well each satellite connects to the main router. A “Good” or “Excellent” rating means proper placement. “Fair” suggests moving the node closer by 5 to 10 feet. Real time bandwidth usage per node shows which areas of your home use the most data. Connected device lists tell you exactly what’s connected to each node.
Acceptable performance benchmarks:
Speeds within 20% of baseline when standing near satellite nodes.
Complete coverage in all rooms without dropped connections.
Seamless roaming between nodes with less than 1 second of interruption.
Stable connections supporting 15 or more devices simultaneously.
If testing reveals weak spots where speeds drop below 10 Mbps or connections drop entirely, reposition the nearest node. Move it 10 feet closer to the main router or halfway between the main router and the weak spot location, then retest.
Common Mesh Extender Problems and Quick Troubleshooting Fixes

Setup issues and connectivity problems happen, but most have simple fixes that take less than five minutes.
| Problem | Likely Cause | Solution |
|---|---|---|
| Node won’t pair with router | Too far apart, WPS timeout | Move node within one room of router, reset both, try WPS pairing again within 2 minutes |
| Intermittent connection drops | Interference, weak placement | Move nodes away from microwaves and metal objects, reduce distance between nodes to 20 feet |
| Slower than expected speeds | Wireless backhaul overload, ISP throttling | Check baseline speed at modem, consider ethernet backhaul, reduce connected device count |
| Devices won’t connect to mesh network | Wrong password, device compatibility | Verify password is correct (case sensitive), check device supports WPA3 or enable WPA2 compatibility mode |
| Node LEDs showing error colors | Configuration failure, weak signal | Check LED meaning in manual, move node closer to router, power cycle the node |
| Mesh app won’t connect to system | Phone on wrong network, app outdated | Verify phone connected to mesh network, update app, restart phone |
Power cycling fixes about 60% of mesh system problems. Here’s the correct procedure: unplug all satellite nodes first and wait 30 seconds. Leave them unplugged. Then unplug your main mesh router and modem, wait 30 seconds, and plug in just the modem. Wait 2 minutes for the modem to fully boot up and establish an internet connection. Now plug in your main mesh router and wait another 2 minutes. Finally, plug in your satellite nodes one at a time with 1 minute intervals between each. This sequence ensures proper IP address assignment and connection establishment.
Factory reset is necessary when:
Connection failures persist after power cycling and repositioning.
You can’t access admin settings because you forgot your password.
You’re moving the system to a new home or location.
You’re selling or giving away the equipment.
Configuration errors have made the system unusable.
To factory reset your mesh system:
Locate the reset button on each node, usually a small recessed hole labeled “Reset.”
Use a paperclip or pin to press and hold the button for 10 to 15 seconds while the node is powered on.
Watch for LED confirmation. The light will flash rapidly or turn a specific color (check your manual) to confirm reset.
Reconfigure the entire system from scratch using the mobile app as if it’s brand new.
When basic troubleshooting doesn’t solve your problem, contact your manufacturer’s technical support. Have your model number, serial number, and a description of troubleshooting steps you’ve already tried ready when you call or chat.
Advanced Features: Guest Networks, QoS, and Device Prioritization
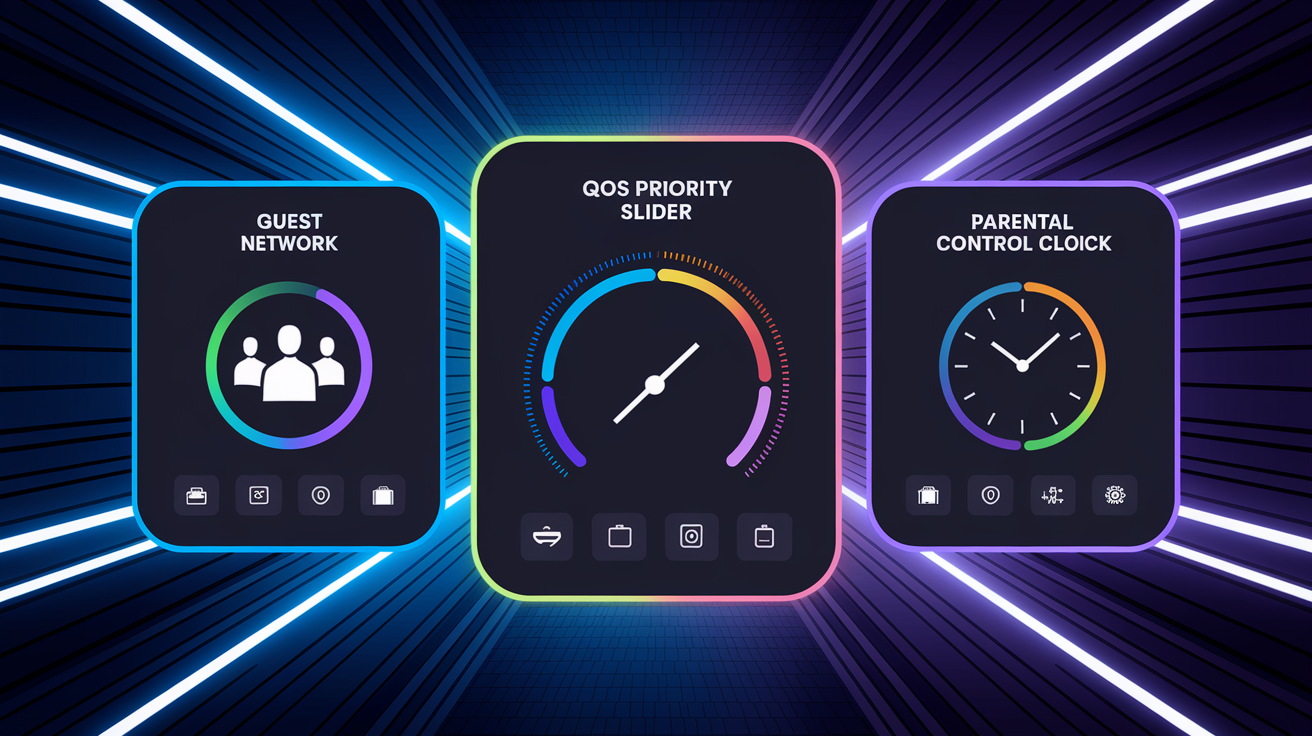
After your mesh system is running, you can configure advanced features that give you better control over network management, security, and performance.
Guest Network Setup
Guest networks create a separate WiFi connection for visitors that keeps them isolated from your main network devices. Your guests get internet access but can’t see your computers, printers, smart home devices, or network storage. Set up a guest network with a different password than your main network. Make it simpler to share but still secure enough to prevent random neighbors from connecting. Many mesh systems let you set automatic expiration times (8 hours, 24 hours, or 1 week) so guest access automatically shuts off after your visitors leave. Bandwidth limits prevent guests from using all your internet speed for large downloads or 4K streaming.
Quality of Service (QoS) Configuration
QoS settings let you prioritize bandwidth for specific devices or activities. Most mesh apps use a simple drag and drop interface where you drag devices into High, Medium, or Low priority categories. Drag your work laptop and video conferencing camera into High priority so your Zoom calls don’t lag when someone else streams Netflix. Gaming consoles also belong in High priority to reduce latency during online gaming. Regular browsing devices like tablets and phones can stay in Medium priority. Smart home devices that only send small bits of data (door locks, thermostats, light bulbs) work fine in Low priority. Some systems automatically detect video calls and streaming, temporarily boosting priority for those connections without you manually adjusting anything.
Device Prioritization and Parental Controls
Parental controls filter content and manage when devices can access the internet. Most mesh systems offer age appropriate presets like “Young Child,” “Teen,” and “Adult” that automatically block categories like social media, gambling sites, adult content, and violent games based on the age group. You can create schedules that shut off internet access during homework time (4 PM to 6 PM) or bedtime (10 PM to 7 AM). Usage monitoring shows which websites each device visits and how much time is spent online. Some systems generate daily or weekly reports showing total screen time per device.
Start with one or two advanced features before enabling everything at once. Too many restrictions and priority rules can create confusion about why certain devices aren’t working as expected.
Expanding Your Mesh Network by Adding More Nodes
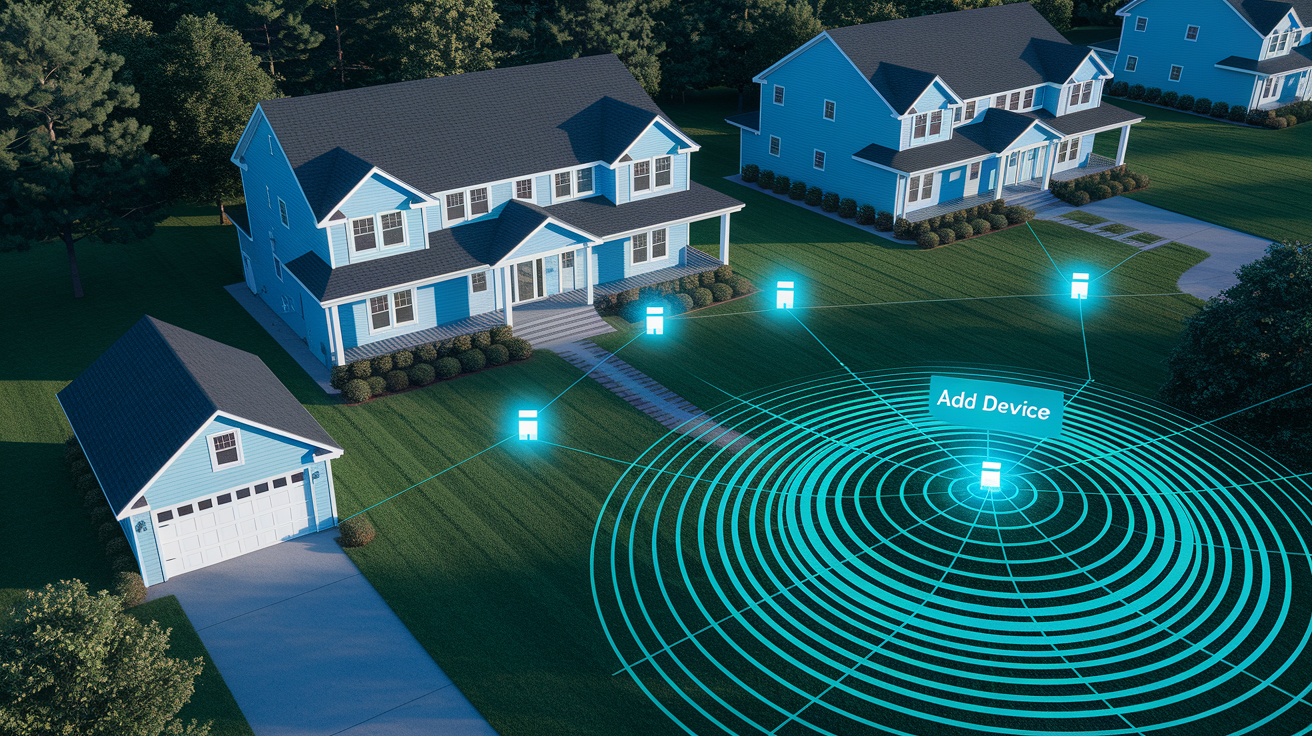
As your coverage needs change, you can add more satellite nodes to extend your mesh network to new areas.
Add nodes when you’re moving to a larger home, adding coverage to detached garages or backyard patios, eliminating remaining dead spots in far corners, or noticing performance degradation because too many devices are connecting to a single node. A good rule is one node per 1,500 square feet of space, though wall materials and home layout affect this.
Here’s how to add a new node to your existing mesh system:
Verify node compatibility with your existing system. Most manufacturers require all nodes to be from the same product line, though some support mixing newer and older models.
Place the new node within range of your existing mesh network. Start within 30 feet of your main router or closest existing satellite.
Plug in the new node and wait for the LED to indicate it’s ready to pair, usually flashing or a specific color.
Open your mesh app and tap “Add Node” or “Add Device.” The app will search for available nodes.
Follow the app prompts to complete pairing. This usually involves pressing the WPS button on the new node or scanning a QR code.
Maximum node count depends on your manufacturer. Most systems support 6 to 10 nodes total, though a few enterprise focused systems handle up to 20. Adding too many nodes doesn’t improve performance because wireless backhaul has limited bandwidth to share between all the nodes. Each additional node reduces the available bandwidth slightly. If you need more than 6 nodes, seriously consider switching some or all nodes to wired ethernet backhaul.
Mesh systems use either star topology (all satellites connect directly to the main router) or daisy chain topology (satellites connect to the closest node in a chain back to the router). Star topology provides better performance but limits range because all satellites must be within 30 feet of the main router. Daisy chain topology extends range further because satellites can be 30 feet from the previous satellite rather than from the main router, but performance decreases with each hop in the chain.
When positioning new nodes, maintain the 30 foot maximum distance rule and use your app’s signal strength tool to verify the new node is getting a “Good” or “Excellent” connection. If the signal shows “Fair” or “Weak,” the node is too far from the previous one and will create a bottleneck that slows your entire network.
Mesh WiFi Extender Compatibility with Different Router Brands
Understanding compatibility prevents buying equipment that won’t work with your existing setup.
Most mesh systems function as complete router replacements, meaning you turn off your ISP’s router and connect the mesh system directly to your modem. Some systems can work in access point mode, which lets you keep your existing router active and uses the mesh system only to extend coverage. Cross brand compatibility is limited. You typically can’t mix a Google Nest node with an Eero satellite or a TP-Link Deco with a Netgear Orbi. Stick with the same brand and usually the same product line for all nodes in your mesh system.
Compatibility factors to check before buying:
WiFi standard support. WiFi 6 (802.11ax) systems work with older WiFi 5 (802.11ac) and WiFi 4 (802.11n) devices, but older mesh systems may not support newer WiFi 6 devices at full speed.
Same brand versus cross brand. Assume cross brand won’t work unless specifically stated by the manufacturer.
ISP modem compatibility. Most mesh systems work with any cable, DSL, or fiber modem, but some ISPs require their proprietary equipment.
Ethernet port requirements. Verify the modem has an available ethernet port and the mesh router has the right type of WAN port. Some use standard ethernet, others use specific connectors.
Frequency band support. Older devices that only use 2.4GHz will work with dual band or tri-band mesh systems, newer WiFi 6E devices need a mesh system with 6GHz support.
Backward compatibility with older devices. WiFi 6 and WiFi 6E systems support older WiFi standards automatically.
Most mesh systems operate in three modes: router mode (replaces your existing router entirely), access point mode (extends an existing router’s coverage without replacing it), and bridge mode (connects to an existing network without routing functions). Router mode provides the best performance and enables all mesh features. Access point mode is useful when your ISP requires their proprietary router but you want better coverage. Bridge mode is rarely needed for home use.
| WiFi Standard | Max Speed | Best For | Compatible With |
|---|---|---|---|
| WiFi 5 (802.11ac) | Up to 1.3 Gbps | Budget setups, homes with internet plans under 500 Mbps | All devices from 2013 onward |
| WiFi 6 (802.11ax) | Up to 9.6 Gbps | Gigabit internet plans, homes with 20+ devices, gaming and streaming | All devices from 2009 onward |
| WiFi 6E (802.11ax with 6GHz) | Up to 9.6 Gbps with less interference | Multi-gig internet plans, future-proofing, dense urban environments | All devices from 2009 onward, 6GHz band requires WiFi 6E devices |
Before purchasing, check the manufacturer’s compatibility list on their website or product packaging. When in doubt, call their support line with your modem model number and ISP name to verify compatibility.
Securing Your Mesh Network with WPA3 and Best Security Practices
A properly secured mesh network protects your personal information, prevents unauthorized users from stealing bandwidth, secures vulnerable IoT devices, and maintains consistent performance by blocking unwanted traffic.
Network security matters because every device on your WiFi can potentially access other devices on the same network. An unsecured network lets neighbors use your internet connection (slowing your speeds), gives attackers access to your computers and phones, exposes your browsing history and personal files, and creates a pathway to compromise smart home devices like cameras and door locks.
Security best practices to implement immediately:
Enable WPA3 encryption or at minimum WPA2 if WPA3 isn’t supported by all your devices. Never use WPA or WEP encryption, which are easily cracked.
Create a strong network password with at least 12 characters including uppercase, lowercase, numbers, and symbols. “P@ssw0rd123!” is better than “password” but still predictable.
Use a different admin password than your network password. If someone cracks your WiFi password, they shouldn’t automatically get access to your router settings.
Change the default SSID to something non-identifying. “NETGEAR-5G-Guest” reveals your router brand, “HomeNetwork” is generic and tells strangers nothing about you.
Disable WPS after initial setup. WPS has known security vulnerabilities and isn’t needed once your nodes are paired.
Enable automatic firmware updates. Security patches fix newly discovered vulnerabilities.
Regularly review your connected device list. Unknown devices mean someone has your password.
Network monitoring helps you spot problems before they become serious security breaches. Check your mesh app weekly for devices you don’t recognize in the connected device list. Review bandwidth usage patterns to catch unusual activity like a device suddenly uploading large files in the middle of the night. Set up new device alerts so you get a notification every time something connects to your network for the first time. Most mesh systems include built in security features like malware protection that blocks connections to known malicious websites and scanning for infected devices on your network.
Guest network isolation prevents visitors from accessing devices on your main network. When your friend connects to your guest network to check their email, they can’t accidentally (or intentionally) access your computer’s shared folders, print documents to your printer, or view your security camera feeds.
Perform monthly security audits by changing your network password every 90 days (or immediately if you’ve shared it with someone you no longer trust), reviewing parental control settings to ensure they’re still appropriate for your kids’ ages, checking for suspicious activity in device logs and bandwidth usage, and verifying all firmware is current with the latest security patches.
Mesh System Integration with Smart Home Devices and IoT
Mesh WiFi systems solve the biggest smart home challenge: maintaining stable connections for dozens of devices simultaneously without dead zones causing security cameras or door locks to disconnect.
Traditional single router setups struggle when you add a smart thermostat, four security cameras, twelve smart light bulbs, three video doorbells, two smart locks, several voice assistants, and streaming devices throughout your home. That’s 25+ devices competing for bandwidth and range. A security camera in your backyard might be too far from your main router to maintain a solid connection, causing it to drop offline randomly or upload choppy footage. Mesh systems eliminate this problem by placing nodes closer to every device in your home.
Smart home benefits of mesh systems:
Stable connections for 20 to 50 simultaneous devices without performance degradation or dropped connections.
2.4GHz band support for older IoT devices. Most smart home devices still use 2.4GHz because it penetrates walls better than 5GHz.
Reduced dead zones affecting critical devices like security cameras, video doorbells, and smart locks.
Built in Zigbee hubs in some systems like Amazon Eero, letting smart bulbs and sensors connect directly without requiring separate hubs.
Dedicated guest network for visitor devices without exposing your smart home system to their phones and laptops.
Device prioritization ensuring critical devices like security cameras and door locks maintain connectivity even during high traffic periods.
Seamless roaming between nodes benefits mobile devices controlling your smart home system. When you’re walking through your house adjusting lights and thermostat with your phone, automatic handoff between nodes means your commands execute instantly without waiting for your phone to reconnect to a different node. The handoff happens in less than one second, so you don’t notice any interruption.
For improved security, consider network segmentation strategies. Many mesh systems let you place IoT devices on a separate VLAN (virtual LAN) or guest network isolated from your computers and phones. This prevents a compromised smart light bulb from being used as an entry point to access your laptop. Use device prioritization to ensure critical devices like security cameras and smart locks maintain connectivity by placing them in the “High” priority category. Monitor bandwidth usage of data heavy devices like video doorbells and cameras. If one device is using excessive bandwidth (indicating possible malware or misconfiguration), you’ll spot it quickly in your mesh app’s usage reports.
Final Words
Your mesh wifi extender setup is complete once you’ve positioned your nodes, verified signal strength in every room, and configured your security settings.
Test your speeds in a few different spots to confirm coverage reaches where you need it.
If something feels off, double-check node placement and run through the LED indicator meanings one more time.
Most issues come down to distance between nodes or a quick power cycle.
You’ve got reliable whole-home WiFi now, and you can add more nodes anytime your coverage needs change.
FAQ
What is the difference between a WiFi extender and a WiFi mesh extender?
A WiFi extender creates a separate network with a different name that you manually switch to, while a mesh extender uses multiple nodes sharing one network name, automatically connecting your device to the strongest signal as you move around your home.
What is a major disadvantage of a mesh network?
A major disadvantage of a mesh network is the higher upfront cost compared to single extenders, typically requiring purchase of 2-3 nodes together, and ongoing expense if you need to expand coverage by adding more nodes later.
Can you use a WiFi extender with a mesh network?
You can use a WiFi extender with a mesh network, but it’s not recommended because the extender creates a separate network name, defeating the mesh system’s seamless roaming benefit and potentially causing connection confusion between the two systems.
Can I connect a mesh WiFi to an existing router?
You can connect mesh WiFi to an existing router by using access point mode or bridge mode, though performance works best when the mesh system replaces your old router entirely in router mode with the main node connected directly to your modem.
How far apart should mesh nodes be placed?
Mesh nodes should be placed no more than 30 feet or two rooms apart from each other, with the same distance limit applying vertically between floors in multi-story homes to maintain strong signal handoff between nodes.
What happens if I don’t update my mesh system firmware?
If you don’t update your mesh system firmware, you miss critical security patches that protect against threats, performance improvements that fix bugs and speed issues, and new features that manufacturers add to enhance functionality.
How many devices can a mesh network support?
A mesh network can support 20 or more devices simultaneously depending on the system, making it ideal for smart homes with multiple phones, tablets, laptops, cameras, thermostats, and IoT devices all connected at once.
Do mesh nodes need to be the same brand?
Mesh nodes need to be the same brand and product line to work together properly, as different manufacturers use proprietary communication protocols that aren’t compatible with each other, preventing cross-brand mesh formation.
Should I enable WPA3 encryption on my mesh network?
You should enable WPA3 encryption on your mesh network if all your devices support it, as it provides the strongest security available, though you may need to use WPA2 if you have older devices that can’t connect with WPA3.
What is ethernet backhaul and do I need it?
Ethernet backhaul connects mesh nodes using physical cables instead of WiFi, providing faster speeds and lower latency ideal for gaming and 4K streaming, but you only need it if you have existing ethernet wiring or prioritize maximum performance.
How do I know if my mesh nodes are positioned correctly?
You know mesh nodes are positioned correctly by using the mobile app’s built-in signal test or checking LED indicators to confirm strong connections, then running speed tests in different rooms to verify coverage matches your baseline speed near the modem.
Can I set up a guest network on a mesh system?
You can set up a guest network on a mesh system through the mobile app, creating a separate SSID that isolates visitors from your main network devices and allows you to set bandwidth limits or access expiration times.